How to Add a Payment Method to WhatsApp Business Account

Last Updated: 30 January 2026 6 min read
1

Initiate Payment Method Setup from Chat Mitra Dashboard

Step 1: Initiate Payment Method Setup from Chat Mitra Dashboard

Begin by logging into your Chat Mitra dashboard where you completed the WhatsApp Business API setup.

In the dashboard, locate the option to "Add Payment Method in Meta Business Suite". This will be part of your onboarding checklist. Click on this option to proceed.

You will be redirected to Meta Business Suite, which is Meta's official platform for managing business accounts and billing. This is where all payment methods for WhatsApp Business are configured.

2

Access Payment Settings in Meta Business Suite

Step 2: Access Payment Settings in Meta Business Suite

Once you are in Meta Business Suite, you will see your business account. On the left sidebar, navigate to Settings and then select your business from the list of available accounts.

Look for the Payment Settings or Billing section in the main menu. This section manages all payment methods associated with your business account on Meta's platform.

Meta Business Suite centralizes billing for all Meta products including WhatsApp, so you may see references to other services. Focus on the payment method setup for WhatsApp Business.

3

Navigate to Billing and Payments

Step 3: Navigate to Billing and Payments

In the Settings menu, find and click on "Billing & Payments" or "Billing". This section displays your current payment methods, billing history, and invoices for all Meta services tied to your business account.

You will see options to view your billing information and manage payment methods. Look for a button that says "Add Payment Method" or "Add Card". Click this button to begin adding your payment information.

4

Confirm Your Location and Currency

Step 4: Confirm Your Location and Currency

Before adding your card details, Meta will ask you to confirm your business location and the currency in which you will be billed.

Select your country from the dropdown menu. This determines the currency for your billing and tax rules that apply to your account. For example, if you select India, your bills will be in Indian Rupees (INR) and GST regulations will apply.

Verify that the location and currency are correct for your business, as changing this later may affect your billing records. Once confirmed, click Next or Continue to proceed.

Important: Your location determines applicable taxes and payment rules. Ensure accuracy as this affects compliance with local regulations.
5

Enter Your Card Details Securely

Step 5: Enter Your Card Details Securely

You now reach the card information form. Enter the following details from your debit or credit card:

  • Cardholder Name: The name printed on your card, exactly as it appears.
  • Card Number: The 16-digit card number found on the front of your card.
  • Expiration Date: The month and year your card expires (MM/YY format).
  • CVV: The three-digit security code on the back of your card.

Enter all information carefully. Any errors may cause the payment method to be declined. Meta uses industry-standard encryption to protect your card details, so your information is transmitted securely.

Security: Meta does not store your full card number. Your payment information is encrypted and processed through secure payment gateways.
6

Confirm and Save Your Card Information

Step 6: Confirm and Save Your Card Information

After entering your card details, review the information to ensure all entries are correct.

Click the "Save Card" or "Add Payment Method" button to save your card information to your Meta Business account.

Meta may perform a small verification charge (usually a temporary authorization) to validate your card. This charge will be reversed and does not appear on your final bill. It typically takes 3 to 5 business days for this verification to complete.

Once saved successfully, your payment method will be available for charging messaging and advertising fees from WhatsApp Business API.

7

Update Your Business Information and Enter Tax Details

Step 7: Update Your Business Information and Enter Tax Details

To complete the payment method setup, you must verify and update your business information in Meta Business Suite. This information is used for billing and tax compliance.

In the Billing & Payments section, locate Business Info and click Edit. You will see a form with the following fields:

  • Business Name: Your official legal business name.
  • Business Address: Your business's physical address, including street, city, state, and postal code.
  • Business Category: The industry or type of business you operate.
  • Phone Number: A business contact number.
  • Website: Your business website.

Fill in all required fields accurately. This information must match your business registration documents.

Verification: Meta may verify this information against official business records. Accuracy is essential for payment processing.
8

Submit Your Tax Information and GST Number

Step 8: Submit Your Tax Information and GST Number

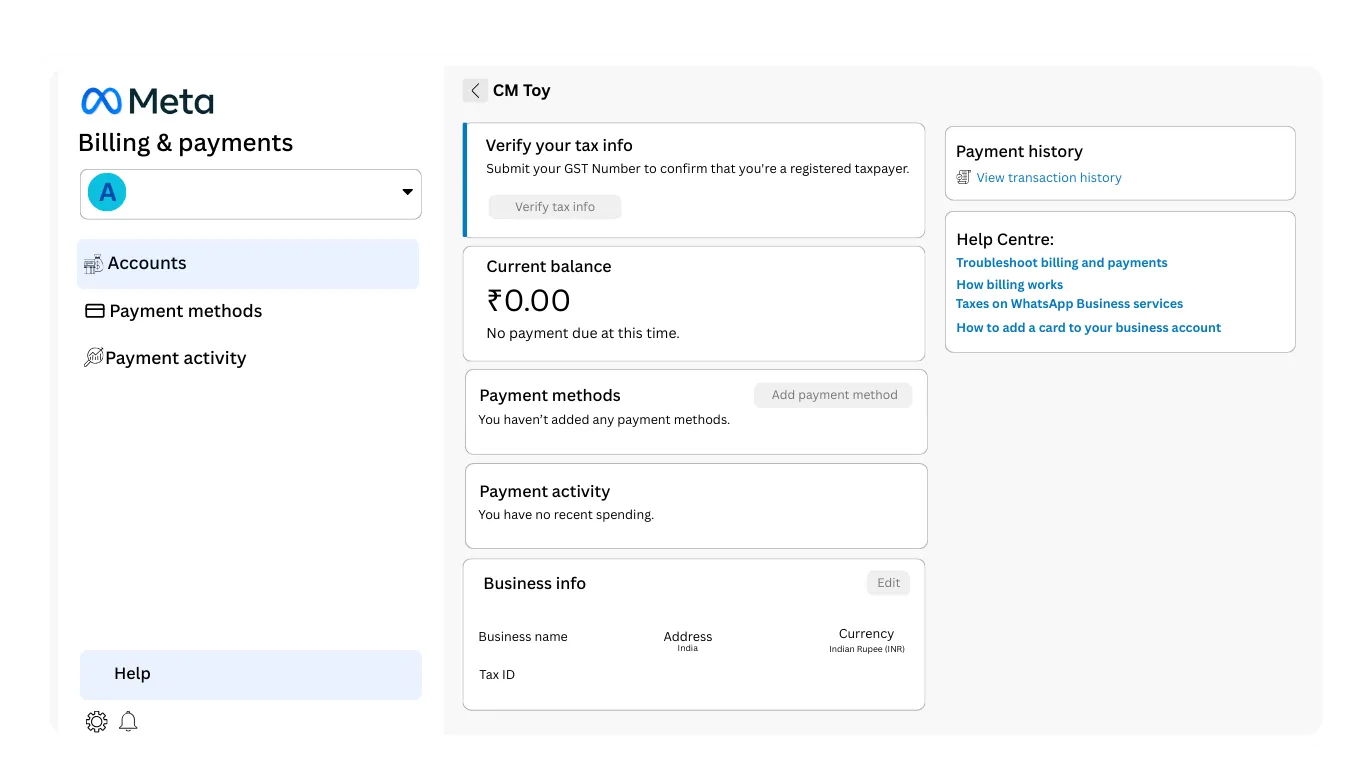
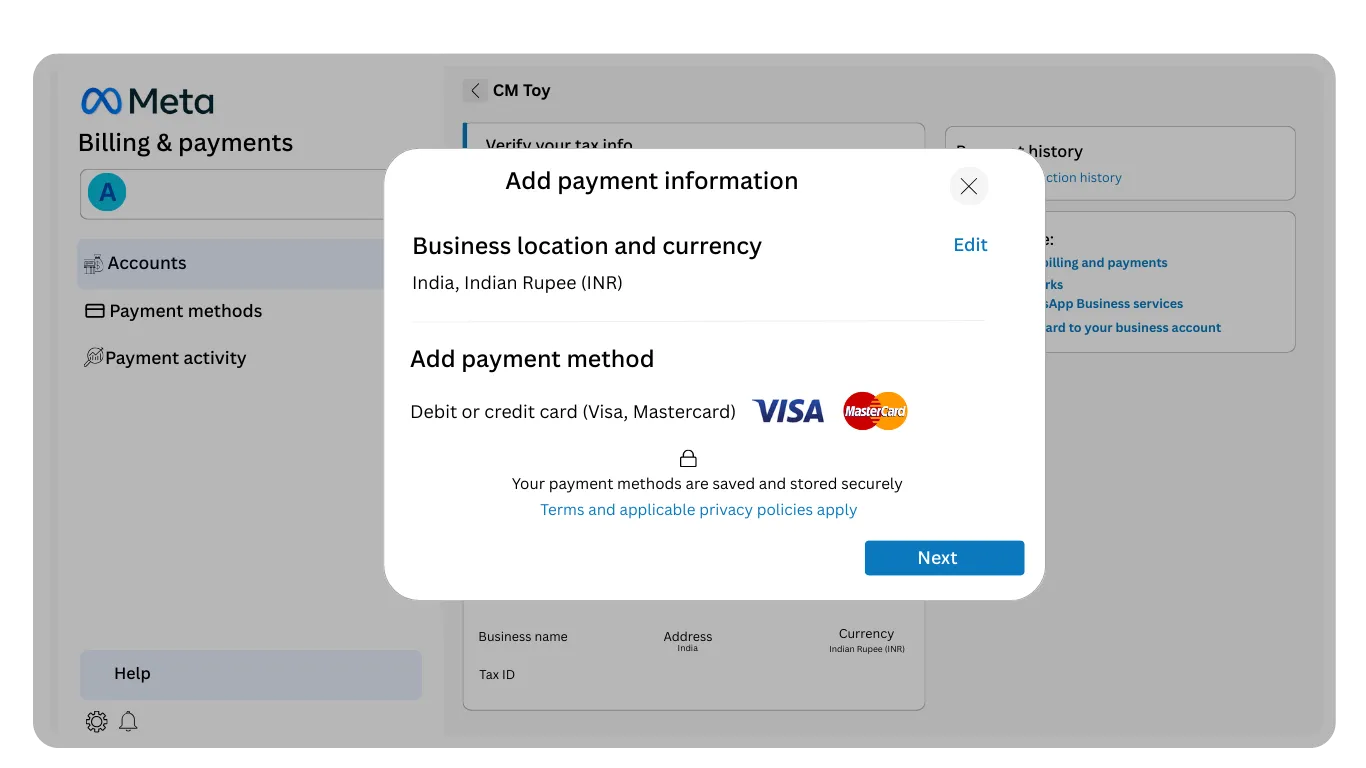
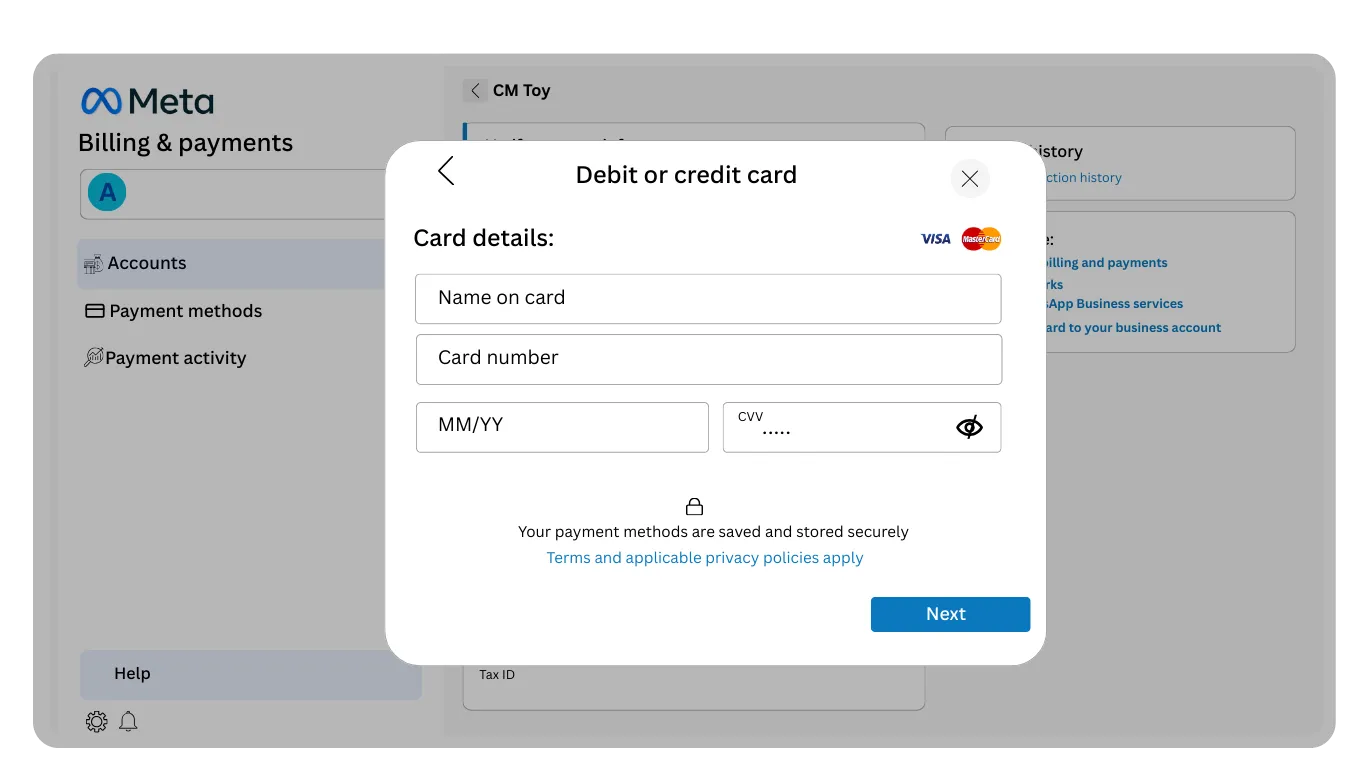
Tax information submission is a critical step for payment method validation. Meta requires this to comply with local tax laws and issue proper invoices.

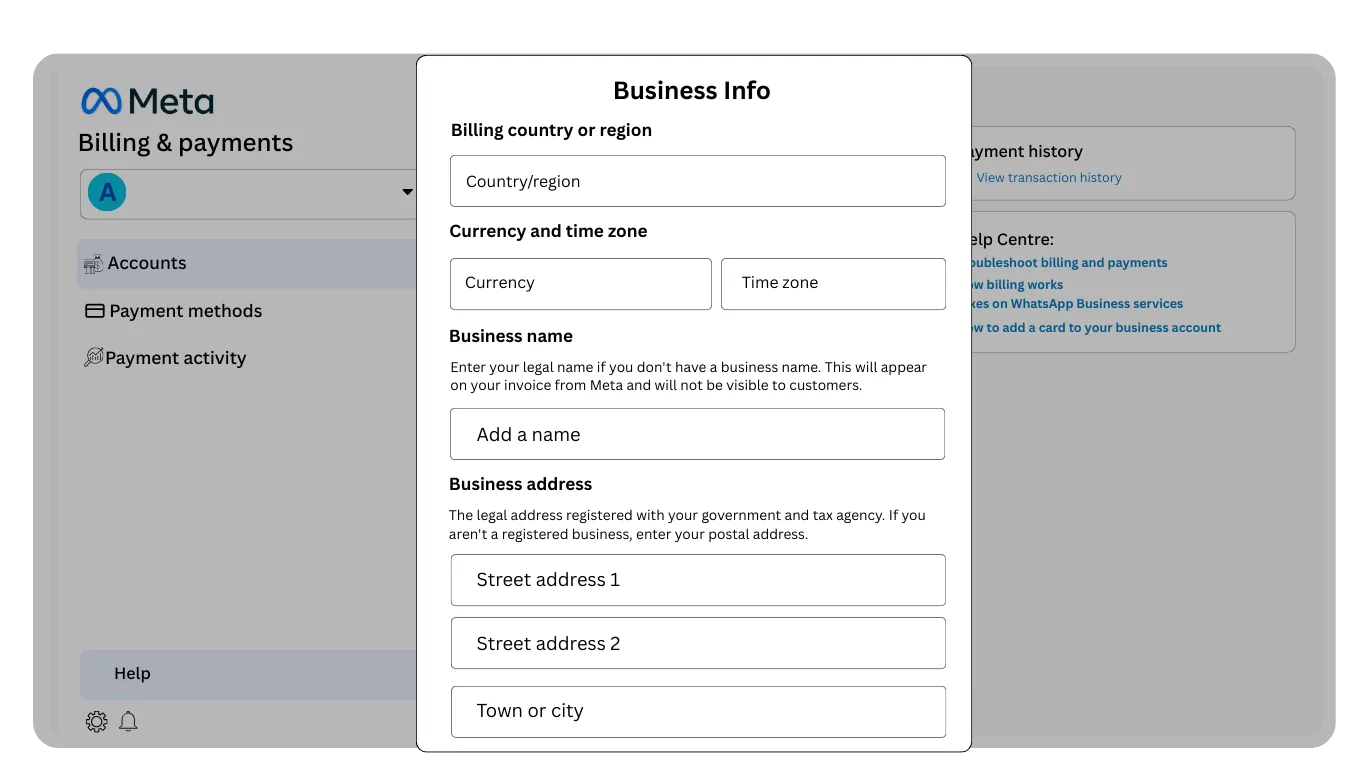
In the Business Info form, scroll down to find the Tax Information section. The fields you see depend on your business location.

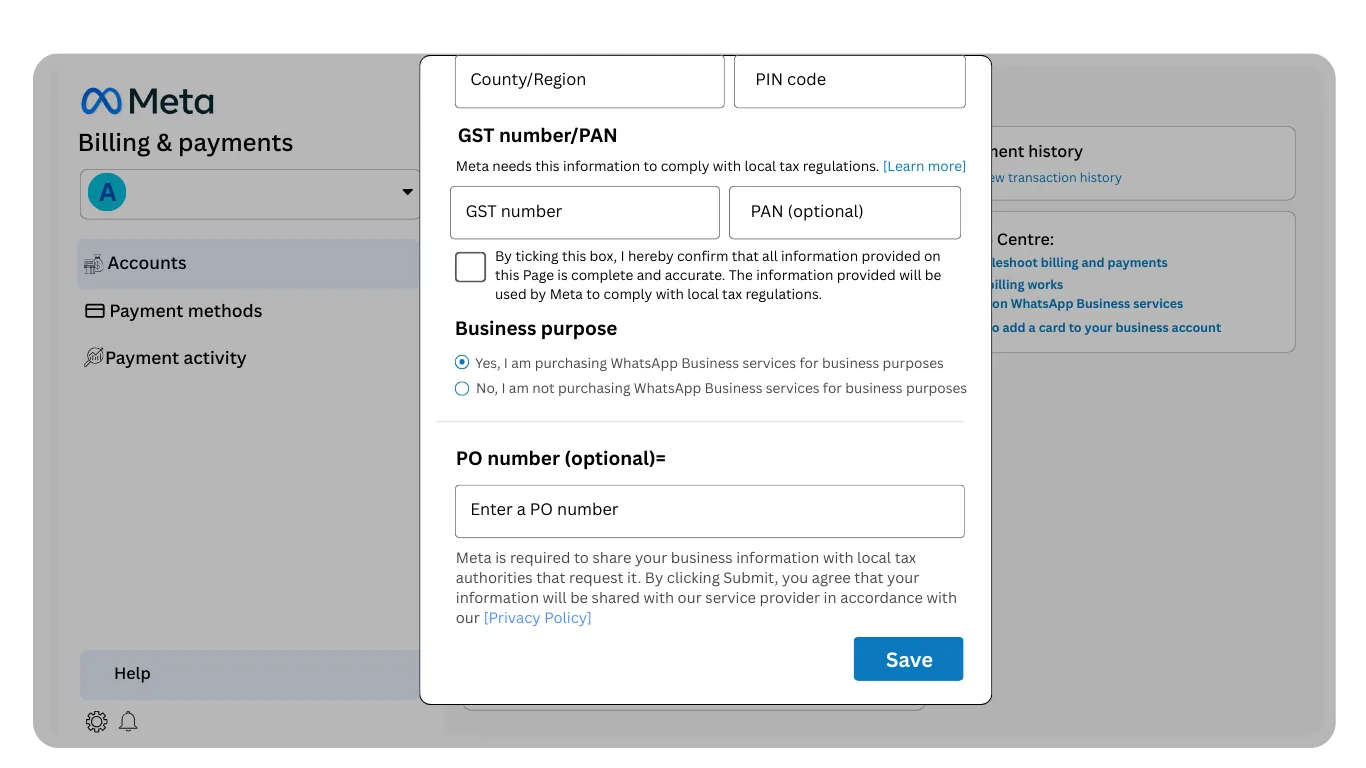
For Businesses in India:

  • GST Number: Your 15-digit Goods and Services Tax (GST) identification number. This is required for all registered businesses in India.
  • PAN (Permanent Account Number): Your 10-digit PAN issued by the Indian Income Tax Department.
  • Business Type: Whether your business is a sole proprietorship, partnership, company, or other entity.

For Other Countries:

Tax requirements vary by country. Common requirements include VAT/GST numbers, tax ID numbers, or business registration numbers specific to your jurisdiction.

Once you have entered all tax information, click Save to submit your business details for verification. Meta typically completes this verification within 5 min.

Processing Time: After submission, your tax information will be verified by Meta. Your payment method may be restricted until verification is complete, which usually takes 5 min. You will receive a notification when verification is finished.
9

Verify Payment Method Setup is Complete

Step 9: Verify Payment Method Setup is Complete

Return to your Chat Mitra dashboard to confirm that the payment method setup is marked as complete.

In your Chat Mitra onboarding checklist, the "Add Payment Method in Meta Business Suite" step should now display a checkmark or "Completed" status. This indicates that Meta has recognized your payment method addition.

If the step is not marked as complete immediately, refresh your Chat Mitra dashboard. It may take a few minutes for the system to sync with Meta's records.

Ready to Send: Your WhatsApp Business API is now fully set up with a valid payment method. You can begin sending messages to customers using message templates. Charges will be applied based on your message volume and conversation type.

Frequently Asked Questions

Why is a payment method required for WhatsApp Business API?

Meta charges for WhatsApp Business API usage based on conversations initiated and messages sent. A valid payment method ensures seamless billing and prevents service interruption due to payment failures.

What payment methods does Meta accept for WhatsApp Business?

Meta accepts debit and credit cards including Visa, Mastercard, and other major card brands. The payment method must be valid, active, and have sufficient funds to cover messaging charges.

Is tax information submission mandatory?

Yes, tax information submission is mandatory. Meta requires your GST number (in India) or equivalent tax ID to comply with local tax regulations and issue compliant invoices for your business.

What happens if I do not submit tax information?

Without submitting and verifying tax information, your payment method will be restricted. You will not be able to send messages or use paid WhatsApp Business features until tax verification is complete.

How long does tax information verification take?

Meta typically verifies tax information within 5 min. During this period, your payment method may be temporarily restricted. You will receive a notification once verification is complete.

Can I change my payment method after adding it?

Yes, you can add a new payment method in Meta Business Suite at any time. You can set a different card as your primary payment method or remove old cards from your account.

What should I do if my card is declined?

If your card is declined, verify that the card details are correct, the card is active and not expired, and you have sufficient funds. You can contact your bank to confirm the card is enabled for online transactions. Try adding a different payment method if the issue persists.

Is my payment information secure in Meta Business Suite?

Yes, Meta uses industry-standard encryption and security protocols to protect payment information. Your full card number is never stored in Meta's system, and your data is encrypted during transmission.

What is the verification charge Meta applies to my card?

Meta may place a temporary authorization charge on your card (usually a small amount like 1 rupee) to verify the card is valid. This charge is reversed and does not appear on your final bill. Reversal typically takes 3 to 5 business days.

Can I use a company credit card for WhatsApp Business payments?

Yes, you can use a company credit or debit card. The cardholder name on the card should match the billing address and business account owner information registered with Meta.