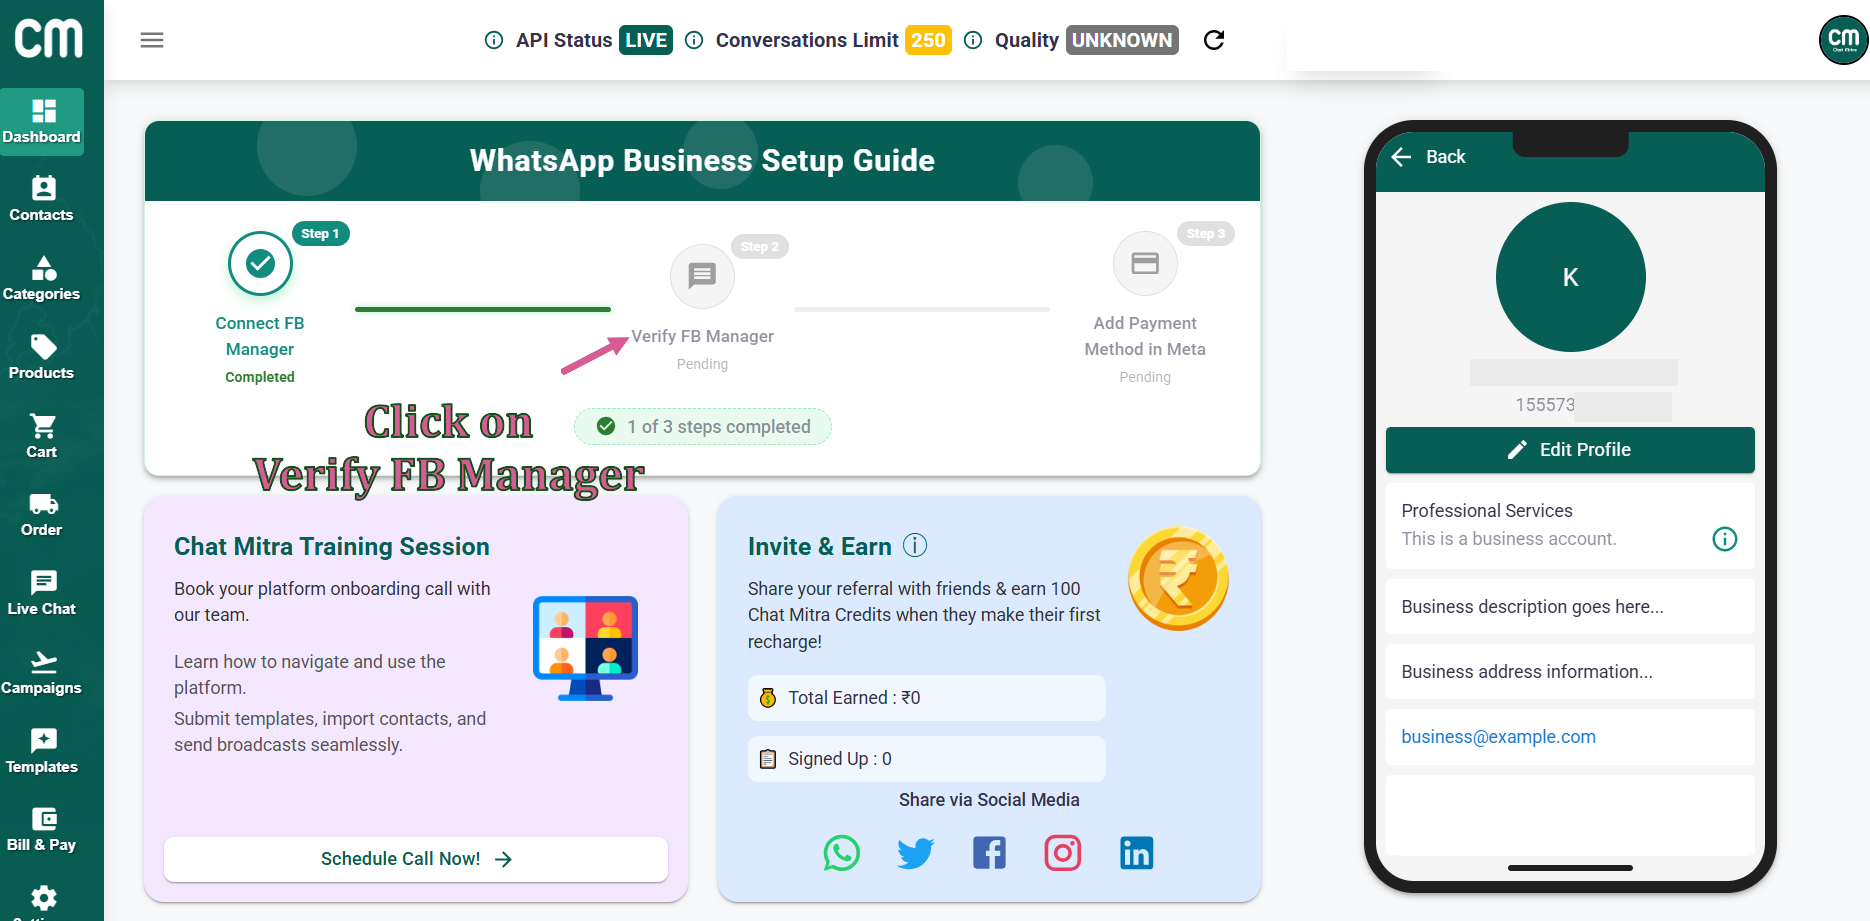
Important Step: If you do not see the business verification option in Meta Business Manager, you need to create a WhatsApp marketing messages business account first.
If the business verification section is not visible or unavailable in your Meta Business Manager, follow these steps to create a WhatsApp marketing messages business account:
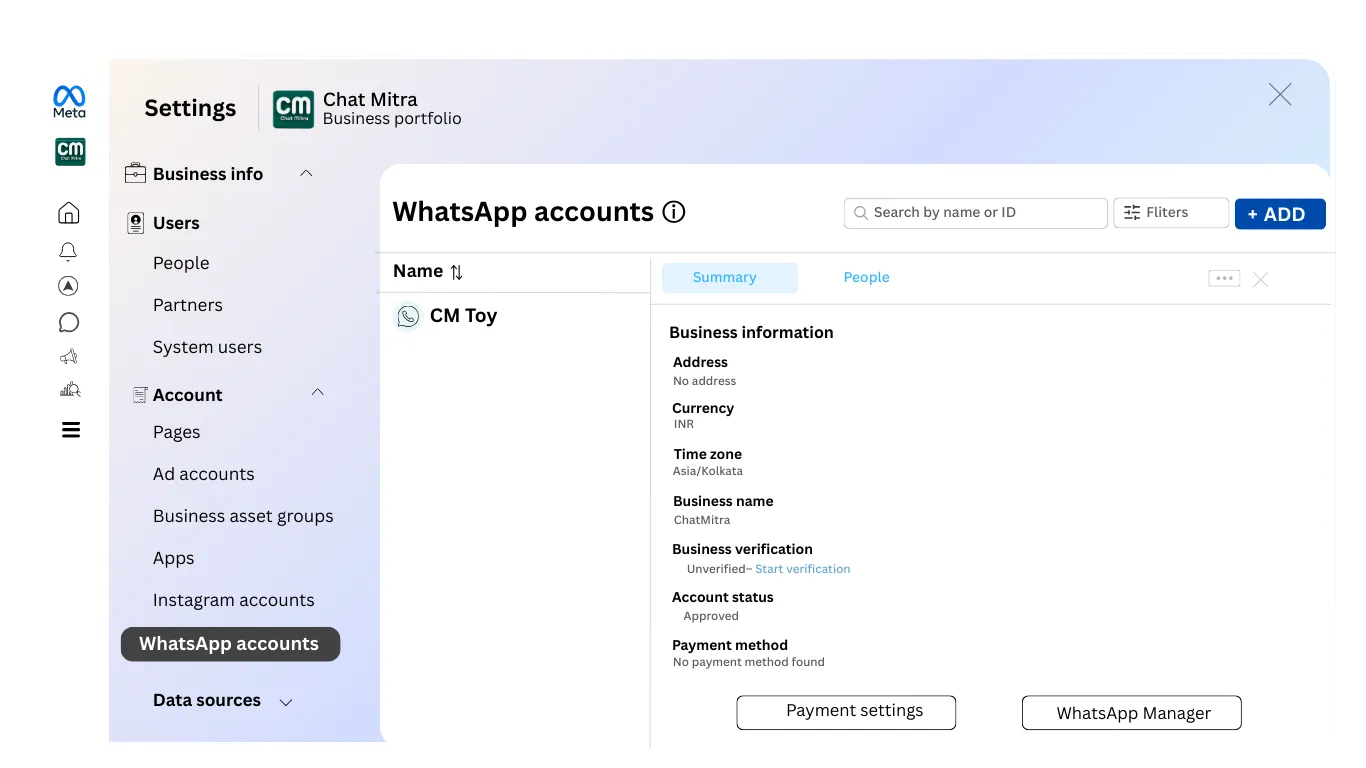
Step 1: Click Add in Meta Business Manager
In Meta Business Manager, navigate to the business setup area and look for an "Add" button. This allows you to add new business assets to your account.
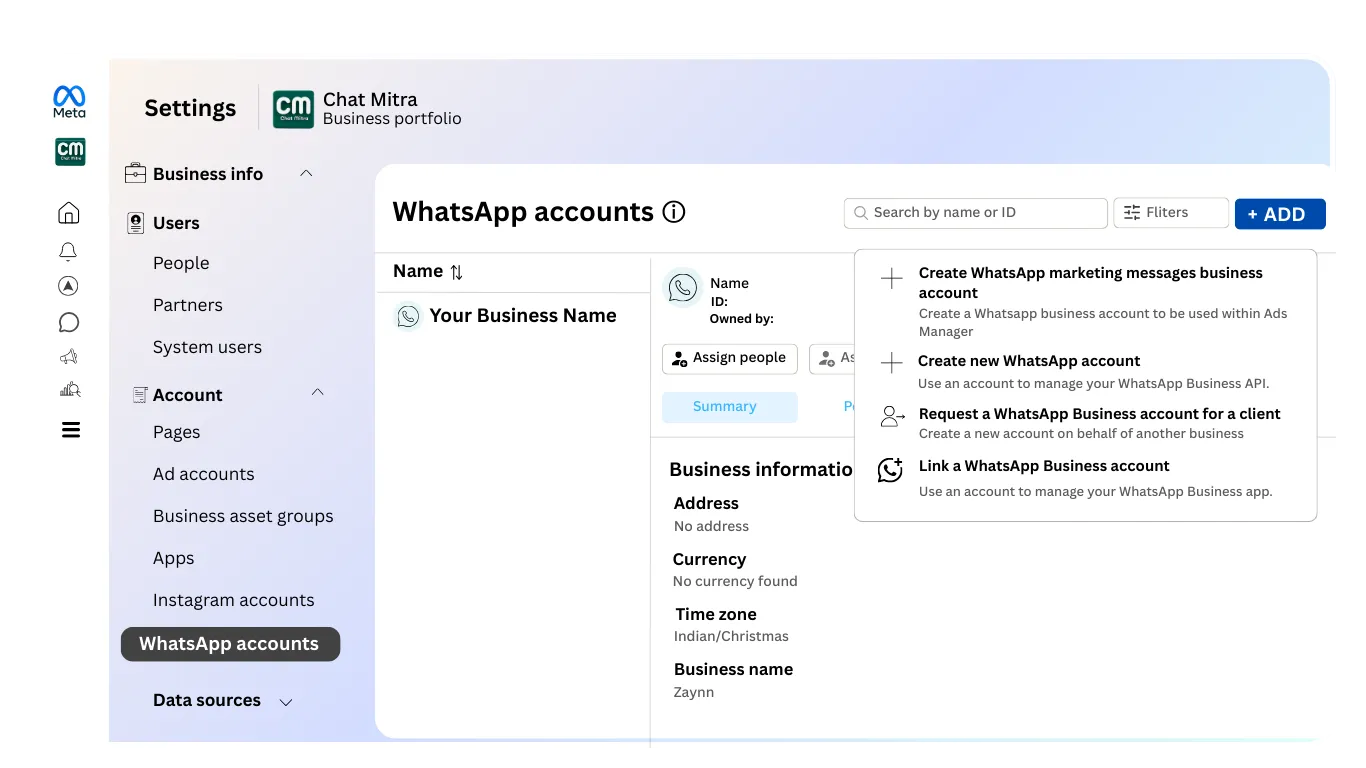
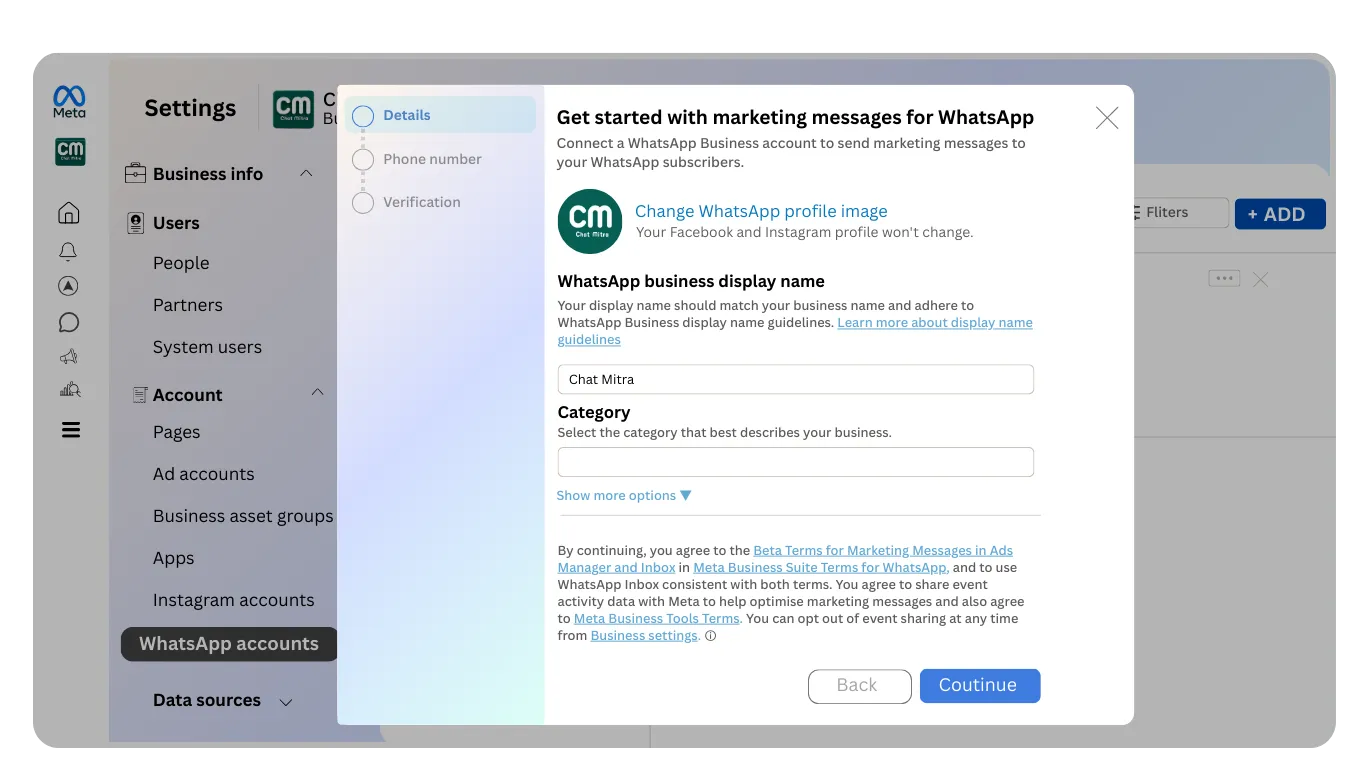
Step 2: Create WhatsApp Marketing Messages Business Account
From the options presented, select "Create WhatsApp Marketing Messages Business Account." This creates a new business account specifically for WhatsApp messaging.
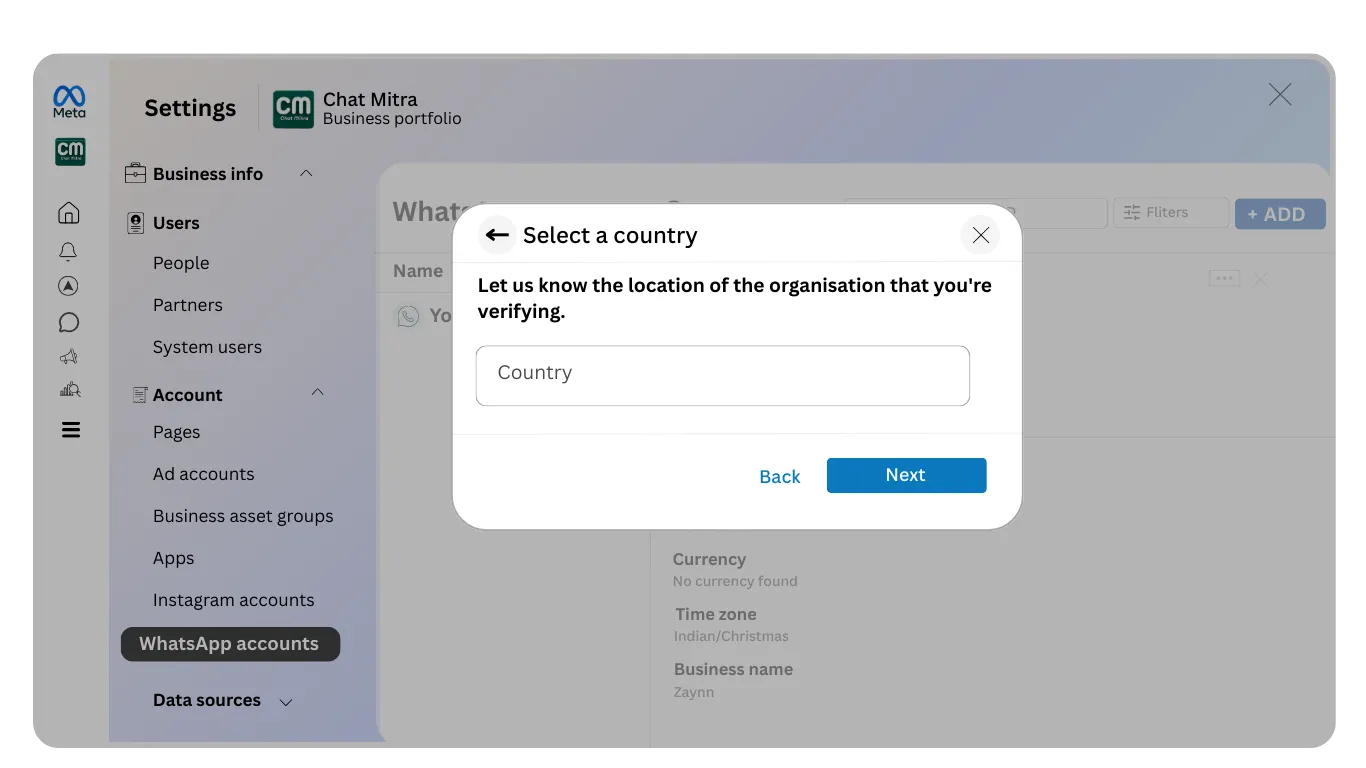
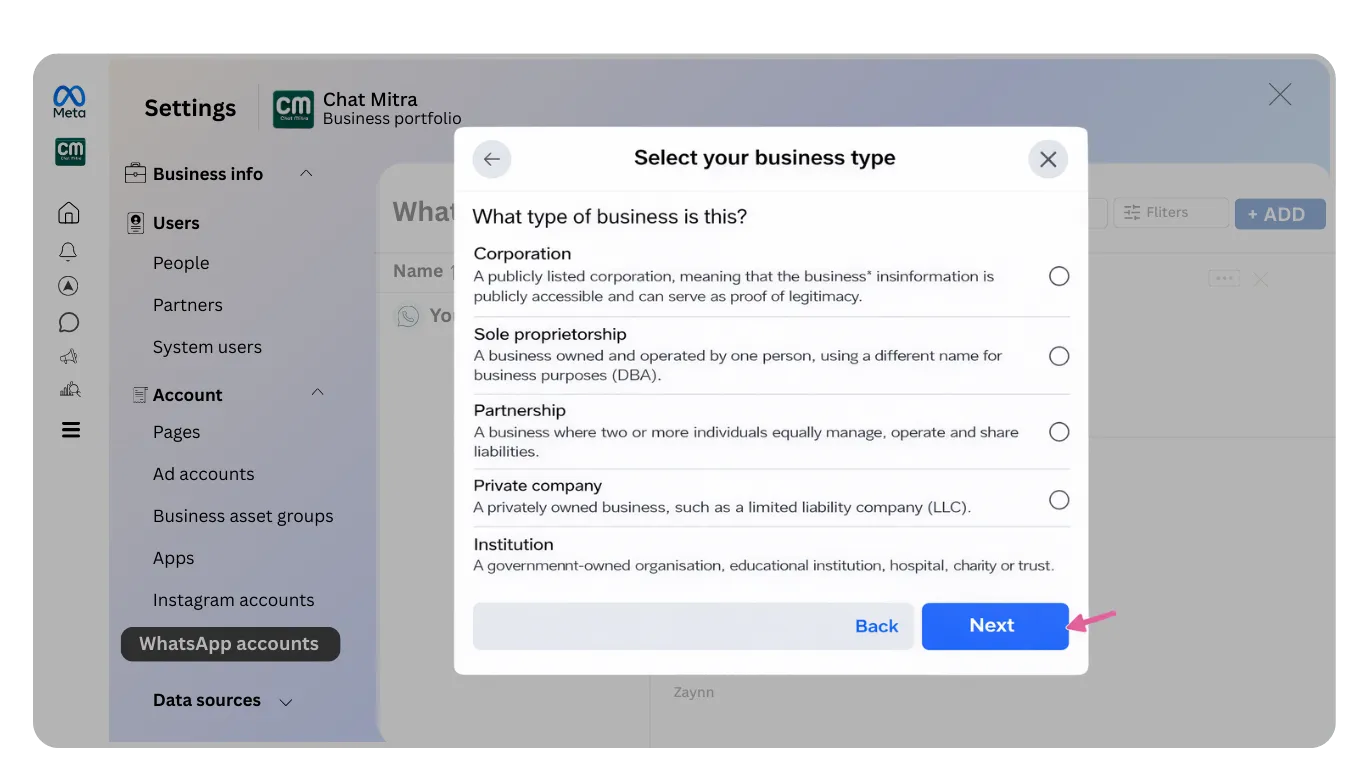
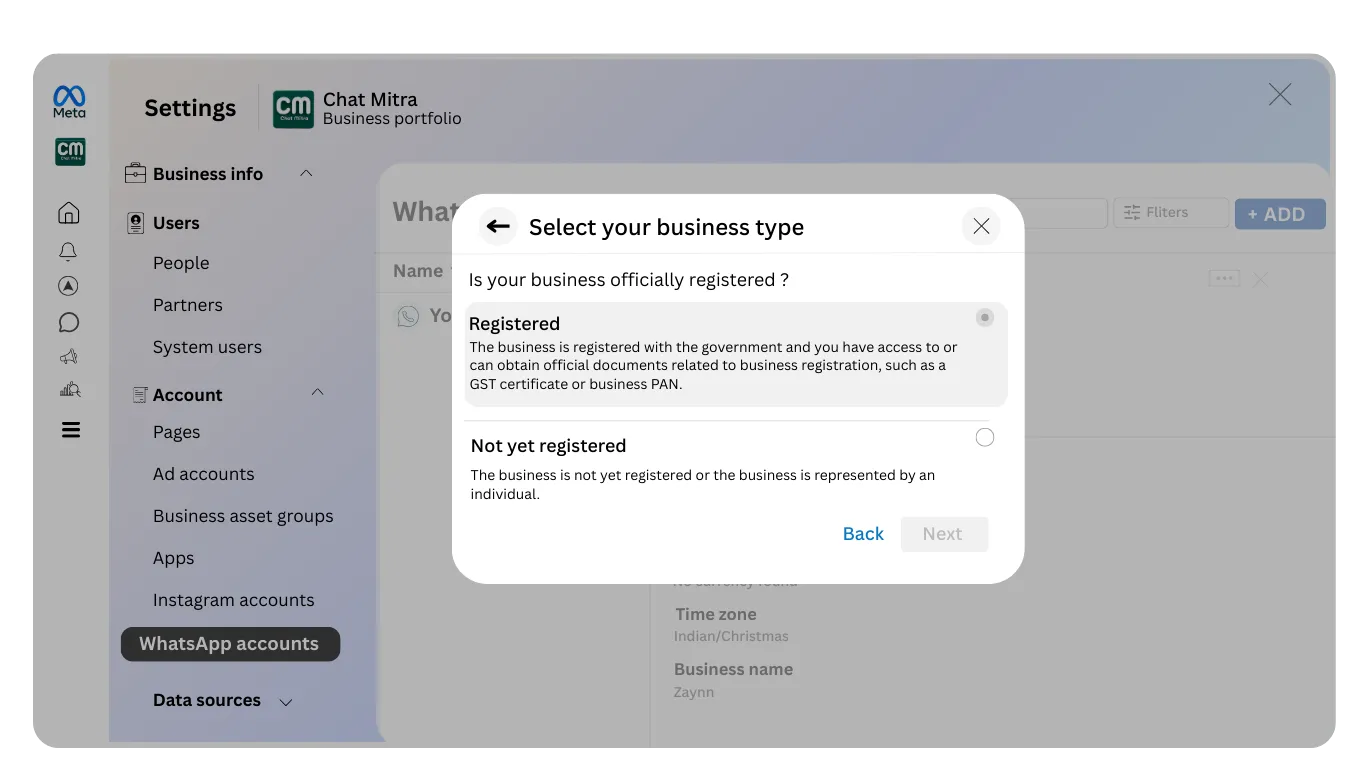
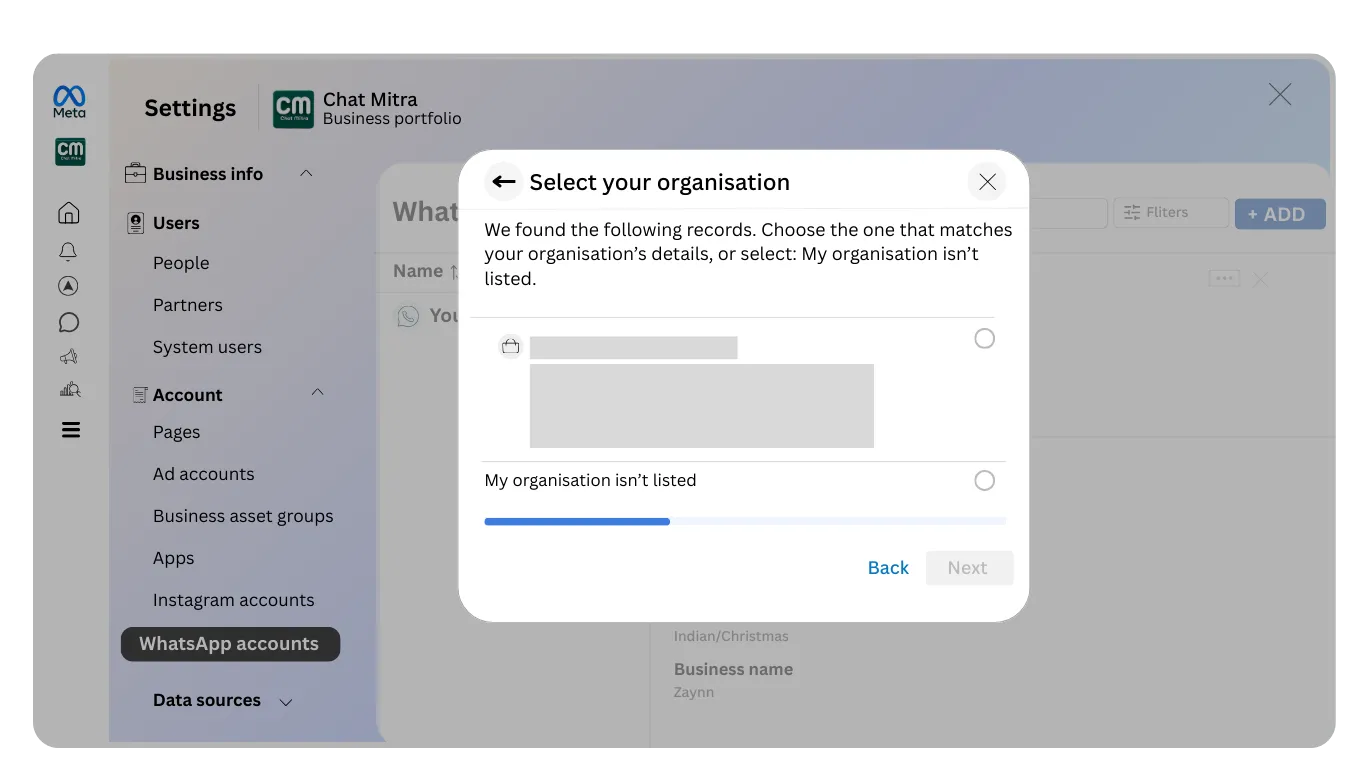
Select Category and Continue
You will be asked to select your business category. Choose the category that best describes your business type (for example, E-commerce, Healthcare, Education, Retail, or Services).
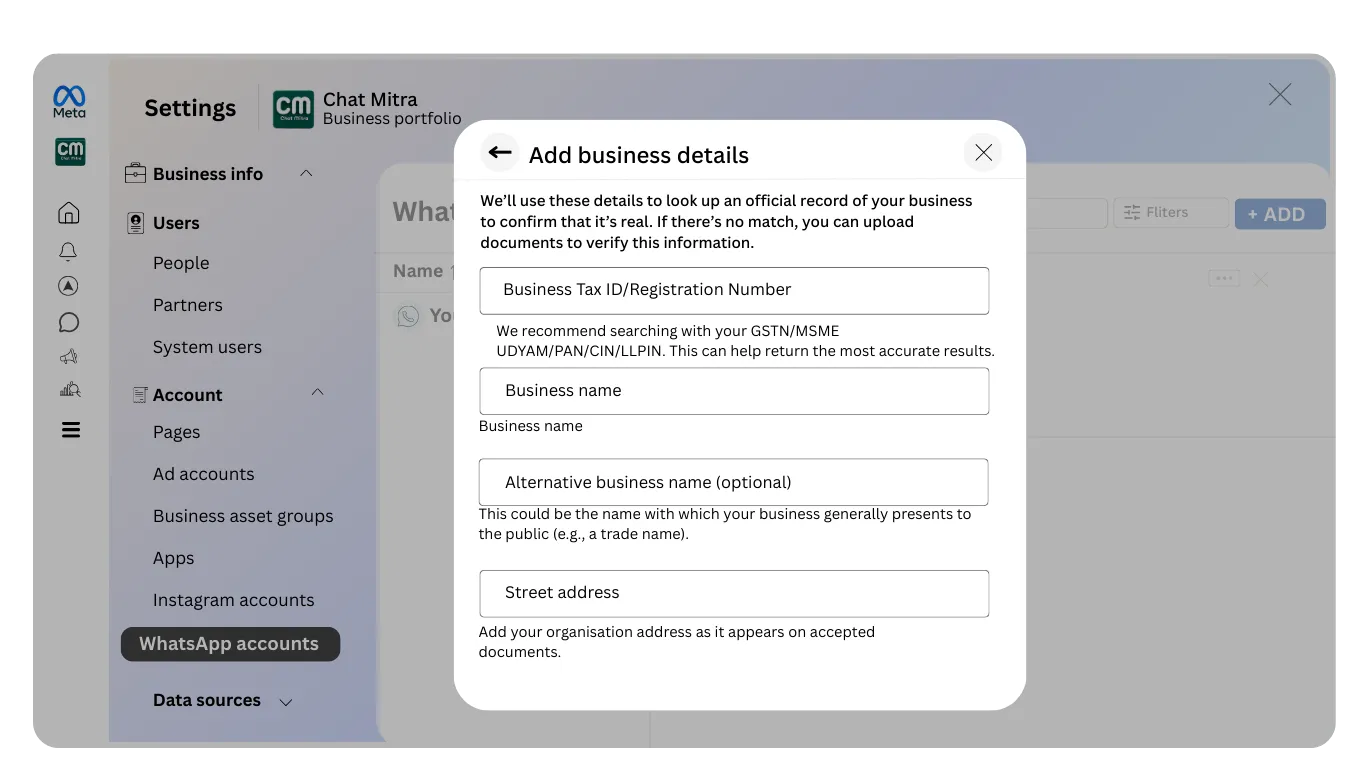
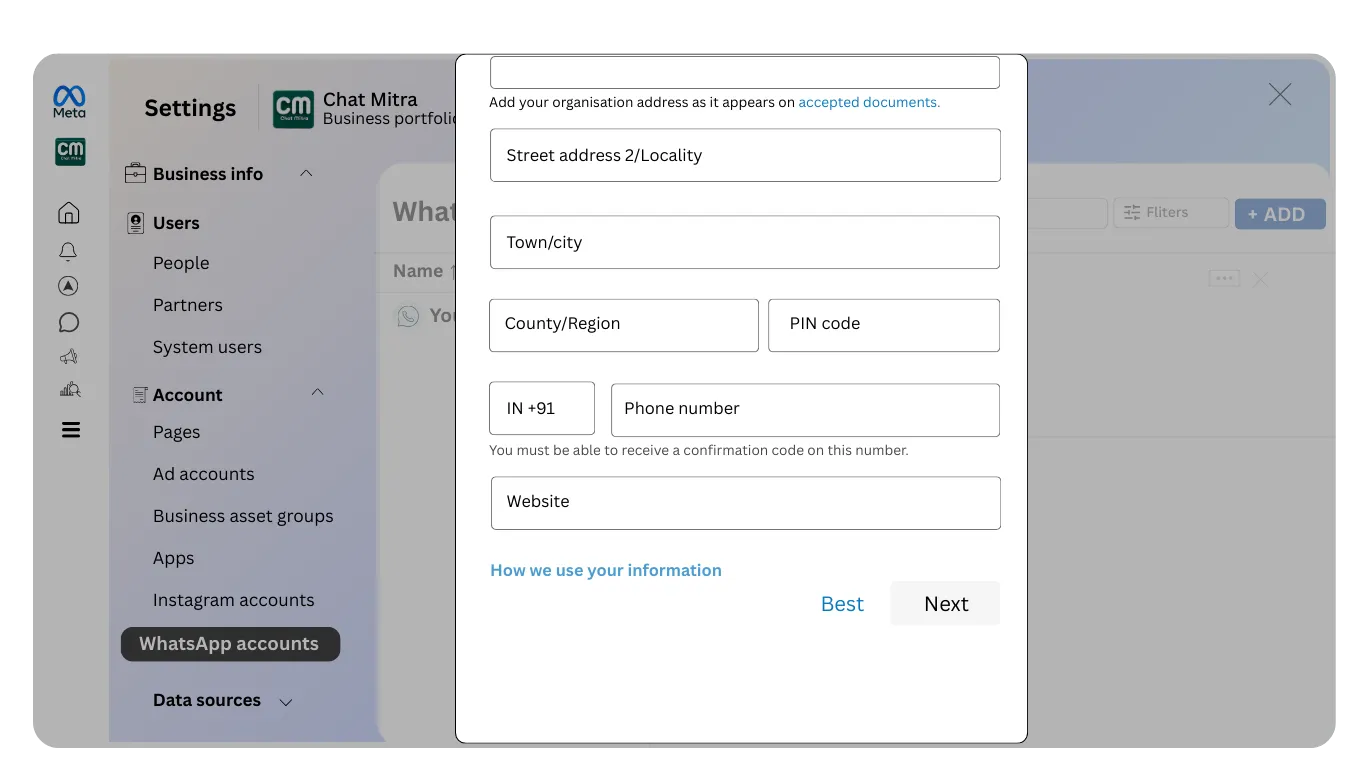
After selecting the appropriate category, click "Continue" to proceed with account creation.
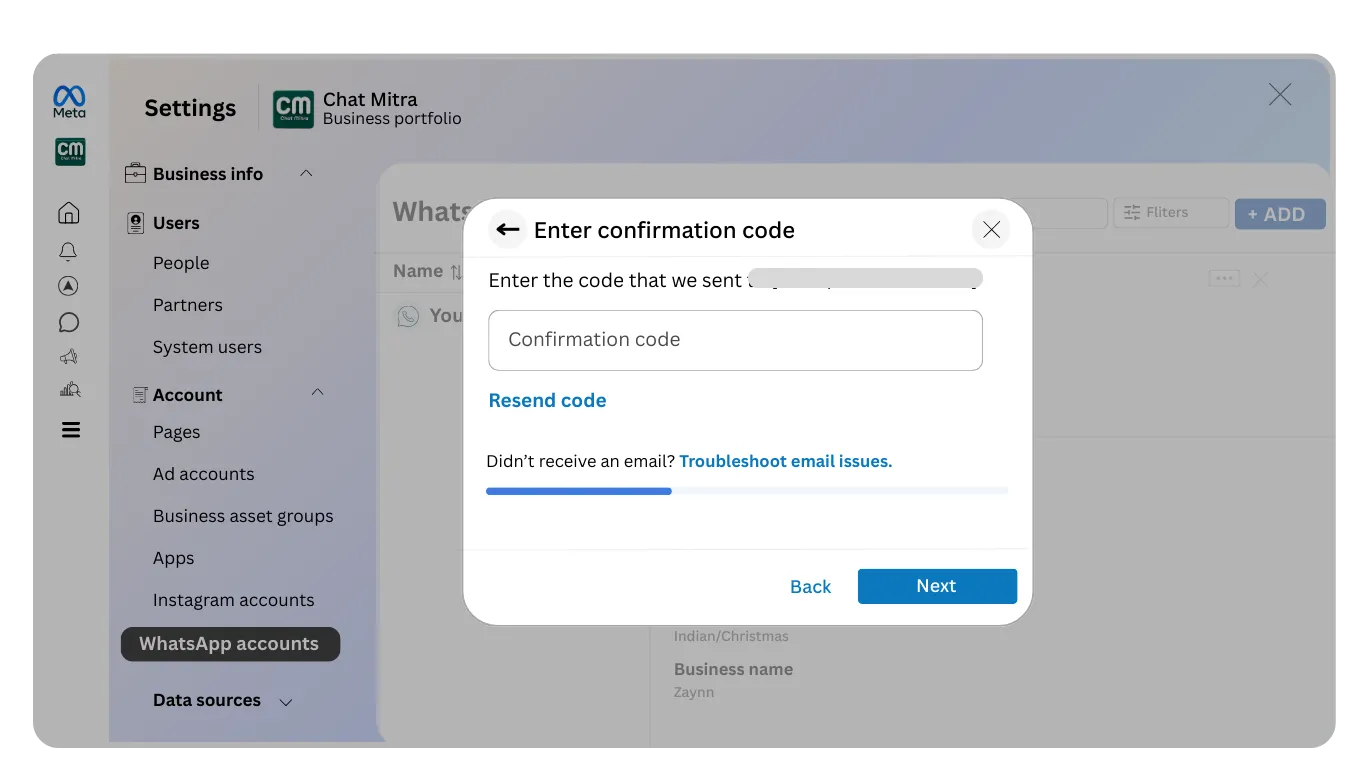
After completing this step, you will be able to access the business verification option. Return to Step 4 (Begin Business Verification Process) and continue with the verification process.