The classic flow is the route most businesses picture when they hear “get verified” — you, your documents, and Meta’s review. Here’s exactly what it involves.
A note on Coexistence accounts: Classic Standard Business Verification is not available for coexistence accounts (where the WhatsApp Business app and API run on the same number). If that’s you, you’ll need a different path.
Getting ready
A little prep before you open the portal saves a lot of back-and-forth. Make sure:
- Your company website is live and uses a secure (https) connection.
- Your business email uses your own domain — not a free Gmail or Yahoo address.
- Your legal and trade names line up across your website, your email and every document you’ll upload.
You’ll typically need a business registration document (incorporation, shop registration, or partnership deed), your GST registration number or certificate in India, and a recent utility bill or bank statement showing your business name and address.
Example: a Bengaluru garments wholesaler lines up its incorporation certificate, its GST certificate, and last month’s electricity bill — all printed with the exact same registered name — before starting.
The steps
The whole process lives inside the Security Centre in Meta Business Suite. One important rule up front: documents must be uploaded by an authorised representative, and the Meta Business Portfolio must be owned by that same authorised representative. Follow these in order.
Access the Security Centre. Go to Meta Business Suite → Security Centre → Start Verification.
Select your business asset. Confirm the business details that appear. If none of the listed businesses match yours, choose “None of these match.”
Get a verification code. Pick how Meta should send it — by text, phone call, or email.
Or verify by domain (optional). If you’ve already verified your business domain, you can use that instead of a code.
Enter the verification code you received and click Submit.
Upload proof of your legal business name. Use an official document such as a business license or articles of incorporation.
Upload proof of your business address or phone number. A utility bill or bank statement works here.
Wait for Meta’s review. This can take up to 14 business days.
Receive your verification status. Meta notifies you, and your verified status appears in Business Suite.

If your business was listed in Step 2, you can skip straight to Step 8 — Steps 6 and 7 are only for businesses that weren’t listed.
Example: a clinic enters “Sunrise Healthcare Pvt Ltd” — not the short brand name “Sunrise” — because the longer legal name is what’s printed on its registration.
If your request was rejected
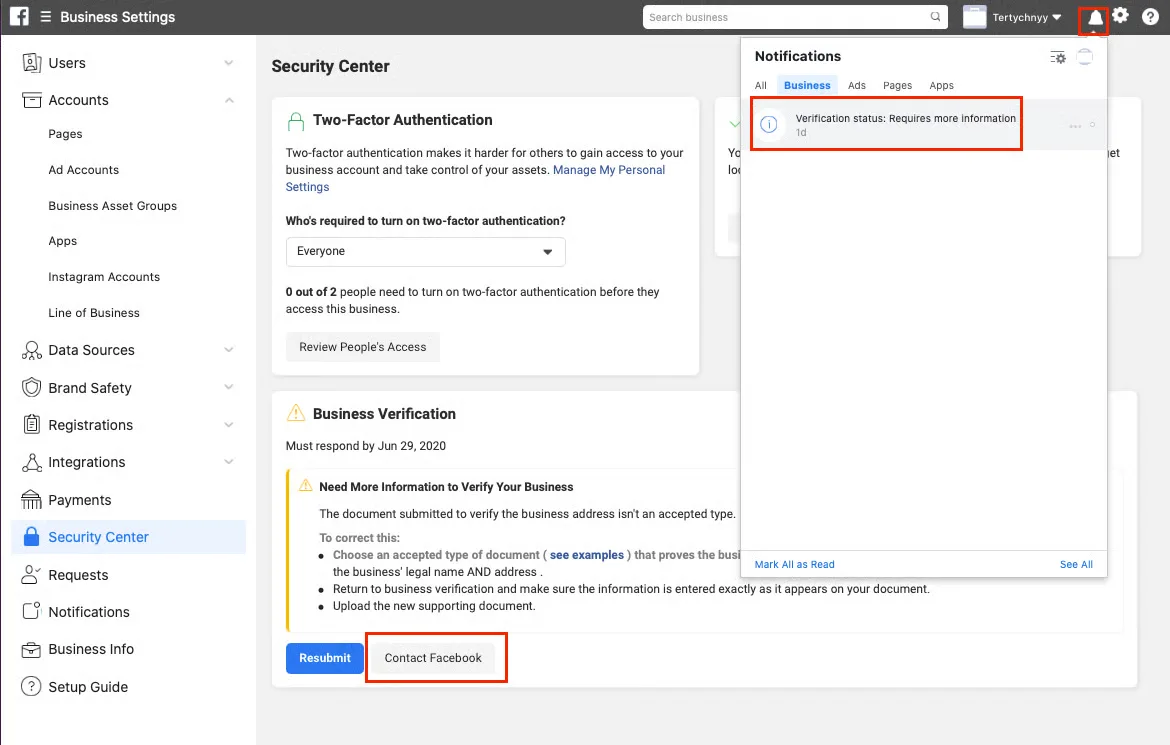
Most rejections come from small inconsistencies, not big problems. When Meta needs more from you, the Security Centre shows a “Need more information to verify your business” notice with a Resubmit button:
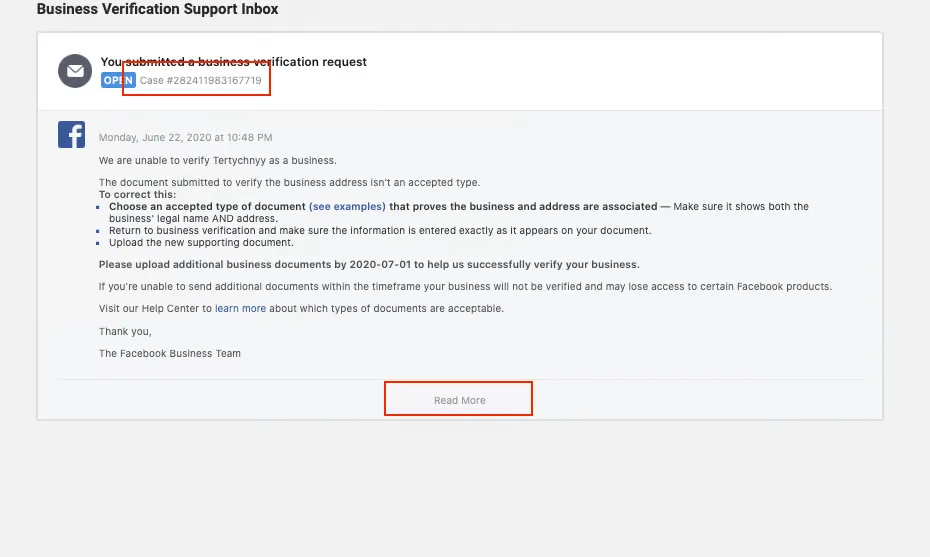
Meta also sends the details to your Business Verification Support Inbox, spelling out exactly what was wrong and the deadline to fix it:
Before you resubmit, check the usual culprits:
- Name mismatch — the business name on the form differs, even slightly, from the name on your documents.
- Stale or wrong address — the utility bill is old, or the address doesn’t match what you typed.
- Unclear documents — scans are blurry, cropped, or missing the page that shows your name and address.
- Inactive or unfindable business — Meta can’t match your business to any public record.
Fix the specific issue, line your documents back up so every detail agrees, and submit again.
Example: a retailer is rejected because the form said “StyleKart” but the GST certificate read “Stylekart Retail LLP” — fixing the name to match exactly cleared it on the next try.
If the Start Verification button isn’t available
Sometimes the button to begin simply isn’t there — it appears greyed out with a note that your business isn’t currently eligible for verification:
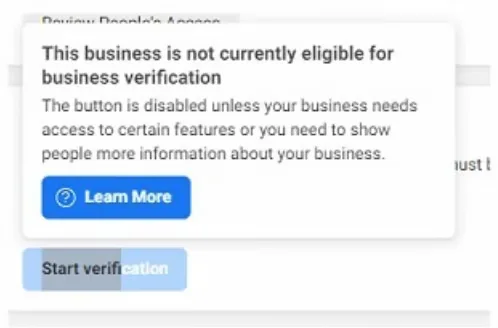
That usually means your account isn’t fully set up to start yet.
To enable the button, make sure your Meta Business Portfolio is owned by an authorised representative and that your business details are complete in Business Suite. Once everything’s in place, the Start Verification option appears in the Security Centre.