How to Connect Any API Without Code: A Practical Guide to HTTP Requests

Quick Summary
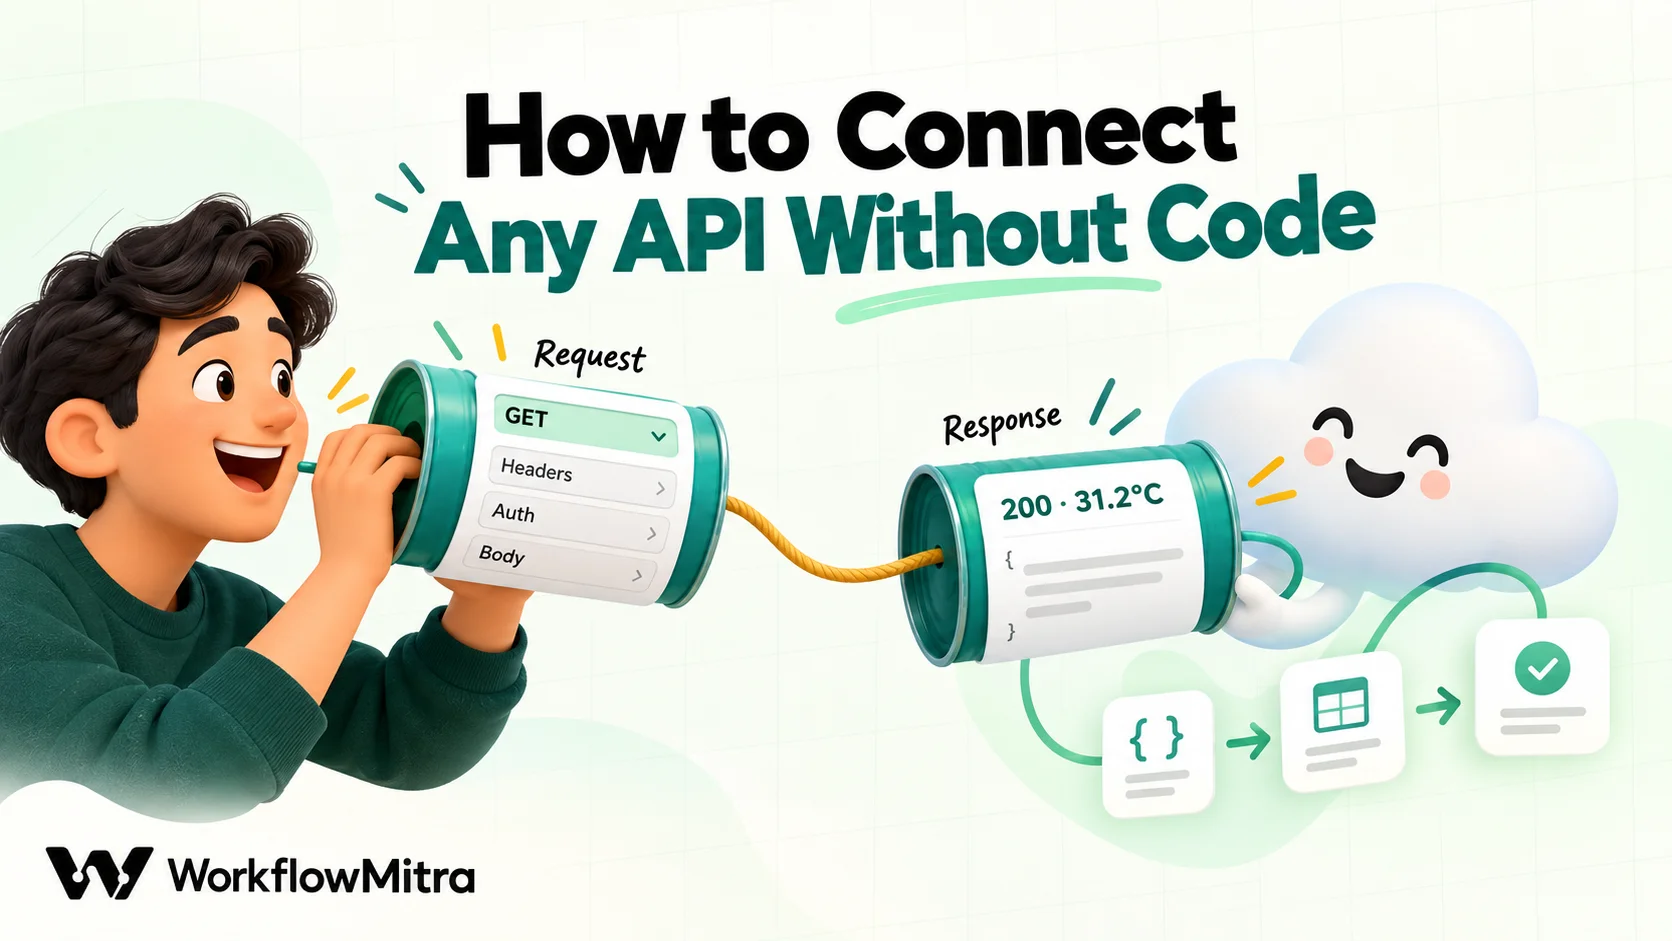
You can connect to almost any REST API without writing code by using an HTTP Request step in a workflow tool. You fill in a form instead: the method (GET, POST, PUT, PATCH or DELETE), the URL from the API's documentation, any headers and authentication, and a JSON body for requests that send data. The step returns the status code and the response, and later steps use its fields. In WorkflowMitra, powered by ChatMitra, the HTTP Request step also imports cURL examples straight from API docs, and its ok field lets an IF step catch errors that would otherwise pass silently.
Most business apps have an API, but only some have a ready-made integration in your automation tool. The gap between the two is where a lot of useful automation never gets built: the invoicing tool your accountant prefers, the regional courier, the industry CRM, the internal system your developer set up last year.
You don’t need a developer to close that gap. An HTTP Request step lets you call almost any REST API by filling in a form: what to ask for, where to send it, how to prove who you are and what data to include. If you can follow an API’s documentation, you can connect to it.
This guide explains how API calls work in plain terms, how to read API documentation, and how to make GET and POST requests, handle errors and stay within rate limits. The examples use the HTTP Request step in WorkflowMitra, powered by ChatMitra, and every request shown was sent through its request engine before publication. The concepts work the same way in any workflow tool.
Can you really connect an API without code?
Yes, for most REST APIs. An API call is a structured message: a method, a URL, some headers, and sometimes a JSON body. A no-code HTTP Request step turns each of those into a form field. You copy values from the API's documentation, map data from earlier steps into the fields, and the step returns the response for later steps to use. You need to understand the request, not program it.
There are limits. APIs that need complex sign-in flows, file uploads in unusual formats, or many dependent calls in a row can still be easier with a developer. But the everyday jobs, such as looking something up, creating a record, updating a status or sending a notification, rarely need more than one well-configured request.
API basics in five minutes
An API (application programming interface) is a set of addresses a service exposes so other software can read or change its data. A REST API organises those addresses around things, such as customers, orders or invoices, and uses standard HTTP methods to act on them.
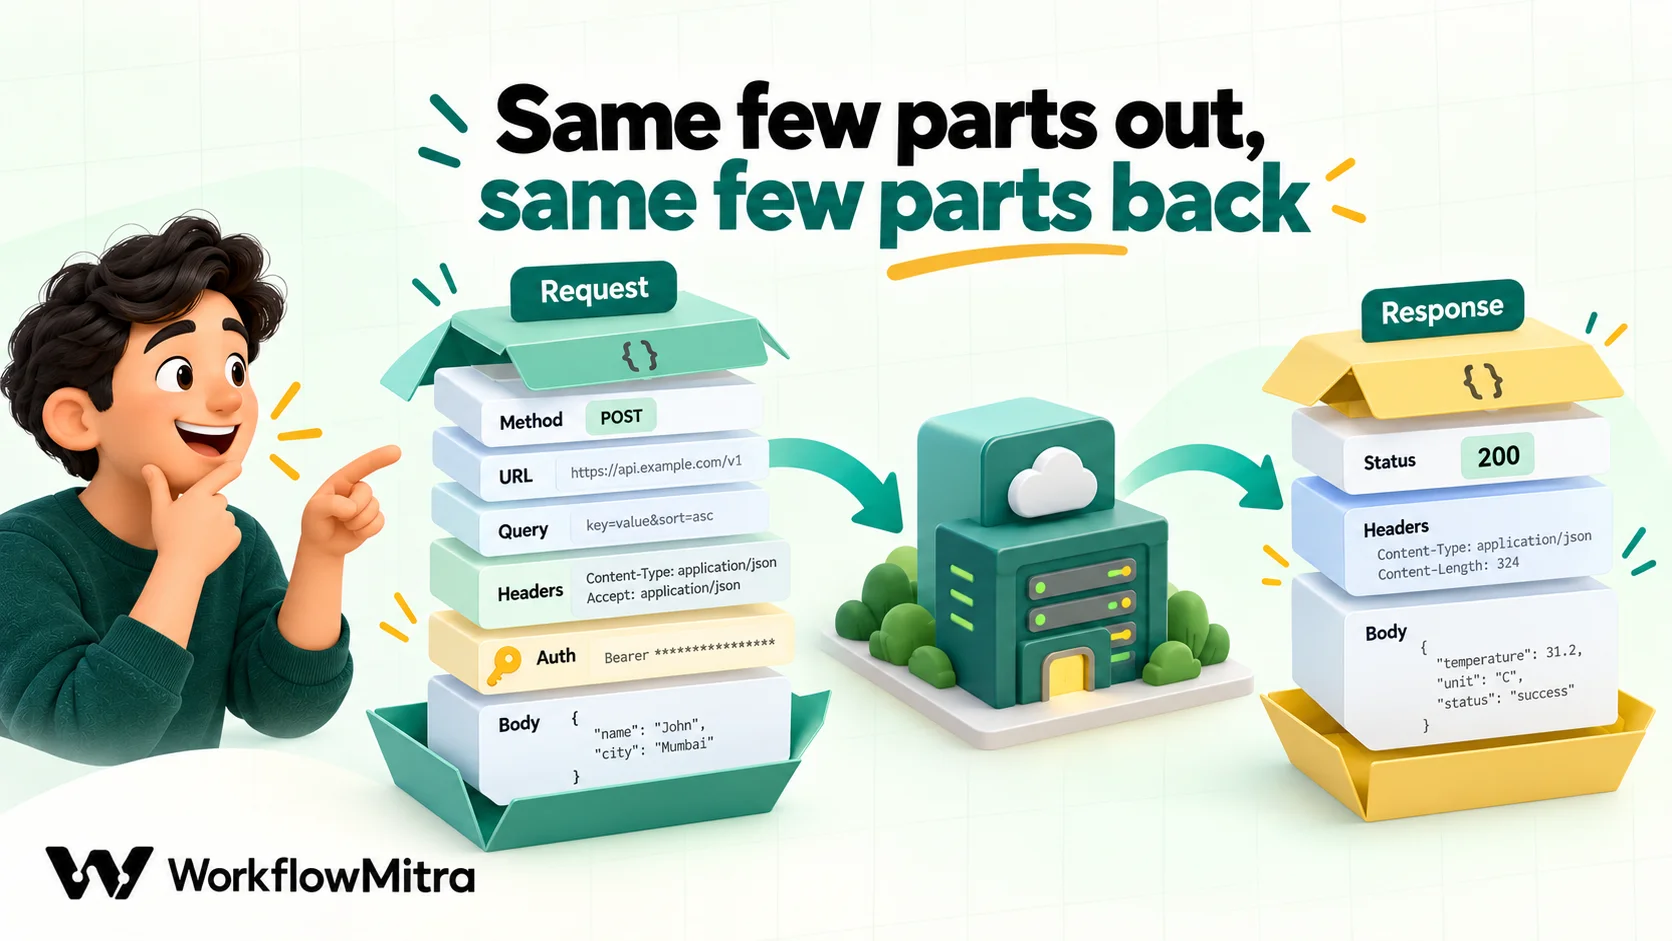
What goes out: the request
| Part | What it is | Example |
|---|---|---|
| Method | The kind of action | GET, POST |
| URL (endpoint) | The address of the thing you're acting on: a base URL plus a path | https://api.example.com/v1/contacts |
| Query parameters | Options added after ?, mostly for filtering and searching | ?status=open&limit=50 |
| Headers | Information about the request, including who you are | Authorization: Bearer …, Content-Type: application/json |
| Body | The data you send when creating or changing something, usually JSON | {"name": "Asha", "city": "Pune"} |
The five methods you’ll meet
| Method | Use it to | Has a body? |
|---|---|---|
| GET | Read or search: fetch a contact, list today's orders | No |
| POST | Create something, or trigger an action: add a lead, send a message | Yes |
| PUT | Replace a record completely | Yes |
| PATCH | Change some fields of a record | Yes |
| DELETE | Remove a record | Usually no |
What comes back: the response
The service answers with a status code (a three-digit number saying how it went), response headers and usually a JSON body. Codes in the 200s mean success, the 400s mean something was wrong with your request, and the 500s mean something went wrong on the service’s side. The full list is defined in the HTTP standard, RFC 9110, and MDN keeps a readable reference of status codes.
JSON is just nested labels and values: {"current": {"temperature_2m": 31.2}}. Workflow tools let you point at a value by its path, such as body.current.temperature_2m.
Which connection type should you use?
An HTTP Request step is powerful, but it isn’t always the best tool. In WorkflowMitra, there are four ways to connect to another system:
| Situation | Best choice | Why |
|---|---|---|
| The app has a built-in step (Google Sheets, WhatsApp, Slack, Zoho CRM…) | The app's own step | Fields are labelled for you and errors are explained in plain words |
| The app is one of App Request's 14 (HubSpot, Shopify, WooCommerce, Zendesk, Freshdesk, Intercom, Zoho Books, Shiprocket and others) | App Request | The base URL and sign-in are handled; your key sits in an encrypted connection |
| Another system should start the workflow when something happens | On webhook call trigger | The other system pushes events to you; no polling |
| Anything else with an HTTP API | HTTP Request | Works with any public REST endpoint |
If you’re new to the difference between pushing and pulling data, our guide to what webhooks are covers webhooks and APIs side by side.
How to read API documentation
API docs look intimidating, but you only need eight facts from them. Look for these, in this order:
- Base URL. The start of every address, such as
https://api.airtable.com/v0. Some services give each customer their own host, like a store domain. - Authentication. Is it an API key in a header, a bearer token, a username and password (basic auth), or OAuth? Where do you create the key?
- The endpoint for your job. “Create a record”, “List orders”, “Update a contact”: its method and path.
- Required fields. Which body fields or query parameters are mandatory, and their types: text, number, true/false, a list.
- An example request. Most docs show a cURL command. It’s the single most useful thing on the page, because it shows every part of a working request.
- An example response. So you know the path to the values you’ll use later.
- Errors. Which status codes the API returns and what it puts in the error body.
- Limits. How many requests per second or per day, and what happens when you exceed them.
Also check for a version header. Some APIs want one on every request, and forgetting it causes confusing errors.
The HTTP Request step in WorkflowMitra
You’ll find HTTP Request in the Core group of the step picker, next to App Request. If you choose HTTP as the very first step, WorkflowMitra adds a Trigger manually step in front of it, so you can run the request by hand while you build.
The form follows the parts of a request:
- Import from cURL at the top. Paste a cURL command from the docs and it fills in the method, URL, headers, authentication and body.
- Authentication type: No authentication, Bearer token, Basic auth, or API key (header), where you choose the header name.
- URL, which must start with
https://(orhttp://) and accepts{{ variables }}from earlier steps, as inhttps://api.example.com/orders/{{ order_id }}. - Method: GET, POST, PUT, PATCH or DELETE.
- Headers and Query parameters as name and value rows.
- Body content type for POST, PUT and PATCH: Empty, application/json · fields (name and value rows that build a JSON object for you), or Raw (JSON string).
- Advanced settings: a timeout in milliseconds (up to 30 seconds, which is also the default) and what to do On failure: Stop workflow or Continue.
- Export as cURL at the bottom, which copies the configured request as a cURL command for sharing or for testing in a terminal.
When it runs, the step outputs four things: status (the code), ok (true for any 2xx status), headers and body. A JSON response is parsed automatically, so later steps can reach into it with expressions like {{ body.data.id }}. A plain-text response arrives as text. Responses are capped at 10 MB.
Example 1: fetch data with a GET request
Let’s build a morning weather check for a team that works outdoors. It uses Open-Meteo, a forecast API that needs no key for non-commercial use. Note that its free tier is for non-commercial use only, so treat this as a practice API; for a business workflow, use its paid plan or a provider you’re licensed to use.
- Trigger: On a schedule, every morning at 7:00.
- HTTP Request, renamed
Get forecast:- Method: GET
- URL:
https://api.open-meteo.com/v1/forecast - Query parameters:
latitude=18.52,longitude=73.86,current=temperature_2m,precipitation,daily=precipitation_probability_max,timezone=Asia/Kolkata,forecast_days=1 - Authentication: No authentication
- IF:
{{ ok }}Is yes. On the “no” branch, alert yourself, because a failed lookup should never look like a dry day. - Message on the “yes” branch, to Slack or as a WhatsApp template to the team: “Now {{ body.current.temperature_2m }}°C. Chance of rain today: {{ $node[“Get forecast”].body.daily.precipitation_probability_max[0] }}%.”
We sent this exact request through WorkflowMitra’s HTTP engine on 7 October 2026. It returned status 200 with the current temperature for Pune (31.2°C at the time) under body.current.temperature_2m, and the day’s rain probability as the first item of a list, hence the [0].
Two habits from this example are worth keeping. Put options in Query parameters rather than typing them into the URL, because each one is easier to read and change. And always rename the step: $node["Get forecast"] is much clearer in a message template than a generated ID.
Example 2: send data with a POST request
Now the other direction: adding each new website lead to an Airtable table. Airtable’s API has a create records endpoint that takes POST https://api.airtable.com/v0/{baseId}/{tableIdOrName}, a personal access token, and a JSON body with the record’s fields.
- Trigger: On webhook call, receiving
name,phoneandbudgetfrom your form. - HTTP Request, renamed
Add to Airtable:- Authentication: Bearer token, pasting the personal access token you created in Airtable with write access to that base
- Method: POST
- URL:
https://api.airtable.com/v0/appXXXXXXXX/Leads(your base ID and table name) - Body content type: Raw (JSON string)
{
  "fields": {
    "Name": "{{ $trigger.name }}",
    "Phone": "{{ $trigger.phone }}",
    "Budget": {{ $trigger.budget }}
  },
  "typecast": true
}- IF:
{{ ok }}Is yes; otherwise send the response body to your team so someone can see what Airtable objected to.
Look closely at the body. Text values sit inside quotes; Budget doesn’t, so it’s sent as a real number. WorkflowMitra escapes values for JSON as it fills them in, which matters more than it sounds. When we sent a name containing quotes, Asha "A" Rao, the body stayed valid JSON. An empty budget arrived as "" and a missing one as null, both still valid. Airtable’s optional typecast setting asks it to convert values such as text into the right field type where it can.
Why Raw rather than application/json · fields? The fields mode is quicker for simple bodies, but every value is sent as text: "qty": "3", not "qty": 3. Many APIs accept that; some reject a number field that arrives as text. Use fields for text-only bodies and Raw when you need numbers, true/false values, lists or nested objects.
Example 3: chain two requests to find, then update or create
Many real jobs need two calls: look something up, then act on what you found. The classic case is “update the contact if they exist, otherwise create them”, sometimes called an upsert. Here’s the pattern with a generic CRM API (the api.example.com addresses stand in for your app’s real endpoints):
- HTTP Request
Find contact: GEThttps://api.example.com/v1/contacts, with a query parameteremail={{ $trigger.email }}. - IF:
{{ $node["Find contact"].body.results[0].id }}Is not empty. - Yes branch, HTTP Request
Update contact: PATCHhttps://api.example.com/v1/contacts/{{ $node["Find contact"].body.results[0].id }}, with a Raw body containing only the fields that changed. - No branch, HTTP Request
Create contact: POSThttps://api.example.com/v1/contacts, with the full record.
The path body.results[0].id reads “the id of the first item in the results list”. We checked how it behaves: when the search finds a match, it returns the ID; when the list is empty, it returns an empty value instead of an error, which is exactly what the IF needs. Your API’s response will use its own names, such as data, items or records, so read the example response in the docs and adjust the path.
Two cautions apply to every chain. First, check ok on the lookup before trusting an empty result: a failed search and “no such contact” both produce an empty ID, and you don’t want a 401 to create duplicate contacts. Second, if two events for the same person can arrive within seconds, both may search before either creates, so duplicates are still possible. When an API offers its own upsert or “create or update” endpoint, use that instead.
Test a request safely before it goes live
API calls change real data, so build them the way you’d test anything that touches production:
- Start behind a manual trigger. Run the request by hand, read
statusandbodyin the run details, and only then connect the real trigger. - Use test credentials where they exist. Many payment and messaging APIs offer separate test keys or sandbox accounts. A test key lets you run a POST as often as you like without creating real charges or records.
- Create a throwaway record. For apps without a sandbox, test against a record you made for the purpose, such as a contact called “API Test”, and delete it afterwards.
- Compare with the docs. If a request fails and you can’t see why, click Export as cURL and compare it line by line with the documentation’s example. Differences in a header name or a missing version header usually jump out.
- Inspect what you send with an echo service. Public endpoints such as
https://httpbin.org/anythingreply with exactly what they received, which is handy for checking that a JSON body or header looks right. Remove the authentication first: never send a real key to a third-party test service.
Remember that clicking Run in the editor runs every step in the workflow for real, including any message or update steps you’ve already added after the request.
Common mistakes when calling APIs
These cause most first-attempt failures:
- A trailing space or line break in a key. Copying from a settings page often adds one. A 401 with a key you’re sure is right is usually this.
- The wrong header name for an API key.
X-API-Key,api-key,Authorization: Token …andAuthorization: Bearer …aren’t interchangeable. Use exactly what the docs say. - Using the website address instead of the API address.
app.example.comandapi.example.comare different hosts. - Missing a required version header or path segment. Such as
/v1/or/v2/, which may also change field names. - Sending numbers as text. Switch to a Raw body when a field must be a number or true/false.
- Acting on an error response. Without an IF on
ok, a 404 or 500 flows straight into the next step. - Calling the API once per item when a batch endpoint exists. It’s slower, costs more credits and hits rate limits sooner.
Set up any request in seconds with Import from cURL
Most API documentation includes a cURL example. It’s a complete, working request in one line, and WorkflowMitra’s Import from cURL turns it into a filled-in form:
- Copy the example from the docs.
- Click Import from cURL, paste it and press Import.
- Replace the placeholder key with yours and the sample values with
{{ variables }}from earlier steps.
The importer understands the common options: -X for the method, -H for headers, -u for basic auth, -d and --data-raw for the body, and an Authorization: Bearer header becomes a Bearer token automatically.
One behaviour to check afterwards: a flat JSON body, one with no nested objects or lists, is imported into fields mode, which sends every value as text. If the API needs numbers or true/false values, switch the body to Raw and paste the JSON back in. A body with nested objects or lists is imported as Raw and kept exactly as written.
Authentication: proving who you are
Almost every useful API needs credentials. The four common types map to the options in the step:
| Type | How it's sent | Where you'll see it |
|---|---|---|
| API key (header) | A header such as X-API-Key: abc123; the docs name the header | Many SaaS and data APIs |
| Bearer token | Authorization: Bearer <token> | Personal access tokens, most modern APIs |
| Basic auth | Username and password (or key and secret), encoded in the Authorization header | Older APIs, some payment and SMS gateways |
| OAuth 2.0 | A short-lived token obtained from a sign-in flow, refreshed regularly | Google, Microsoft, social networks, large SaaS |
The HTTP Request editor covers the first three. OAuth-based APIs are easiest through a built-in app step or App Request, which handle the connection for you. If neither covers your app, check whether the API also offers a long-lived token or API key for server-to-server use.
A word on where secrets live. A key typed into an HTTP Request step is saved as part of that workflow, so anyone who can edit the workflow can see it. For the apps App Request supports, the key goes into an encrypted connection instead and is never shown again. Either way, follow the usual rules:
- Create a separate key per integration with the narrowest permissions the job needs, so you can revoke one without breaking others.
- Never put keys in a URL or a query parameter unless the API requires it; URLs end up in logs.
- Rotate keys when someone leaves the team, and delete the ones you no longer use.
Handling responses and errors
Here’s the behaviour that catches most people out: in WorkflowMitra, an error response doesn’t fail the HTTP Request step. A 404 or a 500 is still a response, so the step records it, sets ok to false, and the workflow carries on. We confirmed this on 7 October 2026 by calling an address that returns 404. If the next step sends a confirmation message, it sends it, even though nothing was created.
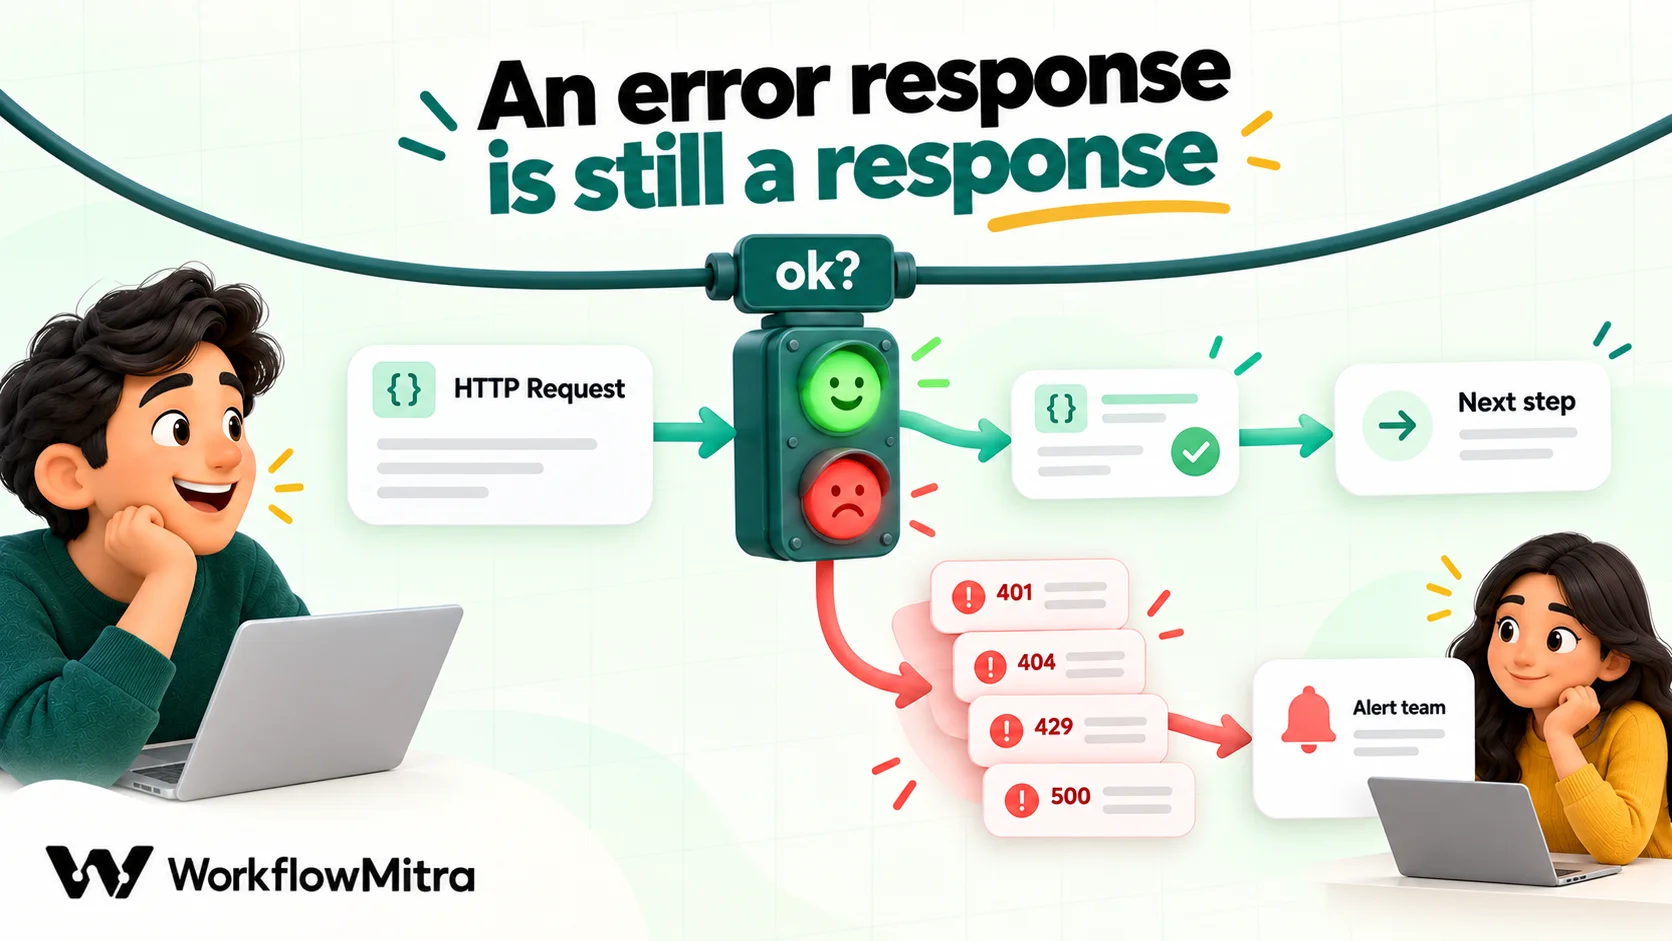
ok before acting on it.The fix is one free step: put an IF after every request that matters, checking that {{ ok }} Is yes, and send the “no” branch to an alert or a review sheet with {{ status }} and {{ body }} in it. Our guide to workflow error handling covers alerts and error branches in more depth.
Network-level failures behave differently. A timeout, a host that doesn’t exist or a blocked address has no response at all, so the step fails and the run stops, unless you set On failure to Continue. Then the step returns ok: false, status: 0 and an error message, and the same IF catches it.
What each status means, and what to do:
| Status | Meaning | What to do |
|---|---|---|
| 200, 201, 204 | Success (201: created; 204: done, no body) | Continue |
| 400 / 422 | The request was malformed or a field is invalid | Read the error body; check field names and types |
| 401 | Credentials missing or not accepted | Check the key, the header name and expiry |
| 403 | Recognised, but not allowed | Widen the token's permissions or scopes |
| 404 | The address or record doesn't exist | Check the path, IDs and API version |
| 409 | Conflict, often a duplicate | Look the record up first, or update instead of create |
| 429 | Too many requests | Slow down; respect Retry-After |
| 500, 502, 503 | The service had a problem | Usually temporary; alert and re-run later |
Rate limits, volume and big jobs
Every API limits how fast you can call it. Airtable, for example, allows 5 requests per second per base and asks you to wait 30 seconds after a 429 response, according to its rate limit documentation. Exceed a limit and you get HTTP 429, often with a Retry-After header saying how long to wait.
One request per trigger, as in the examples above, rarely gets close. Trouble starts when a workflow makes a request for every item in a long list. Some ways to stay safe:
- Prefer batch endpoints. Many APIs accept several records in one request, as Airtable’s
recordsarray does. One call for twenty records beats twenty calls. - Ask for more per page. List endpoints usually take a
limitorper_pageparameter. Request the largest page the API allows so that one call covers a typical day. - Be careful with Loop. A Loop sends one request for every item in a list (the cap is 1,000), and Delay steps aren’t allowed inside a Loop body, so you can’t space the calls out. Keep looped lists short, or send them to a batch endpoint instead.
- Spread scheduled work. If a nightly job makes hundreds of calls, split it across smaller schedules rather than one burst.
- Make 429s visible. Your IF on
okwill catch them. Note the time and volume so you know which job needs slowing down.
Two edge cases worth knowing
APIs that want form-encoded bodies
A few APIs, often in payments and SMS, expect application/x-www-form-urlencoded bodies (name=Asha&city=Pune) rather than JSON. The editor has no form body type, and simply writing name={{ $trigger.name }} in a Raw body breaks as soon as a value contains & or =. When we sent Asha Rao & Co that way, it arrived as two broken fields.
The reliable route is a short Code step that encodes the values first:
const f = { name: input.name, city: input.city };
return {
  form: Object.keys(f)
    .map((k) => encodeURIComponent(k) + "=" + encodeURIComponent(f[k] ?? ""))
    .join("&"),
};
Then, in the HTTP Request step, add a header Content-Type = application/x-www-form-urlencoded and set the Raw body to {{ $node["Encode form"].form }}, without quotes around it. In our test, Asha Rao & Co arrived intact.
Internal systems on your own network
WorkflowMitra runs in the cloud, and its HTTP Request step refuses private and local addresses such as localhost, 192.168.x.x and 10.x.x.x. That’s a deliberate security guard against a class of attack called server-side request forgery. If you need to reach an internal system, it has to be available at a public HTTPS address, protected by a key or token, which is how most internal APIs are exposed to cloud tools anyway.
What API calls cost in WorkflowMitra
Each HTTP Request step uses 1 credit every time it runs, whether the API answers with success or an error, because the call really happened. The IF step that checks the result costs nothing. So the weather workflow above uses 2 credits a morning (trigger and request), plus 1 for the message, about 90 credits a month.
Plans start at 10,000 credits for ₹999 a month, and the 14-day trial includes 10,000 credits with no card. Remember that the API you call may charge separately or cap your usage on its own plan.
Why use WorkflowMitra to connect APIs?
If your main need is calling a handful of APIs and acting on the results, a few things make WorkflowMitra a practical fit:
- Docs to working request quickly. Import from cURL fills the form from the example you’re already looking at, and Export as cURL lets a developer reproduce exactly what the workflow sends.
- JSON-safe templating. Values from earlier steps are escaped as they’re inserted into a Raw body, so a customer name with quotes doesn’t break the request.
- Results you can act on.
status,okand the parsedbodyfeed straight into IF, Code, Google Sheets, Slack or a WhatsApp message sent through ChatMitra, the WhatsApp Business messaging platform that powers WorkflowMitra, or through the Meta Cloud API directly. - Signed-in requests for common apps. App Request covers 14 business apps with encrypted connections, and it can treat error responses as failures with one setting.
- Credit pricing in rupees. One credit per request, with free logic steps.
It’s fair to name the gaps too. The HTTP Request editor has no OAuth 2.0 option, no automatic retry setting and no built-in pagination, and it can’t reach private network addresses. Developer-oriented platforms offer more of those controls. If most of your work is complex API orchestration, compare carefully; if it’s calling a few APIs well, the simpler form is an advantage.
Start with one request
Pick one app you wish your workflows could talk to. Find its API docs, copy the cURL example for the job you need, and import it into an HTTP Request step behind a manual trigger. Run it, read the response, then add the IF on ok before you connect anything that sends or saves.
You can try it in a 14-day WorkflowMitra trial with 10,000 credits. When you need to reshape a response before using it, our guide to code steps in automation shows when a few lines of JavaScript help, and when they don’t.
WorkflowMitra behaviour described here, including the HTTP Request editor's options, output fields, JSON escaping, error handling, private-address blocking, cURL import and credit rates, comes from its source code as of 7 October 2026, and the requests shown were sent through the same request code against public test endpoints and the Open-Meteo API. Airtable details are from its API documentation, and HTTP status meanings from RFC 9110 and MDN Web Docs, all read the same day.
Frequently Asked Questions
Answers to the questions people ask the first time they call an API from a workflow.
Yes. Most REST APIs only need a method, a URL, a few headers and sometimes a JSON body, and an HTTP Request step in a no-code workflow tool lets you fill these in as form fields. You still need to read the API's documentation to know which values to use, but you don't need to write or host a program.
Automate the work between your apps
Build workflows with triggers, conditions and actions, then test them before they go live. Try WorkflowMitra free for 14 days, no card required.