How to Read API Documentation When You Build Without Code

Quick Summary
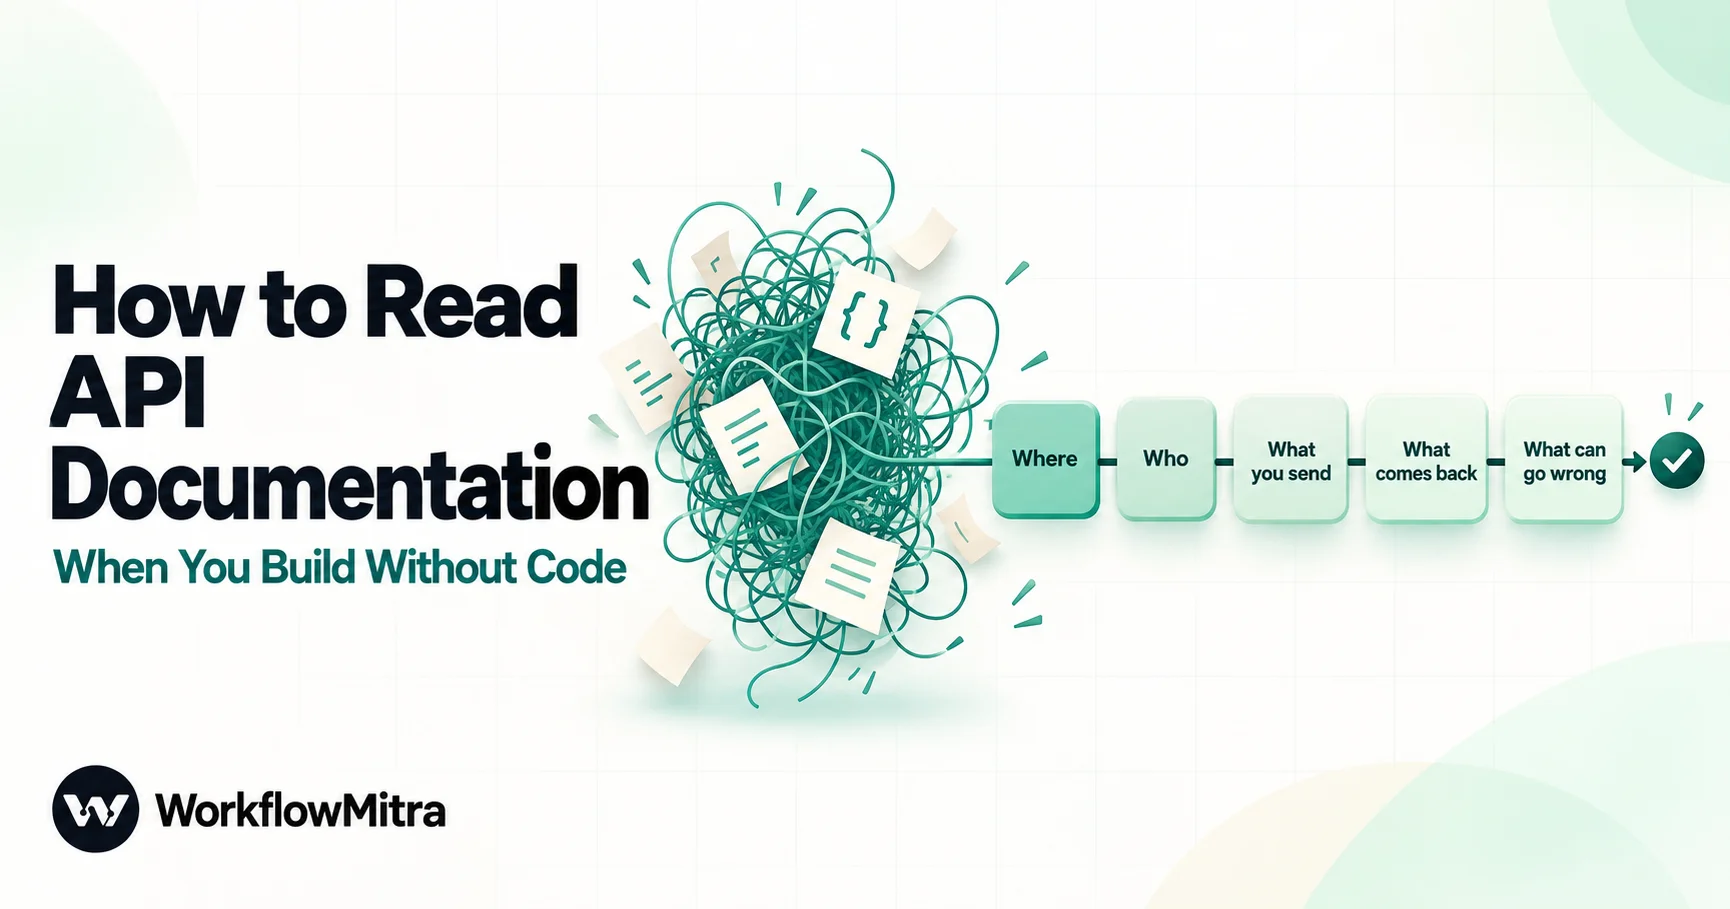
To read API documentation without being a developer, ignore most of the site and answer five questions from one endpoint page: where the request goes (base URL, method and path), who you are (authentication), what you send (path, query, header and body parameters with their types and units), what comes back (the response fields you'll use next) and what can go wrong (status codes, error codes and limits). Each answer maps to one field of a no-code HTTP Request step. Read the parameter table slowly: types decide whether a value goes in quotes, units decide whether ₹300 is 300 or 30000, and the example request settles any contradiction in the table. Test with sandbox keys before live ones.
You found an app that does what you need, and it has an API. Then you open the documentation and meet a wall of endpoints, code tabs in six languages, objects inside objects and words like “idempotent”. It’s easy to conclude the page isn’t meant for you.
It is. API documentation is written in a very repetitive way, and once you know the pattern you can read most of it without writing a line of code. This guide shows you how to read API documentation as a no-code builder: what to read, what to skip, how to decode the notation, and how every part of an endpoint page turns into a field in an HTTP Request step in WorkflowMitra, powered by ChatMitra. One real page, Razorpay’s “Create a Payment Link”, is used throughout so you can see each idea on an actual document.
Quick answer: to read API documentation, open the one endpoint page that does your job and answer five questions: where the request goes (base URL, method, path), who you are (authentication), what you send (path, query, header and body parameters, with their types and units), what comes back (the response fields you'll use next) and what can go wrong (status codes, error codes, limits). Each answer fills one field of a no-code HTTP Request step. When the parameter table and the example request disagree, trust the example, then confirm with one test call using sandbox keys.
What is API documentation?
API documentation is the manual for talking to a piece of software from the outside. It tells you which addresses accept requests, what each request must contain and what you get back. Developers read it to write code; a no-code builder reads it to fill in a form.
Most documentation sites mix four kinds of pages, and knowing which is which saves most of your reading time:
| Page type | What it's for | Read it? |
|---|---|---|
| Getting started / overview | The base URL, test and live modes, how to get keys | Yes, first. Five minutes here prevents most early errors. |
| API reference | One page per endpoint: its parameters, examples and errors | Only the endpoint you need. This is where you'll spend your time. |
| Guides and tutorials | How several calls fit together for a common job | When your job needs more than one call, such as "create a customer, then charge them". |
| SDKs, libraries, changelog | Code packages for programmers; a history of changes | Skip the SDKs. Glance at the changelog for your endpoint only. |
The SDK pages are the ones that scare people off. They show the same request written in PHP, Python or Node.js, which only matters if you’re writing in that language. A workflow tool doesn’t need any of them. The one code sample worth your attention is the cURL example, because it’s the raw request with nothing hidden.
The five questions every endpoint page answers
An endpoint page can be long, but it only ever answers five questions. Read with these in mind and the page sorts itself into sections.
- Where does the request go? The base URL, the method (GET, POST, PUT, PATCH or DELETE) and the path. Together they make the address and the verb, such as
POST https://api.razorpay.com/v1/payment_links/. - Who are you? The authentication method: an API key, a bearer token, a username and password (basic auth) or OAuth. Usually described once, on its own page, and assumed on every endpoint after that.
- What do you send? The parameters: some in the path, some in the query string, some in headers and most, for create and update calls, in a JSON body. Each one has a name, a type, a “required” flag and a description.
- What comes back? The response: a status code and a body, usually JSON. You need the names and paths of the few fields you’ll use in later steps.
- What can go wrong? Error codes and messages, rate limits and any rule hidden in a description, such as “must be at least 15 minutes in the future”.
Here’s how those answers map onto WorkflowMitra’s HTTP Request step. Every field in the step’s form has a home in the documentation.
| Question | Where the docs answer it | HTTP Request field |
|---|---|---|
| Where | Base URL (overview page) + path (endpoint heading) | URL |
| Where | The verb beside the path | Method |
| Who | Authentication page | Authentication type: No authentication, Bearer token, Basic auth or API key (header) |
| What you send | Path parameters | Typed into the URL, usually as {{ }} values |
| What you send | Query parameters | Query parameters rows |
| What you send | Header parameters (version, content type, idempotency key) | Headers rows |
| What you send | Request body parameters | Body content type: application/json · fields or Raw (JSON string) |
| What comes back | Response example and response parameters | The step's output: status, ok, headers, body |
| What can go wrong | Errors section, rate limits page | An IF on {{ ok }}; Advanced settings: Timeout (ms), On failure |

If you’ve never set up the step itself, our guide on how to connect any API without code walks through the form and three working examples. This article stays on the reading side.
Read in this order
Docs sites are built for browsing, not for finishing a job. A fixed reading order keeps you from wandering:
- Overview or getting started. Note the base URL, whether there’s a separate sandbox URL, and whether test keys exist. Payment, messaging and shipping APIs almost always have a test mode; use it until the workflow works.
- Authentication. Find out what kind of credential you need, where to create it and which header carries it. Our guide to API authentication methods explains each type in plain terms.
- Your one endpoint. Search the reference for the verb of your job: “create”, “list”, “fetch”, “update”. Read that page top to bottom with the five questions.
- The errors section. Some sites put errors on each endpoint page, others on a shared page. Skim it before you test, so the first failure isn’t a surprise.
- Limits. Look for “rate limits”, “quotas” or “throttling”. If the docs say nothing, note that you don’t know, and pace any bulk job anyway.
- The changelog, briefly. Search it for your endpoint’s name. You’re checking for “deprecated”, “removed” or “requires version header”, nothing more.
That’s usually 15 to 20 minutes of reading for a well-documented API. If you find yourself on an SDK page, you’ve drifted.
How to read an endpoint page, section by section
Let’s read Razorpay’s Create a Standard Payment Link page the way you’d read any endpoint. It’s a good teaching page because it’s thorough, it uses real Indian units, and it contains two small contradictions of the kind you’ll meet everywhere.
The heading: method and path
At the top: POST /v1/payment_links/, under the base URL https://api.razorpay.com. That answers “where” in full. POST means you’re creating something, so expect a body. The /v1/ is the API version; it’s part of the address, so you copy it exactly.
Authentication
The page shows curl -u [YOUR_KEY_ID]:[YOUR_KEY_SECRET], and Razorpay’s authentication page confirms that every Razorpay API uses basic auth with a key ID and key secret. It also says the secret is shown only once, when you generate it, and that test-mode and live-mode keys are separate. So in the step you choose Basic auth, with the key ID as the username and the key secret as the password.
The parameter table
This is the heart of the page. Each row has four parts, and each part tells you something different:
- Name, such as
amount. Copy it character for character. APIs are case-sensitive, andAmountis a different field. Razorpay lists “extra fields sent” as an error, so a misspelt name doesn’t just get ignored. - Type, such as
integer,string,boolean,objectorarray. This decides whether the value goes in quotes, and it’s the most common source of “but the value is right” errors. More on this below. - Required or optional. Fill every required field. Optional fields have defaults; Razorpay’s
expire_by, for example, defaults to six months from creation. - Description. Read every word. Descriptions hide the rules:
amount“must be in the smallest unit of the currency”,reference_idmust be unique and at most 40 characters, andexpire_bymust be a Unix timestamp no more than six months ahead.
Nested fields appear indented under their parent, or with a dotted name. Razorpay lists name, email and contact under customer. In JSON that’s an object inside the body: "customer": {"name": "...", "contact": "..."}. When a doc writes customer.name or customer[name], it means the same thing.
The example request and response
On the right, or below the table, sits a cURL example and a sample response. Treat these as the tiebreaker. A table is written by hand and can drift; an example has usually been run at least once.
Razorpay’s page shows why. Its table marks upi_link as required, yet the description says that if upi_link “is not passed or passed with value as false, a Standard Payment Link will be created”. And it lists the type of notify as array, while the example sends an object: "notify": {"sms": true, "email": true}. In both cases the example and the description agree with each other, and the label is the odd one out. That pattern is common, so when a label surprises you, look at the example before you believe it.
The response parameters
The sample response shows what you’ll get back: an id starting plink_, a short_url you can send to the customer, a status (created, partially_paid, expired, cancelled or paid), the amount fields and several Unix timestamps. You don’t need all of it. Pick out the two or three fields later steps will use, here id and short_url, and note their paths.
The errors
At the bottom, Razorpay lists the error messages for this endpoint with their causes: “amount should be minimum 100 for INR”, “should be a whole number”, “timestamp must be atleast 15 minutes in future”, “payment link creation with reference ID already attempted”. Read these before your first test. Each one is a rule the table didn’t state plainly.
Decoding the notation
API docs share a small vocabulary of symbols. None of it is code; it’s shorthand.
| You see | It means | What you do |
|---|---|---|
/payment_links/{id} or /payment_links/:id | A path parameter: a slot in the address | Replace the whole {id} or :id, braces and colon included, with the real value |
[YOUR_KEY_ID], <api_key>, YOUR_TOKEN | A placeholder for your own value | Replace it, brackets included. Never send the placeholder text |
?count=10&skip=20 | Query parameters after the ?, separated by & | One row each in Query parameters |
string, integer, number, boolean | Text, whole number, any number, true/false | Quotes for strings only; numbers and true/false go in bare |
string <date-time>, integer <int64> | A type with a format hint | Follow the format: ISO 8601 date-time, or a large whole number |
enum, "possible values", "one of" | Only the listed values are accepted | Copy one exactly; case matters |
object | A group of named fields | Nested { } in JSON |
array of objects, [ ] | A list | [ ] in JSON, even for one item |
nullable | The field may come back as null | Plan for it being empty in later steps |
| Asterisk, "required", bold name | Must be sent | Fill it every time, and check the description for "only if" |
... inside an example | "More of the same, cut for space" | Don't copy the dots |
Reading types and units: where most errors hide
Two values can look identical on screen and be different to an API. 1000 is a number. "1000" is text that happens to contain digits. An API that declares amount as an integer may accept both, convert the text, or refuse it, and the documentation rarely tells you which. Send the type the table asks for and you never have to find out.
This matters in a no-code step for a specific reason. WorkflowMitra’s HTTP Request step has two JSON body modes:
- application/json · fields builds the JSON from rows you fill in. It’s quick, but every value is sent as text. A row with
amount=1000goes out as"amount": "1000". - Raw (JSON string) lets you write the body yourself. A value you leave unquoted, such as
"amount": {{ amountPaise }}, goes out as a real number, and values inside quotes are escaped for JSON as they’re filled in. A name likeAsha "A" Raostays valid JSON.
We checked the cURL importer against Razorpay’s own sample on 20 October 2026. Razorpay’s example contains nested objects (customer, notify), so the importer kept it as a Raw body with every number and true/false intact. A flat example, with no nested objects, imports into the fields mode instead, and 1000 and false became the text values "1000" and "false". So after any import, check what mode the body landed in. Our guide to converting cURL commands lists the other checks.
Units are the second trap. The description, not the type, tells you the unit:
- Money in the smallest unit. Razorpay wants paise: ₹300 is
30000, and its error list includes “amount should be minimum 100 for INR” (₹1) and “should be a whole number”. If your source has rupees, convert:{{ round(multiply(amount, 100)) }}turned1250.50into125050when we ran it. - Time in Unix seconds or milliseconds.
expire_byis a Unix timestamp in seconds. WorkflowMitra’stimestamp()returns milliseconds, so{{ floor(divide(timestamp(), 1000)) }}gives “now” in seconds. Mix them up and you’re 1,000 times off. - Dates as ISO 8601.
2026-10-20T09:30:00Zstyle, with a time zone. Our guide to time zones in automation covers the Z. - Phone numbers. Some APIs want
+919876543210, others919876543210, others ten digits. The description or example decides. See formatting phone numbers to E.164.
One more detail when you write expressions: separate function arguments with commas, as in multiply(amount, 100). When we tried semicolons on 20 October 2026, the expression came back empty.

Path, query, header or body: telling parameters apart
Good docs group parameters under headings such as “Path parameters”, “Query parameters”, “Headers” and “Request body”. Weaker docs mix them in one table. When that happens, use the method and the example to sort them:
- In the address, between slashes (
/payment_links/{id}): a path parameter. Type it into the URL. If the value could contain a space, slash or&, wrap it inencodeURL(). WorkflowMitra inserts{{ }}values into the URL exactly as they are, soINV 1042/Awould break the path, while{{ encodeURL(invoice) }}sendsINV%201042%2FA. - After the
?(?from=…&to=…&count=2&skip=1): query parameters. Put each in its own Query parameters row; the step encodes these values for you. Razorpay’s Fetch All Payments page usesfromandto(Unix seconds),count(default 10, maximum 100) andskip. - Shown with
-Hin the cURL example: headers. Common ones areContent-Type, a version header and an idempotency key. Authentication headers are usually better set through Authentication type. - Shown with
-dor as a JSON block: body fields. GET requests normally have no body; if the docs show filters for a GET call, they’re query parameters.
Reading the response, and pointing to the fields you need
The response section shows what a successful call returns. Your job is to find the path to each value you’ll use. In WorkflowMitra, the HTTP Request step outputs status, ok, headers and body, and the API’s JSON sits under body. So Razorpay’s short_url becomes {{ body.short_url }} in the next step, or {{ $node["Create payment link"].body.short_url }} from any later step. Our guide to passing data between steps explains the two forms.
Watch for three response patterns:
- Wrappers. List endpoints often wrap results. Razorpay’s Fetch All Payments returns
"entity": "collection", acountand anitemslist, so the first payment isbody.items[0], notbody[0]. - Response headers. Rate-limit counters and pagination links sometimes live in headers, not the body. WorkflowMitra stores header names in lower case, so read them as
headers["x-ratelimit-remaining"], whatever case the docs print. - Nullable fields. Razorpay’s
paymentsisnulluntil someone pays. A later step that reads it must expect an empty value. Our guide to empty values in automation has the patterns.
Reading the errors section
Errors come in two layers, and the docs usually describe both:
- The HTTP status code: 400 for a bad request, 401 for failed authentication, 404 for not found, 429 for too many requests, 5xx for a problem on their side.
- The error body: the API’s own code and message, often more useful than the status.
The two don’t always match the way you’d guess. When we sent Razorpay a request with made-up keys on 20 October 2026, it answered status 401 with this body:
{"error": {"code": "BAD_REQUEST_ERROR", "description": "Authentication failed"}}The status says authentication; the code says bad request. Route your workflow on the status, and log the description for whoever fixes it.
In WorkflowMitra, a 4xx or 5xx response doesn’t stop the run. The HTTP Request step finishes with ok set to false and the status and body in its output, so add an IF on {{ ok }} (Is yes) after any call that matters. Timeouts and network errors are different: they fail the step unless Advanced settings › On failure is set to Continue. Our HTTP status codes guide shows which errors to retry and which to fix.
The sections people skip: pagination, limits, versions and environments
These rarely matter on day one and often matter in week three.
Pagination. A list endpoint returns one page at a time. Docs describe it in one of a few styles: page number and page size, offset and limit (Razorpay’s count and skip), a cursor or “next” token in the response, or a link in a response header. Note the maximum page size and how you’ll know you’ve reached the end, usually a page with fewer items than you asked for, or no next cursor.
Rate limits. Look for requests per second, minute or day, and what happens when you cross the line, normally a 429 with a Retry-After header. If the docs give no number, as Razorpay’s authentication page doesn’t, keep bulk jobs slow and treat 429 as “wait”. Our API rate limit guide covers pacing in workflows.
Versions. Versions live in the path (/v1/), in a header (LinkedIn-Version: 202510 style) or in a date. If a header version is required, every request needs it, and old versions are retired on a schedule the changelog announces.
Environments. Test and live keys, sometimes separate base URLs, sometimes features that only exist in one. Razorpay’s own error list says UPI payment links aren’t supported in test mode, and test mode allows up to 30 payment links per business. Read the environment notes before you decide a feature is broken.
Webhooks. Many docs have a webhooks section. That’s the opposite direction: the app calling you when something happens. You read it to set up a trigger, not a request. Our introduction to what webhooks are explains the difference.
Documentation formats you’ll meet
The same information arrives in a handful of layouts:
- OpenAPI (Swagger) sites. Many reference sites are generated from an OpenAPI description, a standard file format for REST APIs. Generated pages, such as those built with Swagger UI, look alike: endpoints grouped by resource, a coloured method badge, parameter tables and an expandable schema. Some have a “Try it out” button that sends a real request from the page.
- Three-column references. Navigation on the left, explanation in the middle, code examples on the right. Razorpay’s pages follow this layout. The right column is where the cURL example lives.
- Postman collections. Some companies publish their API as a Postman collection, a saved set of ready-made requests. Each request shows the method, URL, headers and body in separate tabs, which map straight onto the step’s fields.
- GraphQL docs. One URL, and a query language instead of many endpoints. They read differently; see using a GraphQL API without code.
- A PDF or a single long page. Common with Indian SMS gateways, courier partners and older ERPs. The five questions still apply; you just have to find the answers yourself.
Worked example: from Razorpay’s page to a working step
Here’s the whole reading turned into a step that creates a payment link for an order and sends it on. The step just before it is a Set Variable step holding orderId, customerName, phone and amount (in rupees), so the request can read them with plain {{ }} placeholders.
- Overview. Base URL
https://api.razorpay.com. Use test-mode keys while building. - Authentication. Generate test keys in the Razorpay Dashboard (Account & Settings › API Keys). Copy the secret straight away; Razorpay won’t show it again. In WorkflowMitra: Authentication type = Basic auth, key ID as username, key secret as password.
- Method and URL. POST,
https://api.razorpay.com/v1/payment_links/. - Body. Choose Raw (JSON string), because
amountmust be an integer andnotifyholds true/false values:
{
  "amount": {{ round(multiply(amount, 100)) }},
  "currency": "INR",
  "reference_id": "{{ orderId }}",
  "description": "Payment for order {{ orderId }}",
  "customer": {
    "name": "{{ customerName }}",
    "contact": "{{ phone }}"
  },
  "notify": { "sms": false, "email": false },
  "reminder_enable": true
}- Check every rule from the descriptions.
amountis in paise and at least 100.reference_idis unique per link and at most 40 characters, so an order ID works and a retry with the same ID is refused instead of making a second link.expire_byis left out, so the link lasts the default six months. If you need it, it must be Unix seconds, at least 15 minutes ahead and within six months:{{ subtract(floor(divide(timestamp(), 1000)), subtract(0, 86400)) }}gives “now plus one day” (the double subtraction adds 86,400 seconds), and goes in unquoted. - Test behind a manual trigger. Run once with test keys and sample data. Read
statusandbodyin the run. A 200 with anidstartingplink_means the request is right. - Guard and use the result. Add an IF on
{{ ok }}(Is yes). On the yes branch, use{{ $node["Create payment link"].body.short_url }}in your message. To send it on WhatsApp, use an approved template through the WhatsApp step; ChatMitra’s guide to sending a payment link on WhatsApp covers the template side. On the no branch, alert yourself with{{ status }}and{{ body.error.description }}.
Each HTTP Request step uses 1 WorkflowMitra credit per run, including calls that return an error, and IF steps are free. Razorpay charges its own fees on payments collected; check its pricing page for those.
What to do when the documentation is thin
Not every API is documented as well as Razorpay’s. When answers are missing:
- Find any example request. A single cURL example answers more questions than a page of prose. Search the docs, the vendor’s help centre and their public Postman workspace.
- Send the smallest possible request. Required fields only, test keys, behind a manual trigger. The error message often names the missing or wrong field.
- Read the error carefully. “faulty key: expire_by” or “extra fields sent” is the API telling you exactly what to fix.
- Check the date. An old forum answer may describe a retired version. Prefer the vendor’s changelog.
- Ask support with a precise question. Include the endpoint, your request body (with secrets removed) and the full response. You’ll get a better answer than “it doesn’t work”.
- Don’t guess with live keys. A wrong guess on a payments or messaging API can charge a customer or send a real message.
Common mistakes when reading API docs
| Mistake | What happens | Fix |
|---|---|---|
| Reading an SDK page instead of the reference | You copy library calls that no HTTP step understands | Use the cURL example and the parameter table |
Leaving {id} or [YOUR_KEY] in place | 404 or 401 with a confusing message | Replace placeholders, brackets included |
| Numbers sent as text | Type errors, or a value silently treated differently | Raw JSON body with unquoted values |
| Rupees where paise are wanted | A link for ₹3 instead of ₹300 | Read the unit in the description; multiply by 100 |
| Seconds and milliseconds mixed up | Dates in 1970 or in the far future | Divide timestamp() by 1000 for Unix seconds |
| Trusting a "required" label over the example | Sending fields you don't need, or the wrong type | Let the example and description settle it; test once |
| Building with live keys | Real charges or real messages while testing | Test mode first, live keys last |
Ignoring ok: false | The workflow carries on as if the call worked | IF on {{ ok }} after every important call |
A one-page worksheet for any endpoint
Copy this into a note before you build. When every line is filled, the step is ready to configure.
- Base URL, and the sandbox URL if different
- Method and path, with each path parameter named
- Authentication type, where the key comes from, and test vs live
- Required body fields, with type and unit for each
- Optional fields you’ll use, and their defaults
- Query parameters, including page size and filters
- Required headers (version, content type, idempotency)
- The response paths you’ll use later, such as
body.short_url - The errors you expect, and what the workflow should do for each
- Rate limit, or “not stated”
- Anything in the changelog that affects this endpoint
Read once, build with confidence
API documentation stops being intimidating when you stop reading it like a book. Pick one endpoint, answer the five questions, respect the types and units, and let the example settle any doubt. The same habits work for a payments API, a CRM, a shipping partner or an SMS gateway.
WorkflowMitra, powered by ChatMitra, gives you an HTTP Request step with Import from cURL, basic, bearer and API-key authentication, raw JSON bodies and an ok flag to route on, plus the IF, WhatsApp, Google Sheets and Slack steps that use what the API returns. Browse the templates or the feature overview, then try your first documented endpoint on a WorkflowMitra trial: 14 days, no card needed. When the request works, test the full workflow and add error handling before you switch it on. For a second practice document, ChatMitra’s own WhatsApp API reference uses the same patterns.
Sources: Razorpay Docs, Create a Standard Payment Link, Fetch All Payments and Authentication; OpenAPI Initiative, What is OpenAPI?; SmartBear, Swagger UI; Postman Learning Center, Collections overview; all read 20 October 2026. Razorpay's 401 response was observed with made-up keys on 20 October 2026. WorkflowMitra behaviour checked in the product source code, by running the cURL importer on Razorpay's examples and by running the expressions shown through the expression engine on 20 October 2026. Order IDs, names and amounts are illustrative.
Frequently Asked Questions
Short answers to common questions about reading API documentation.
Skip the SDK and library pages and open the one endpoint that does your job, such as "Create a payment link". Answer five questions from that page: where the request goes, how you authenticate, what you send, what comes back and what can go wrong. Each answer fills one field of a no-code HTTP Request step, and the example request at the side of the page shows all five together.
Automate the work between your apps
Build workflows with triggers, conditions and actions, then test them before they go live. Try WorkflowMitra free for 14 days, no card required.