MongoDB Automation Without Code: Insert, Update and Query Documents from Workflows

Quick Summary
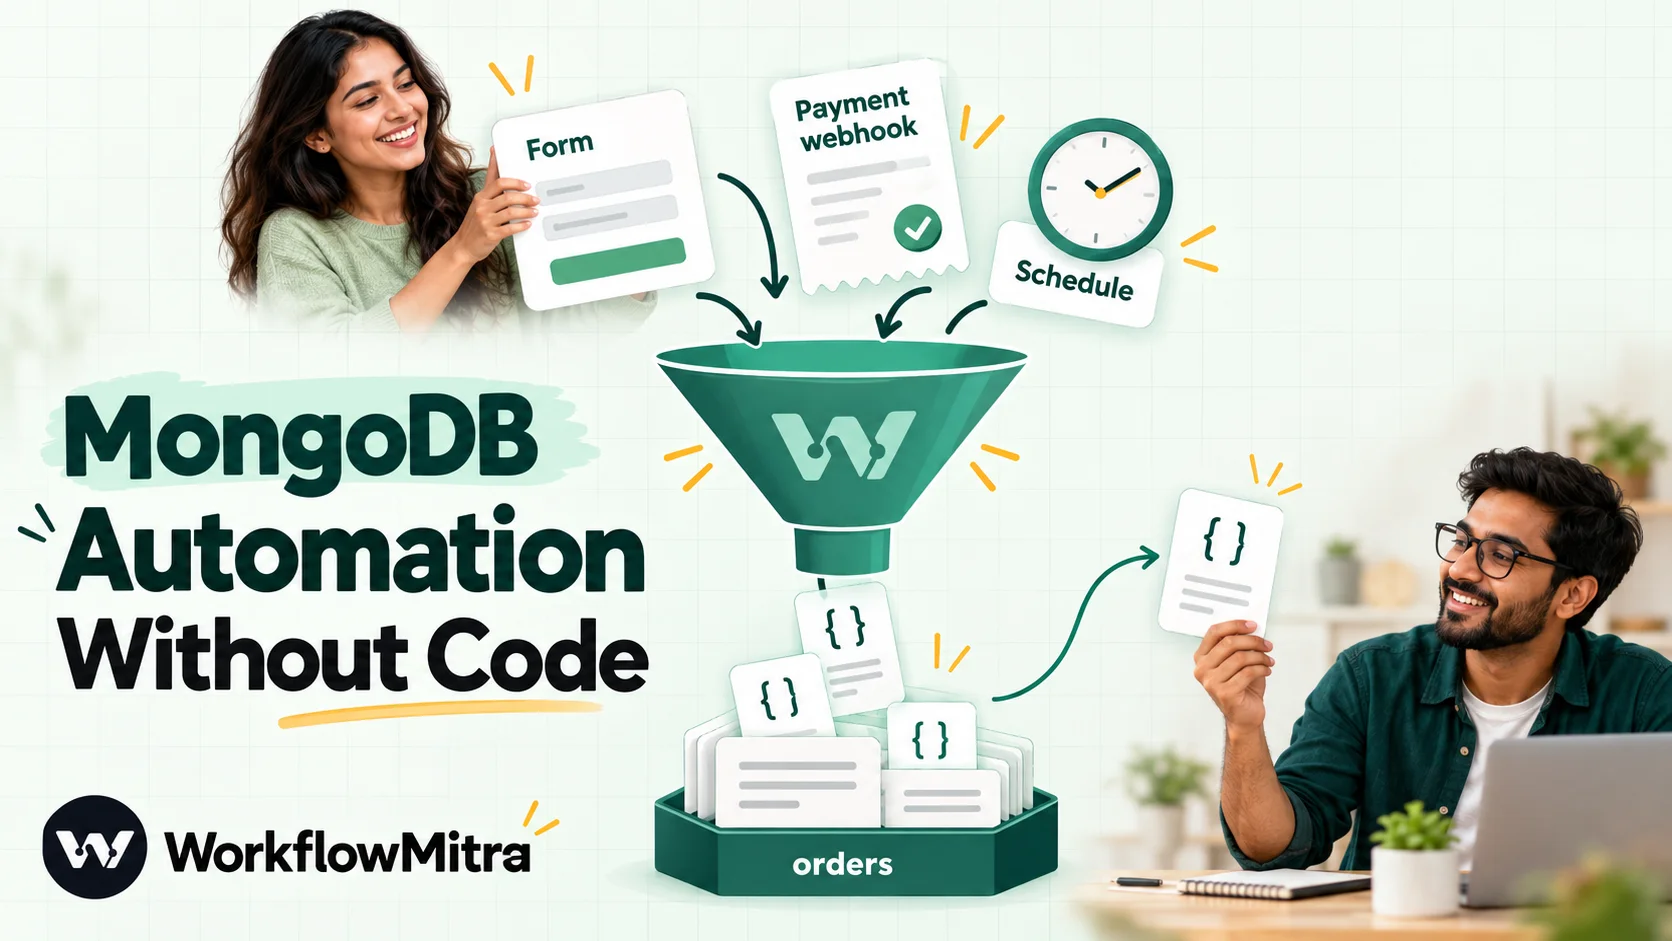
MongoDB automation without code means letting a workflow insert, update, look up and delete documents when something happens elsewhere, such as a form submission, a payment webhook or a schedule. You connect the database once with its connection string and a user that can only touch the collections the job needs, then add a MongoDB step that runs one operation with JSON you write once and fill with values from the trigger. The parts that need care are the JSON itself: placeholders must stand alone as whole values, a missing value matches documents that lack the field, and IDs and dates need converting. In WorkflowMitra, powered by ChatMitra, each MongoDB step costs 1 credit.
MongoDB holds the data behind a lot of web and mobile apps: users, orders, sessions, product catalogues. Sooner or later, data that starts somewhere else has to land there too. A landing-page form needs to create a lead document, a payment webhook needs to mark an order as paid, and somebody wants a daily list of new sign-ups in a spreadsheet. The usual answer is a small piece of backend code for each job, which then needs a server, a deploy and someone to remember it exists.
This guide shows how to do that work with a workflow instead: connect MongoDB once, then insert, update, look up and delete documents from triggers, without writing an application. It covers the parts that integration pages skip, all of them checked by running WorkflowMitra’s own MongoDB step against a MongoDB 8.2 server before publication: how values from a trigger turn into JSON, why a missing value can update the wrong document, why _id lookups fail, and how to react to new documents when there is no MongoDB trigger. The workflows are built in WorkflowMitra, powered by ChatMitra, but the MongoDB advice applies whichever tool you use.
What MongoDB automation means
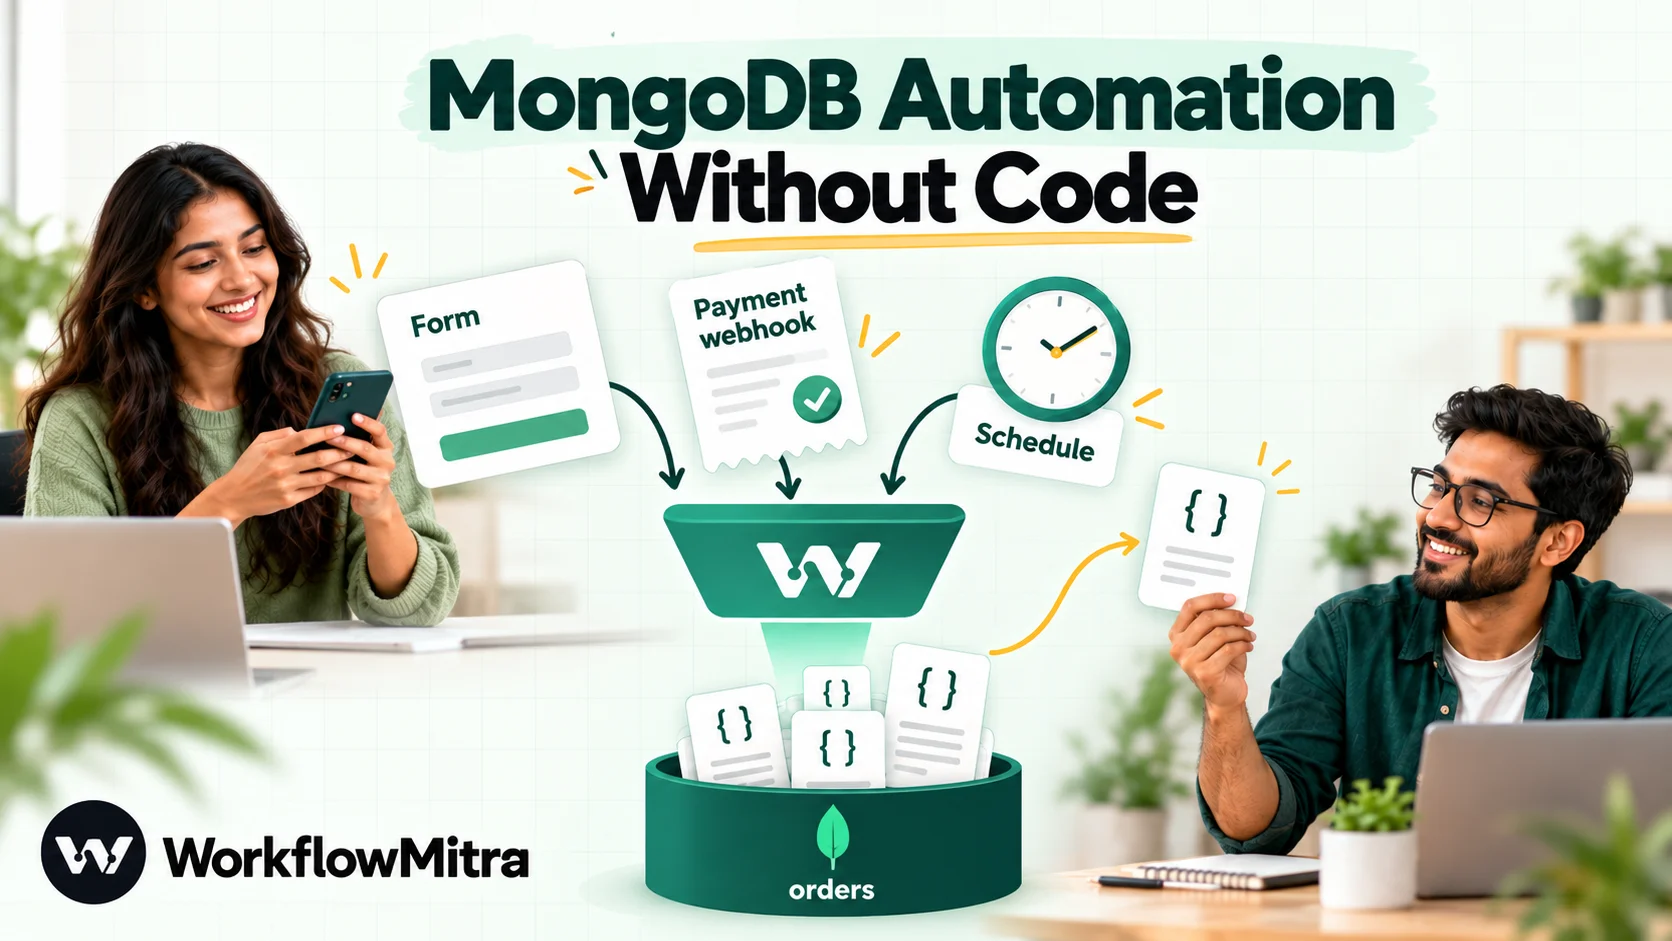
The short answer: MongoDB automation is letting a workflow read and write documents in your database when something happens elsewhere. A trigger starts the run, a MongoDB step performs one operation (find, insert, update or delete) on a collection, and the result feeds the next step.
Three pieces make it work:
- A connection to the database, saved once as a credential, using a database user that can touch only what the job needs.
- A trigger: an incoming webhook from a form or payment provider, a schedule, a new row in a Google Sheet, a new email.
- A MongoDB step with a filter (which documents) and a document or update (what to write), written as JSON with placeholders for the values that change on every run.
In WorkflowMitra, powered by ChatMitra, the MongoDB step sits alongside PostgreSQL, MySQL, Redis, Google Sheets and messaging steps on the same canvas, so a single workflow can take a webhook, store it in MongoDB and send a confirmation in one pass.
What teams automate with MongoDB
Most MongoDB workflows fall into a handful of patterns. Pick the one closest to your job; the tutorials below build the first four.
| Pattern | Trigger | MongoDB operation | Example |
|---|---|---|---|
| Capture events | Webhook | Insert one | Every website order or form lead becomes a document |
| Keep a profile current | Webhook or sheet row | Update one with upsert | One customer document per email, updated on every purchase |
| Look up before acting | Any | Find one | Check whether a customer exists or is blocked before replying |
| Export or process new documents | Schedule | Find many, then Update one per document | Copy yesterday's sign-ups to a sheet, then mark them exported |
| Change status from outside | Payment or shipping webhook | Update one | Mark an order paid or shipped when the provider reports it |
| Clean up | Schedule | Delete many with a filter | Remove abandoned carts older than a set date |
The eight operations and what each one returns
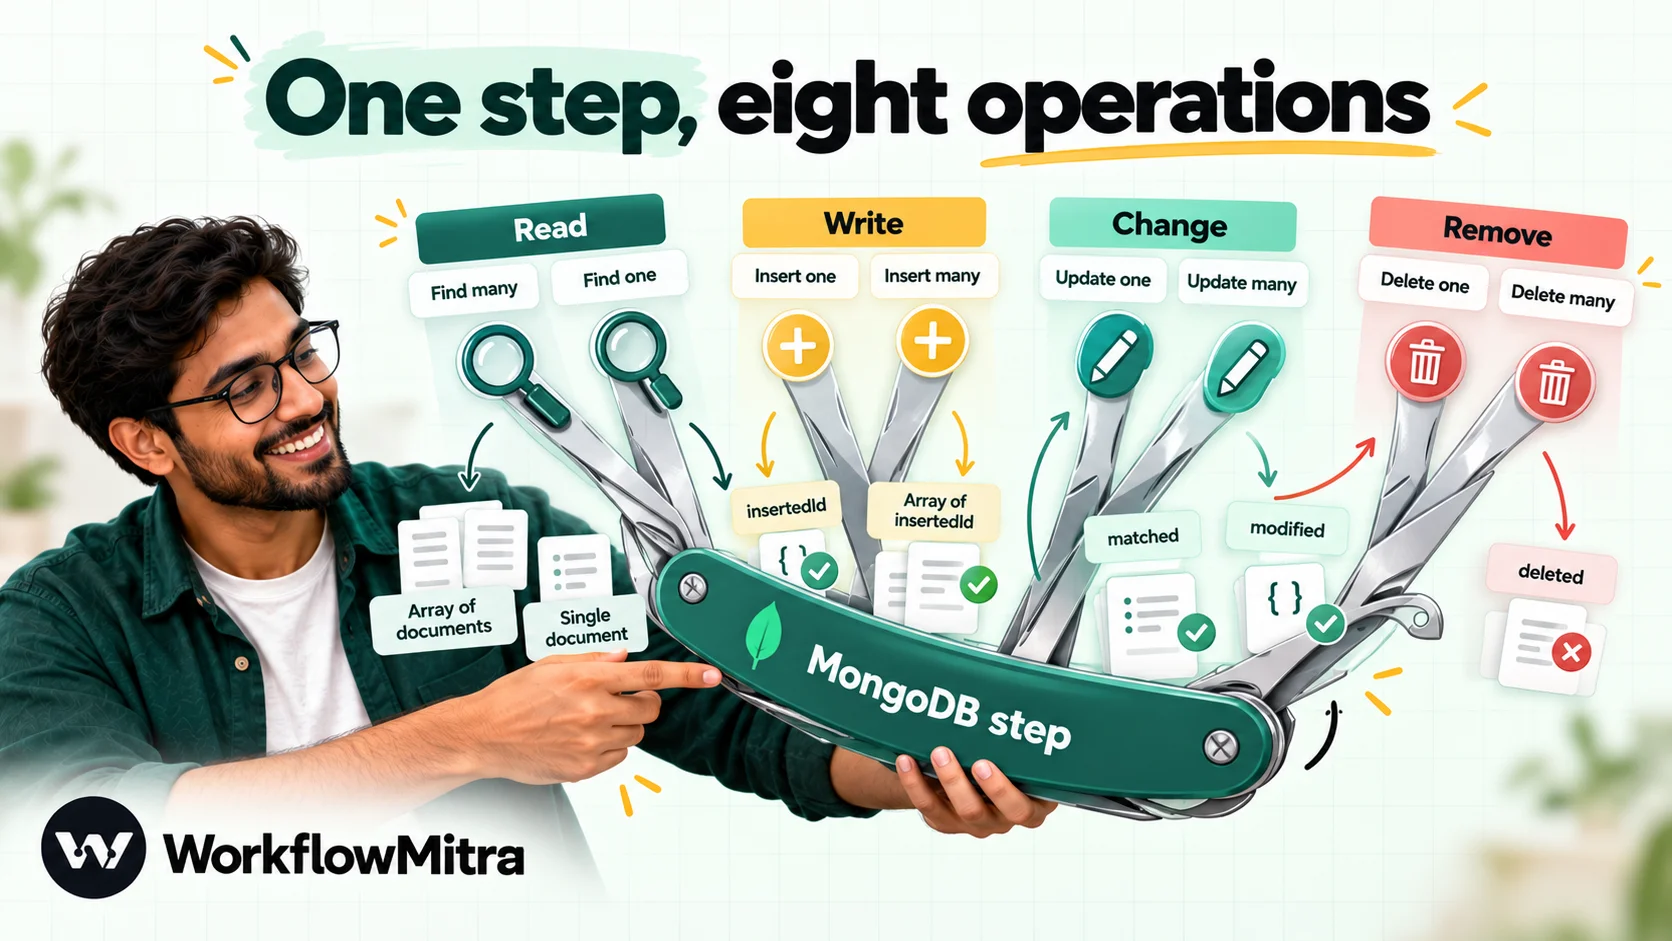
A WorkflowMitra MongoDB step runs exactly one operation. Knowing what each returns matters, because the next step reads that output.
| Operation | What it does | Fields you fill | Output for the next step |
|---|---|---|---|
| Find many | Returns matching documents | Filter, Sort, Projection, Limit (default 100, maximum 1,000) | A list of documents; an empty list when nothing matches |
| Find one | Returns the first match | Filter, Sort, Projection | One document, or empty (null) when nothing matches |
| Insert one | Adds one document | Document | insertedId |
| Insert many | Adds a list of documents | Documents (a JSON array, or a list from the previous step) | insertedIds, insertedCount |
| Update one | Changes the first match | Filter, Document, optional upsert | matched, modified, and upsertedId when it inserted |
| Update many | Changes every match | Filter (required), Document, optional upsert | Same as Update one |
| Delete one | Removes the first match | Filter | deleted (0 or 1) |
| Delete many | Removes every match | Filter (required) | deleted count |
In the output, ObjectIds become plain text and dates become ISO text such as 2026-10-08T09:26:06.742Z, so later steps can use them directly in messages or spreadsheet cells.
What isn’t there is just as useful to know. There is no aggregation pipeline, no count or distinct, no replace or find-and-modify, no multi-document transaction and no MongoDB trigger. If a job needs a $group or a $lookup, run that part in your application or a scheduled script and let the workflow handle what comes before and after.
Connect MongoDB safely
Most failed first runs are connection problems, so it pays to set this up deliberately.
Use the connection string, and fill in the Database field
In MongoDB Atlas, open your cluster, choose Connect, then Drivers, and copy the connection string. It starts with mongodb+srv://. In WorkflowMitra, go to Credentials, add a MongoDB credential and paste it into Connection URI, replacing the password placeholder with the real password. Then press Verify: the check connects, reports the user it authenticated as, and lists that user’s roles, which is a quick way to confirm you’re not using an admin account by mistake.
The credential form also lets you type host, port, database, username and password separately. For Atlas, use the connection string instead. In our tests the separate fields failed for two reasons. They build a plain mongodb:// address, which can’t use the +srv lookup an Atlas host name relies on. They also put the database name in the address, and MongoDB then looks for the user in that database, not in admin, where Atlas creates database users. The result is “Authentication failed” with a password that is correct. The separate fields suit a self-hosted server where the user was created in the same database you name.
Two more settings decide where your data goes:
- Database on the step overrides the database in the connection string. Atlas connection strings usually name no database at all, and the driver then uses one called
test. Our own test write landed there. Fill in the field on every step. - Collection is created silently on the first insert if it doesn’t exist, and a Find on a misspelled collection returns an empty list, not an error. Copy names exactly.
Give the workflow its own database user
Create a user just for automation. In Atlas, under Database Access, add a user with the readWrite privilege on just the one database the workflows need, not “Read and write to any database” and never atlasAdmin. If a workflow only reads, give it read. When you need tighter limits, MongoDB custom roles can grant actions on specific collections. Our test user had readWrite on one database, and an attempt to write to a different database was refused with “not authorized”, which is the behaviour you want.
Decide how the cluster lets the workflow in
A cloud automation tool connects to your database over the internet, so the database must accept that connection. Atlas controls this with its IP access list. WorkflowMitra doesn’t publish a list of outgoing IP addresses and has no SSH tunnel option, so if your cluster must only admit known addresses, ask the WorkflowMitra team before you build.
The alternative is an access-list entry of 0.0.0.0/0, “allow access from anywhere”. Atlas asks you to confirm it because it is less secure, and MongoDB’s own guidance on wildcard IP access explains the risk. If you take that route, make the other layers strong: a long random password, a user limited to one database, TLS (on by default for mongodb+srv addresses), and a password you rotate when people leave. Some teams put automation on a separate Atlas project or cluster that holds only what workflows need.
For a self-hosted MongoDB, set SSL on the credential to “On — verify the certificate” when the server has a certificate from a public authority, or “accept any certificate” for a self-signed one. MongoDB client certificates (mutual TLS) aren’t supported on this credential.
How trigger values get into your JSON
This is the section that saves the most time. Filters and documents are JSON you write once, with {{ }} placeholders that are filled from the previous step on every run. How a placeholder is written decides what MongoDB stores, and some mistakes don’t fail loudly; they quietly write or match the wrong thing.
We ran each case below through the MongoDB step itself with a webhook payload of {"id": "A-1", "email": "[email protected]", "amount": 1200, "amountText": "1200.50", "items": [{"sku": "S1", "qty": 2}]}.
| You write | MongoDB stores | Notes |
|---|---|---|
"email": "{{ email }}" | "[email protected]" (text) | The normal case |
"amount": {{ amount }} or "{{ amount }}" | 1200 (a number) | A whole placeholder keeps the value's type, quoted or not |
"items": "{{ items }}" | The list of item objects | Lists and objects arrive intact |
"amount": "{{ toNumber(amountText) }}" | 1200.5 (a number) | Convert text from forms and sheets before you store or compare it |
"createdAt": "{{ now() }}" | ISO text, not a date | Use $currentDate when you need a real date (see Tutorial 2) |
"phone": "{{ phone }}" with no phone sent | null | Dangerous inside a filter, explained below |
"src": "{{ $trigger.source }}" | null | The MongoDB step reads only the previous step |
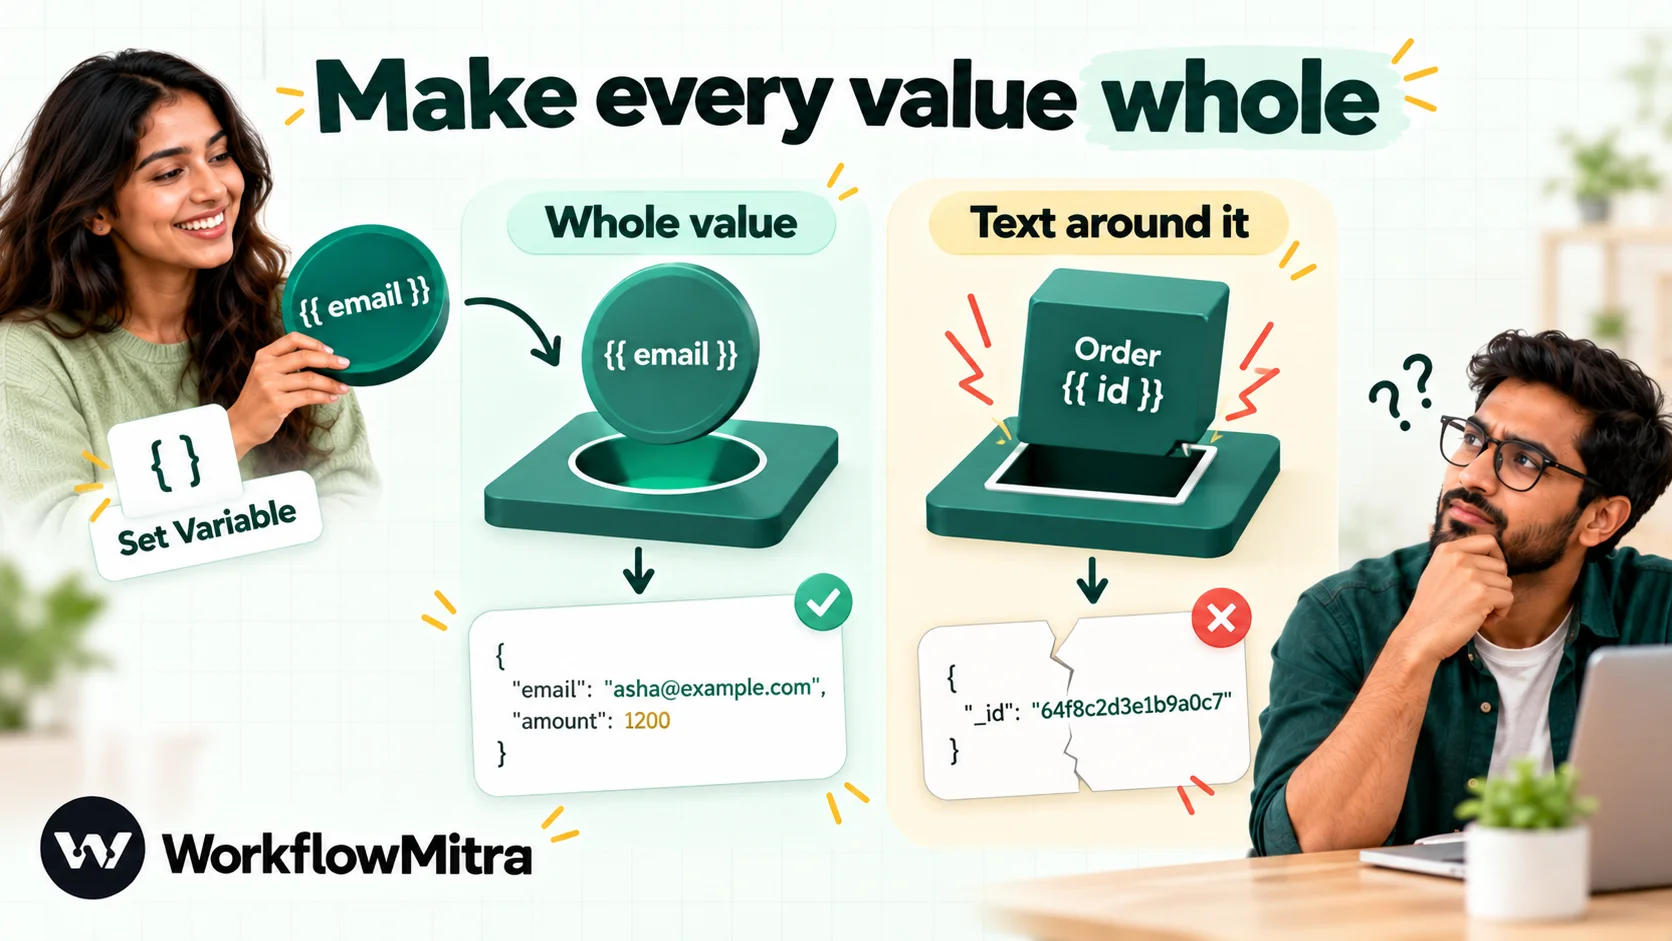
"note": "Order {{ id }} for {{ email }}" | The whole document becomes {} | Text around a placeholder breaks the JSON; build the text first |
Five rules follow from that table.
1. Every placeholder must be the entire value. Text before or after a placeholder in the same string breaks the JSON when the template is filled. The step then treats the whole document or filter as empty, without an error. In our test, an Insert one with "note": "Order {{ id }}" added a document containing nothing but an _id. If you need combined text, add a Set Variable step just before the MongoDB step, create a field such as note with the value Order {{ id }} for {{ email }}, and write "note": "{{ note }}" in the document.
2. The MongoDB step sees only the previous step. $trigger and $node["…"] references come through empty here, unlike in most other steps. When the values you need are spread across earlier steps, use the same Set Variable step to copy them in. Set Variable keeps everything it received and adds your fields, so the MongoDB step sees the lot.
3. Your JSON must be valid JSON. Keys need double quotes and trailing commas aren’t allowed. { email: "{{ email }}" } looks fine but isn’t JSON, and a filter that doesn’t parse is treated as no filter. The editor checks JSON syntax only when a field contains no placeholders, so a broken filter with a placeholder saves without a warning. We ran exactly that filter on Update one, and it updated the first document in the collection. Update many and Delete many refuse to run without a filter, which protects them; Find one, Update one and Delete one don’t.
4. A missing value matches documents that lack the field. If the trigger doesn’t send phone, the filter {"phone": "{{ phone }}"} becomes {"phone": null}, and MongoDB’s rule for null queries is that this matches documents where the field is null or missing. Our Find one returned an unrelated order that simply had no phone field. Before any Update one or Delete one, add an IF step that stops the run when the key value is empty.
5. Trigger data can’t become query syntax. If a caller sends {"$ne": null} as an email address, the step strips the $ key before running, so the lookup matches nothing instead of everything. Operators you write yourself in the JSON ($gte, $in, $set) work normally. That’s the right split: you control the shape of the query, and incoming data only fills in values.
Tutorial 1: Save every webhook event as a document
A website or store sends each order to a webhook, and you want one document per order.
Before you start, create a unique index on the field that identifies an order. In Atlas, open the collection, choose Indexes, then Create Index, and enter { "orderId": 1 } with the unique option ticked. In mongosh it’s db.orders.createIndex({ orderId: 1 }, { unique: true }). MongoDB’s unique index is your real protection against duplicates: senders retry, people double-click and runs get replayed, and the index makes a second copy impossible.
- Add the trigger. Start a workflow with a webhook trigger and send it a sample order from your store, form or a tool like
curl. A JSON body arrives as the trigger’s output, so its fields can be read as{{ order_id }},{{ email }}and so on. - Prepare the values (optional). If you need combined text, a converted number or a value from an earlier step, add a Set Variable step now, as rule 1 describes.
- Add the MongoDB step. Pick your credential, enter the database and the
orderscollection, and choose Insert one. In Document, write:
{
  "orderId": "{{ order_id }}",
  "email": "{{ email }}",
  "total": "{{ toNumber(total) }}",
  "items": "{{ items }}",
  "status": "new",
  "source": "website"
}- Test it. Send the sample again and open the run. The MongoDB step’s output shows the new document’s
insertedId, and the document is in the collection. Test runs write for real; there is no simulated mode for database steps. Point the step at a test collection, such asorders_test, until you’re happy, then change the collection name. - Handle the duplicate case. Send the same order a second time. The step fails with MongoDB’s duplicate-key error (
E11000 duplicate key error … dup key: { orderId: "A-1" }). That’s the index doing its job. Decide what should happen next: right-click the step and choose Add error handler to route failures somewhere useful, or use Tutorial 2’s upsert, which can’t hit the error at all.
Once documents arrive reliably, the same workflow can continue past the insert. A common next step is a WhatsApp confirmation sent through ChatMitra or the Meta Cloud API, using ChatMitra’s order confirmation message examples as the template.
Tutorial 2: Upsert a customer profile
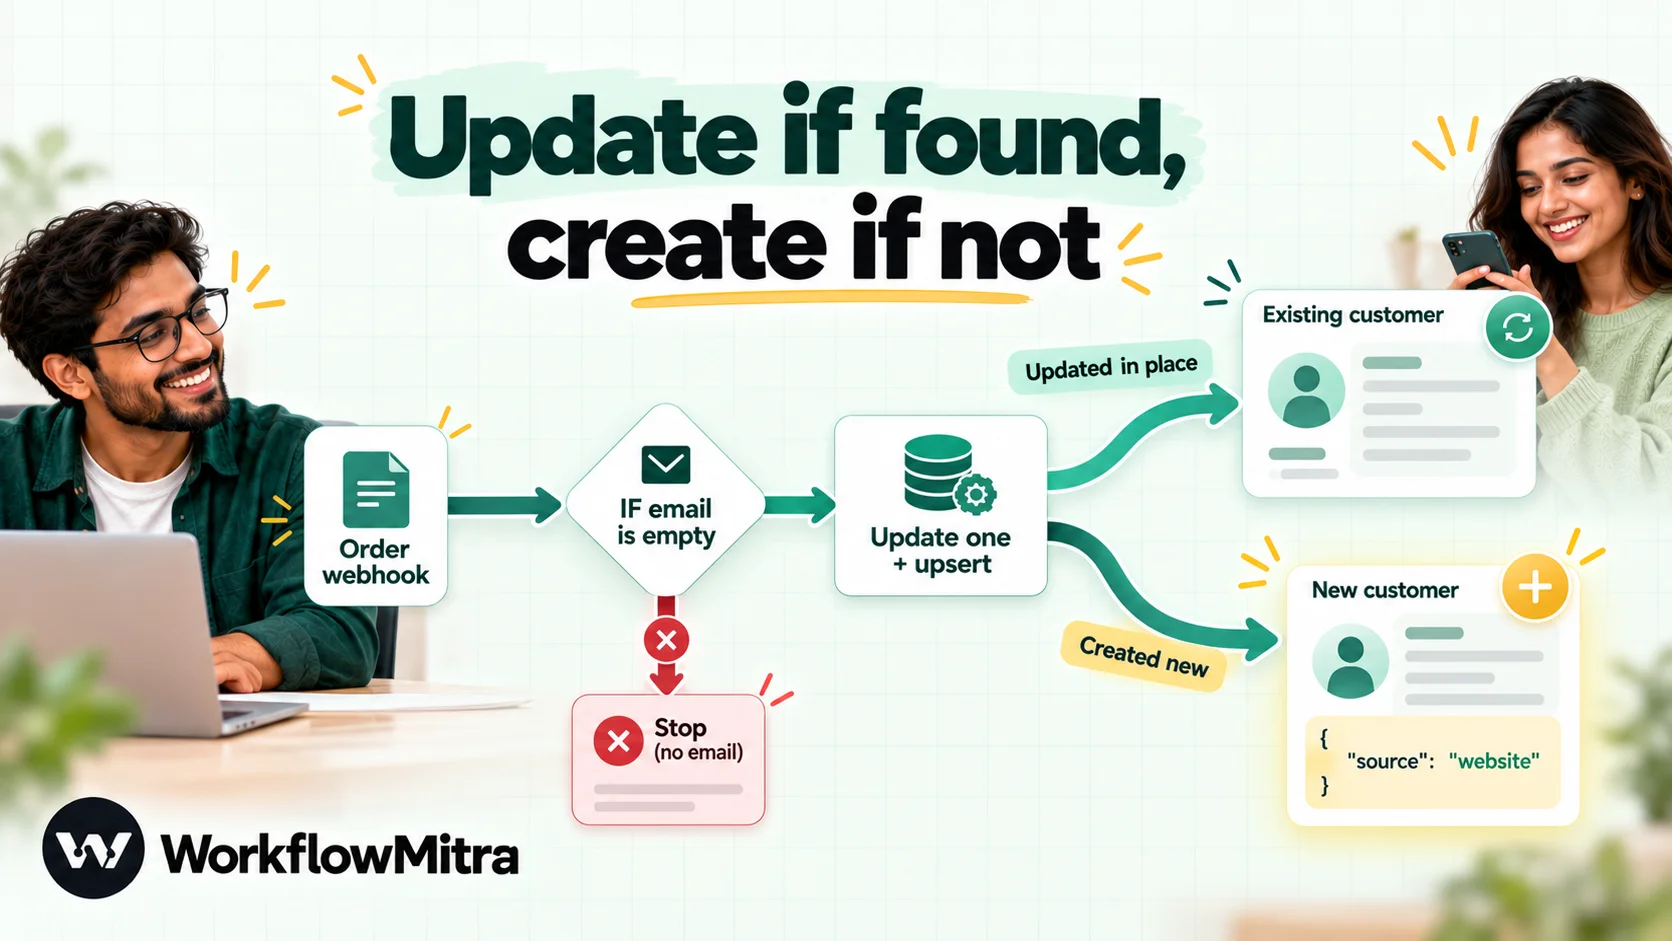
You want one document per customer, created on their first order and updated on every later one. That’s an upsert: update the match, or insert when there isn’t one.
- Guard against an empty key. Add an IF step after the trigger with a route for
emailIs empty, and leave that route unconnected (or send it to a “needs review” step). Connect the MongoDB step to Else. Without this, an order with no email would match, and modify, a customer document that has no email field (rule 4). - Add the MongoDB step on the
customerscollection with Update one, and tick Insert a new document if no document matches the filter (upsert). - Filter:
{ "email": "{{ email }}" }- Document:
{
  "$set": { "name": "{{ name }}", "lastOrderId": "{{ order_id }}" },
  "$inc": { "orderCount": 1 },
  "$setOnInsert": { "source": "website" },
  "$currentDate": { "updatedAt": true }
}
What each operator does:
$setoverwrites the listed fields on every run.$incadds to a counter, starting from zero for a new customer.$setOnInsertwrites its fields only when the upsert creates the document, so a first-seen value is never overwritten.$currentDatestores the server’s time as a real MongoDB date, which is the way to get a true date field out of a workflow.
When the upsert creates the document, MongoDB also copies the filter’s email into it.
Read the result in the step output:
matched: 0with anupsertedId: a new customer was created.matched: 1, modified: 1: an existing customer was updated.matched: 1, modified: 0: the customer existed and nothing changed (for example, the same event processed twice with only$setfields).
Two details trip people up. If the document has no operators at all, such as {"status": "paid"}, the step wraps it in $set for you, which is handy for simple updates. But you can’t mix the two styles. A document with both plain fields and operators fails with “Update document requires atomic operators”. Once you use one operator, put everything under operators.
Tutorial 3: Look up a document and decide what to do
Many workflows need to check something before acting: is this customer blocked, has this order already been confirmed, does a coupon exist?
Add a MongoDB step with Find one, a filter such as {"email": "{{ email }}"}, and a projection that returns only what you need, such as {"blocked": 1, "plan": 1} (the _id comes back too unless you exclude it). Then add an IF step that routes on the result. Find one returns empty when nothing matches, so a route for _id Is empty catches unknown customers, a route on blocked catches blocked ones, and Else carries on.
Finding a document by its _id
Sooner or later a payload carries a MongoDB _id, perhaps because your app put it in a link or a webhook. The obvious filter doesn’t work:
{"_id": "{{ id }}"}compares text with an ObjectId and matches nothing, even when the ID is right.{"_id": {"$oid": "{{ id }}"}}fails with “unknown operator: $oid”, because that notation belongs to tools such as Compass, not to queries.
What works is converting the text inside the query with $toObjectId:
{ "$expr": { "$eq": ["$_id", { "$toObjectId": "{{ id }}" }] } }We confirmed this returns the right document. It’s a workaround, though. The better design is to give documents your own unique key, such as an order number, a customer email or a UUID, index it, and use that in every workflow.
Comparing dates and numbers
The same type rule applies to ranges. If createdAt is a real date, {"createdAt": {"$gte": "{{ since }}"}} compares a date with text and returns nothing. Convert inside the query instead:
{ "$expr": { "$gte": ["$createdAt", { "$dateFromString": { "dateString": "{{ since }}" } }] } }Numbers are simpler. A value that arrived as text, such as "1095" from a form or sheet, matched nothing against a number field in our test, while {"n": {"$gte": {{ toNumber(min) }}}} returned the expected documents. If in doubt, convert on the way in, so the stored data has the right types to begin with.
Tutorial 4: Process new documents on a schedule
WorkflowMitra has no MongoDB trigger, so a workflow can’t wake up when your app inserts a document. There are two good ways round that.
Option A: let the writer call the workflow. If you control the application, have it call a WorkflowMitra webhook after it saves the document, with the fields the workflow needs. That’s instant, costs nothing while idle, and keeps MongoDB out of the critical path. Developers can also listen with MongoDB change streams, which need a replica set, and forward events to the webhook.
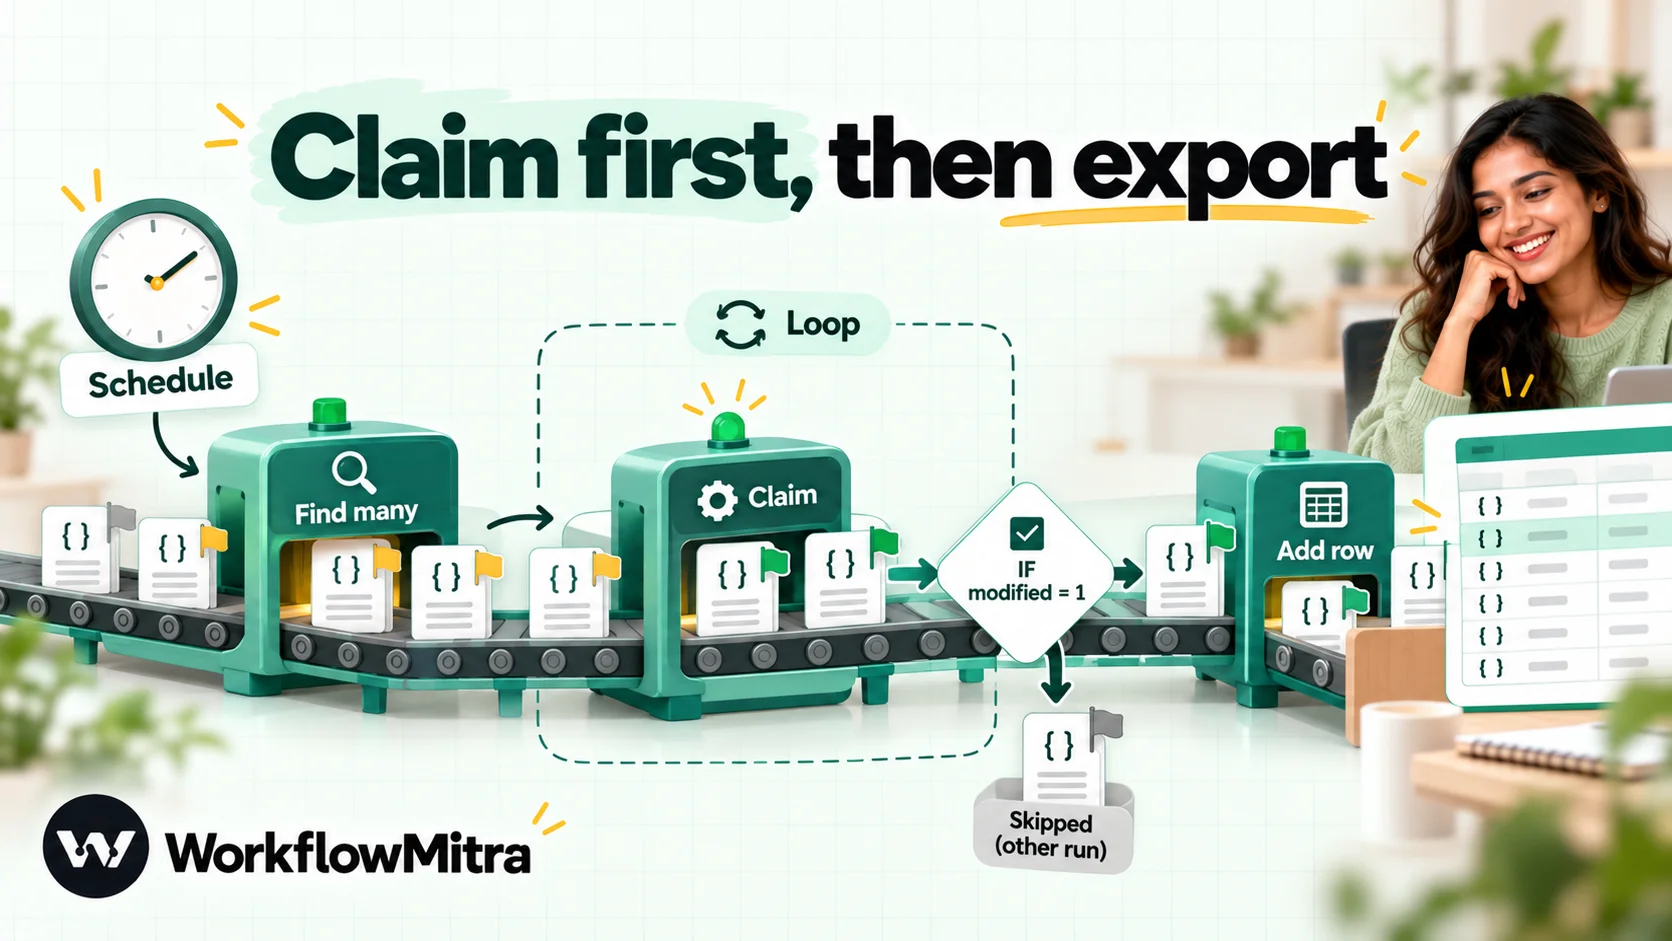
Option B: poll with a marker field. When you can’t change the application, check on a schedule and mark what you’ve handled. Here’s an export of new sign-ups to Google Sheets:
- Schedule trigger every hour (or whatever freshness the job needs).
- MongoDB, Find many on
signups, with filter{"exportedAt": {"$exists": false}}, sort{"createdAt": 1}and limit200. The limit keeps each run small; anything left over is picked up next time. - Loop over the list.
- Inside the loop, first step: MongoDB, Update one to claim the document. Filter
{"email": "{{ email }}", "exportedAt": {"$exists": false}}, document{"$currentDate": {"exportedAt": true}}. As the first step of the loop, plain placeholders read the current item. - IF
modifiedequals 1. If two runs overlap, only one of them can claim a given document, so only one exports it. - Google Sheets, Add row, using
{{ $trigger.email }}and{{ $trigger.name }}. Inside a loop,$triggermeans the current item; the previous step’s output is now the claim result.
Why claim first and export second? Scheduled runs can overlap if one is slow, and claiming with a filter that includes the “not yet exported” condition makes the claim atomic. The cost is that a failed Sheets write leaves a document marked but not exported. If that matters, attach an error handler to the Sheets step that clears the mark with a Set Variable step (copying {{ $trigger.email }}) followed by an Update one with {"$unset": {"exportedAt": ""}}, or run a weekly comparison of the sheet against the collection.
There’s no skip or page option on Find many, so the marker field is also how you work through a large backlog: each run takes the next batch of unmarked documents until none are left.
What it costs
In WorkflowMitra every executed step costs 1 credit, and logic steps (IF, Switch, Set Variable, Merge) are free. A Loop costs 1 credit per item.
| Workflow | Credits |
|---|---|
| Webhook → Insert one (Tutorial 1) | 2 per event |
| Webhook → IF → Update one with upsert (Tutorial 2) | 2 per event |
| Webhook → Find one → IF → reply step (Tutorial 3) | 3 per event |
| Scheduled check (Tutorial 4), even when nothing is new | 2 per check |
| Each document processed in Tutorial 4 (loop item, claim, sheet row) | 3 per document |
The schedule interval matters more than people expect. Checking every 15 minutes is 96 checks a day, or about 5,760 credits a month before a single document is exported. Checking hourly is about 1,440. A shop exporting 1,500 sign-ups a month with an hourly check uses about 1,440 + 4,500 = 5,940 credits, which fits the entry plan of 10,000 credits a month for ₹999 (₹849 a month billed yearly; prices checked on 8 October 2026 on WorkflowMitra pricing). The same job checking every 15 minutes would need about 10,260 and spill over. Where you can, prefer Option A’s webhook, which costs nothing while idle.
Limits worth knowing
Better to know these before you design around them:
- No MongoDB trigger. Use a webhook from your app or the polling pattern above.
- No aggregation, count, distinct, replace or transactions. Pipeline-style updates (an array of stages) are treated as empty and change nothing.
- Find many returns at most 1,000 documents per step, with no skip option. Use a marker field or a range on an indexed field to work through more.
- Placeholders read only the previous step, and must stand alone as whole values.
- No real dates from placeholders. Use
$currentDatefor timestamps, or store ISO text and convert with$dateFromStringwhen you query. - The connection is made fresh for each step and gives up after about 10 seconds if the server can’t be reached. Fine for event-driven work; for thousands of writes, use Insert many with a list instead of thousands of single inserts.
- No published outgoing IP addresses and no SSH tunnel. See the access section above.
- No mutual TLS for MongoDB credentials. Password and TLS only.
Troubleshooting
| Symptom | Likely cause | Fix |
|---|---|---|
| "Authentication failed" with the right password | Separate fields used for an Atlas user, so MongoDB looks for the user in the wrong database | Paste the Atlas connection string into Connection URI |
| "not authorized on test to execute command" | No database named, so the driver used test | Fill in Database on the step |
| Step fails after about 10 seconds with a server selection timeout | The cluster refuses the connection (IP access list or firewall) | Review network access; see "Decide how the cluster lets the workflow in" |
A document with only an _id appears | Invalid JSON or text around a placeholder in Document | Quote every key, remove trailing commas, build text in Set Variable |
| The wrong document was updated or deleted | Filter didn't parse, or a key value was missing (null matches missing fields) | Fix the JSON; add an IF guard for empty key values |
E11000 duplicate key error | A unique index rejected a repeat insert | Expected; use upsert or an error handler |
| "unknown operator: $oid" | Compass-style notation in a filter | Use $expr with $toObjectId, or your own key |
| "Update document requires atomic operators" | Plain fields mixed with $set, $inc etc. | Put every field under an operator |
| Find returns an empty list for a range | Comparing a number or date field with text | toNumber() for numbers, $dateFromString for dates |
matched: 1, modified: 0 | Nothing changed, or the update document was invalid and treated as empty | Check the Document JSON if you expected a change |
| Empty results from a collection you know has data | Misspelled collection or wrong database | Copy names exactly; check the Database field |
A checklist before you go live
- A dedicated database user with only
readorreadWriteon one database, verified with the credential’s Verify button. - Database named on every step; collection names copied, not typed.
- A unique index on the business key of every collection a workflow inserts into.
- IF guards in front of every Update one and Delete one, so an empty key stops the run.
- Every placeholder a whole value; combined text and cross-step values prepared in Set Variable.
- One full run against a test collection, with the output of each MongoDB step checked.
- An error handler on steps where a failure must be noticed, and a schedule interval you’ve costed.
Why use WorkflowMitra for MongoDB workflows?
The case for doing this in a workflow rather than in code is mostly about who can see and change it. A webhook-to-MongoDB job written as a backend endpoint is invisible to everyone except the developer who wrote it. As a workflow, the trigger, the guard and the write are on one canvas, every run is logged with each step’s input and output, and a failed run can be inspected without reading logs on a server.
WorkflowMitra, powered by ChatMitra, suits this kind of work for a few specific reasons:
- Safe value binding by default. Trigger data fills values but can’t add query operators, which closes the most common NoSQL injection route without any extra work.
- Real update operators.
$set,$inc,$push,$setOnInsertand$currentDatepass straight through, so upserts and counters behave exactly as MongoDB documents them. - Cheap logic. IF guards, Set Variable preparation and Switch routing cost no credits, so adding the safety checks in this guide doesn’t add to the bill.
- MongoDB next to messaging. The same workflow that stores an order can confirm it on WhatsApp through ChatMitra, post it to Slack or add it to a sheet.
- Rupee pricing with a 14-day trial on 10,000 credits and no card required.
It’s also fair to be clear about the gaps: there’s no MongoDB trigger, no aggregation, a 1,000-document read limit per step and no published IP list. If your work is mostly heavy aggregation or bulk ETL, a data pipeline tool or a script is the better fit, with a workflow handling the events around it.
Start with one collection
Pick one job someone currently does by hand or with a fragile script, such as saving form leads or marking orders paid. Create the database user and the unique index, build the workflow against a test collection, and send it a dozen real payloads, including one with a missing field. When every run looks right in the history, switch the collection name. You can build and test all of it on the 14-day trial. If the next job is reporting rather than writing, the database to Google Sheets guide covers scheduled exports, and the guide to JSON in workflows goes deeper on the data shapes these steps read and write.
Frequently Asked Questions
Short answers for teams wiring MongoDB into their automations.
Yes. Workflow automation tools connect to MongoDB with a connection string and run operations such as insert, update, find and delete when a trigger fires. You still write small pieces of JSON for the filter and the document, but no application code, server or scheduler. In WorkflowMitra, a MongoDB step offers eight operations: Find many, Find one, Insert one, Insert many, Update one, Update many, Delete one and Delete many.
Automate the work between your apps
Build workflows with triggers, conditions and actions, then test them before they go live. Try WorkflowMitra free for 14 days, no card required.