Email to Slack: Post the Emails That Matter to the Right Channel

Quick Summary
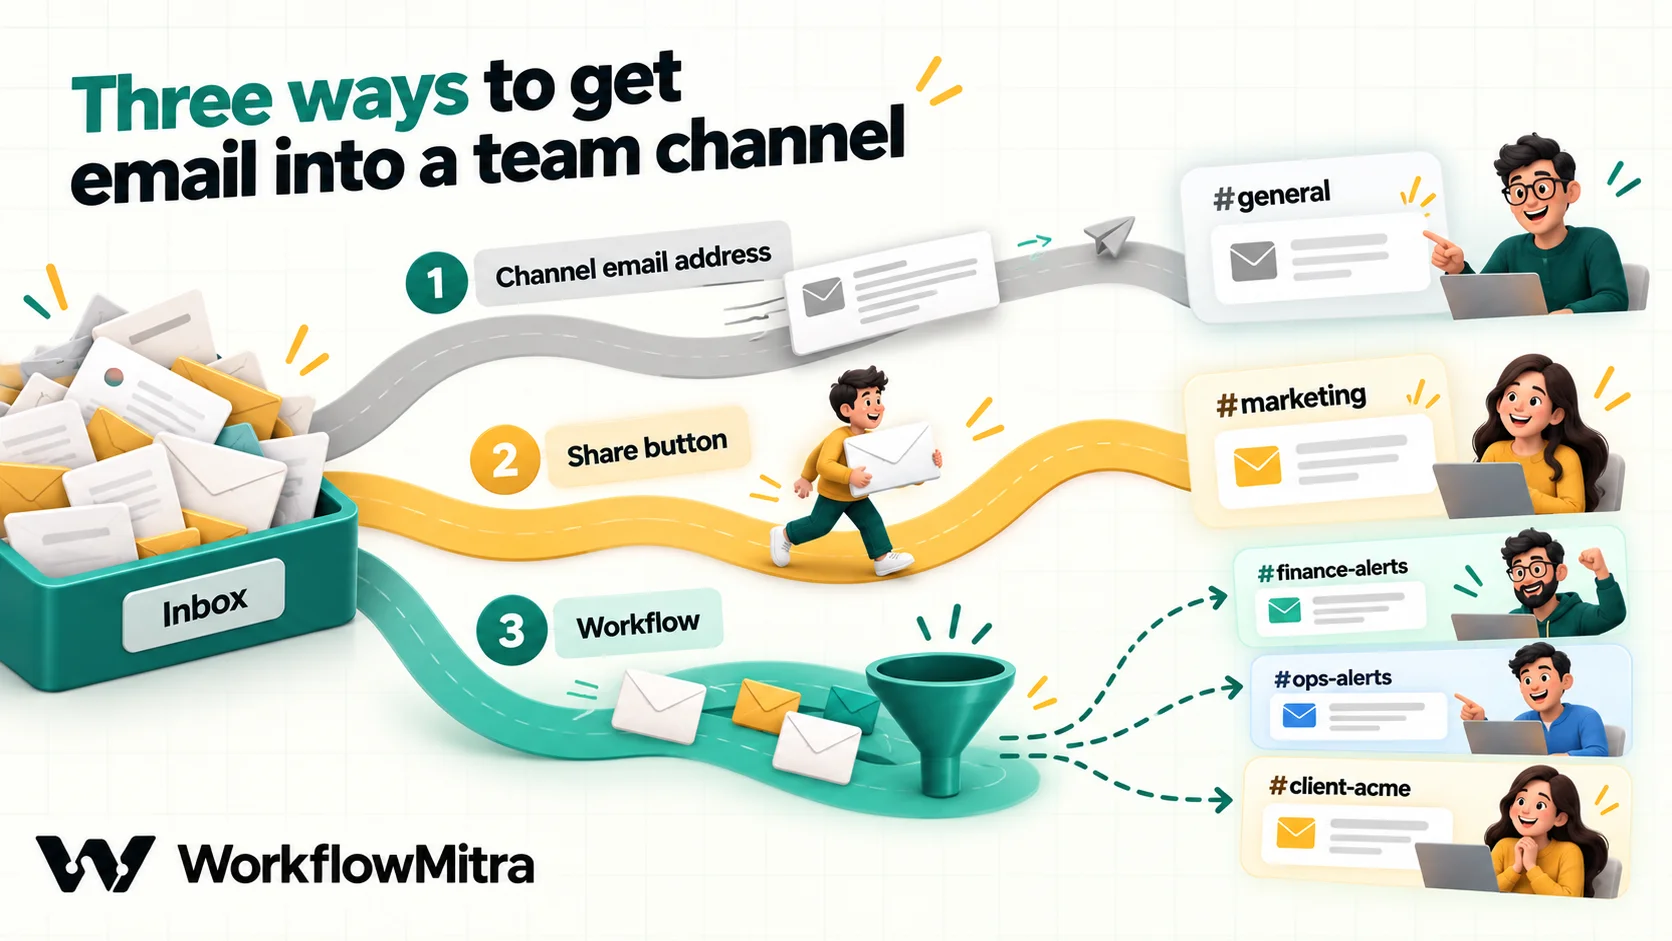
There are three ways to get email into Slack. On a paid Slack plan, any channel can have its own email address, and an auto-forwarding rule in your mailbox sends matching emails there. On every plan, the Slack for Gmail and Slack for Outlook add-ons share single emails by hand, and a personal Slackbot address forwards mail to your own DM. When emails need filtering, routing to different channels or a short consistent format, a workflow does it: in WorkflowMitra, powered by ChatMitra, the email trigger watches a Gmail, Zoho Mail, Yahoo, iCloud or custom mailbox over IMAP, a Switch step picks the channel, and the Slack step posts through an incoming webhook. Each posted email costs about 2 credits.
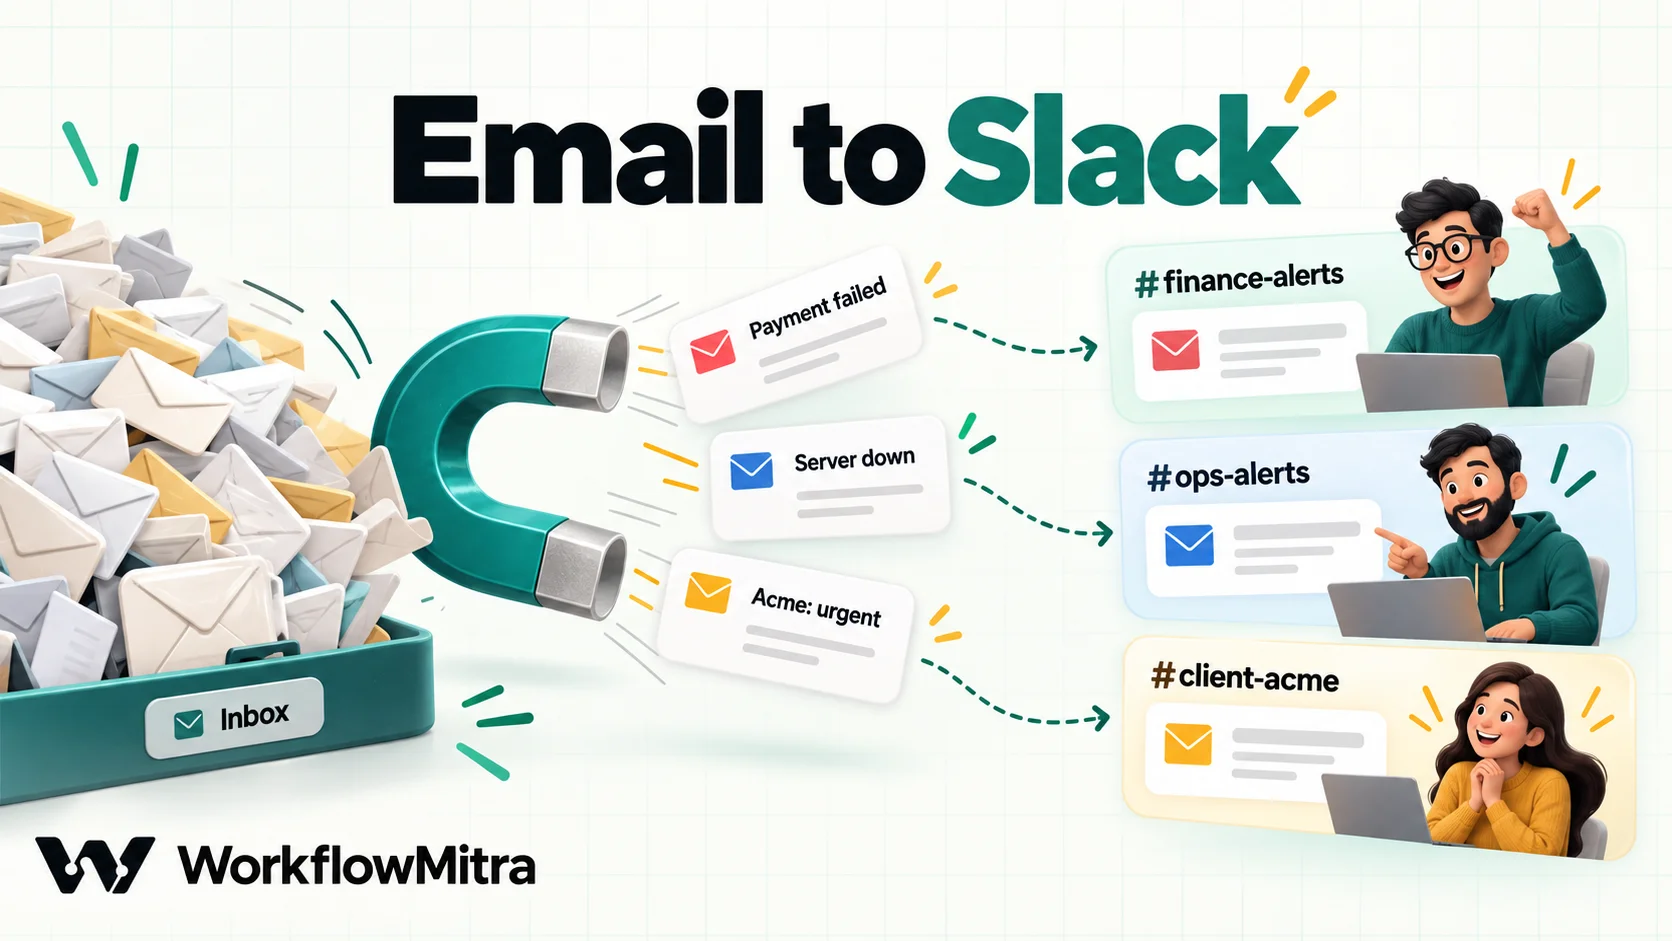
Most teams already route some email into Slack, usually by hand. Someone sees a payment failure, a client escalation or an angry review notification, takes a screenshot or pastes the subject, and drops it into a channel with “can someone look at this?”. It works until that person is on leave.
Getting email into Slack automatically fixes the dependency on one person, but the way you do it matters. Slack has a good built-in option that suits some teams completely. Others need something that chooses which emails go where and keeps the messages short. This guide covers both: Slack’s own options and their limits, how to decide which emails belong in which channel, and how to build a filtered, routed email-to-Slack workflow with WorkflowMitra, powered by ChatMitra.
How do you send emails to Slack?
There are three ways to send emails to Slack. On a paid Slack plan, give a channel its own email address and set your mailbox to auto-forward matching emails to it. On any plan, share individual emails with the Slack for Gmail or Slack for Outlook add-on, or forward mail to your personal Slackbot address. To filter emails, send them to different channels or post a short consistent summary, use a workflow that watches the mailbox and posts to Slack through an incoming webhook.
| Option | Slack plan | What arrives in Slack | Best for |
|---|---|---|---|
| Channel or DM email address | Paid plans | The whole email, posted by Slack | One channel that should see every email from one source |
| Slack for Gmail / Slack for Outlook add-on | All plans | A single email you choose to share, with an optional note | Occasional, hand-picked emails |
| Slackbot forwarding address | All plans | Emails you forward, in your own DM with Slackbot | Personal reminders, not team alerts |
| Workflow + incoming webhook | All plans (counts as an app) | A message you design: sender, subject, a short preview, a mention | Filtering, routing to several channels, consistent formatting |
When Slack’s own email address is enough
Be honest about this before you build anything. If you’re on a paid Slack plan and your need is “every email from this one source should appear in this one channel”, Slack’s built-in feature is the simplest answer.
To set it up, open the channel, click the channel name in the header, choose the Automations tab and select Send emails to this channel, then Get email address. Slack’s help article on sending emails to Slack walks through it, including how to add a name and image so the posts are easy to recognise. Then add an auto-forwarding rule in Gmail, Zoho Mail or Outlook that sends matching emails to that address.
Two practical notes. Workspace owners and admins can stop members from creating these addresses, so if the option is missing, ask an admin. And anyone who knows the address can post into the channel, so treat it like a password rather than something to put on a website.
The built-in route starts to strain when:
- One inbox feeds several channels. A shared
support@oraccounts@mailbox receives very different emails. You end up with one auto-forward rule and one Slack address per destination, maintained in two places. - Whole emails are too much. Long threads, signatures and disclaimers fill the channel. People scroll past instead of acting.
- Your Slack is on the free plan. Channel addresses aren’t available, and the Slackbot address only reaches your own DM.
- You can’t auto-forward. Many Microsoft 365 organisations block automatic forwarding to outside addresses, and a channel address is an outside address.
- The email should also do something else. Log a row in a sheet, create a ticket, or escalate to a phone if nobody reacts.
- You want to keep the body out of Slack. For finance or HR mail, posting only the sender and subject is often the safer default.
If none of those apply, stop here and use the channel address. If several do, a workflow is the better tool.
Decide which emails go to which channel
The most common mistake with email-to-Slack is treating it as a pipe: everything in, everything out. Slack channels lose their value quickly when they fill with emails nobody needs to act on.
Start with a routing map. List the emails that already get passed around by hand, and for each one write the channel it belongs in and who acts on it.
| How to recognise it | Channel | Who acts | |
|---|---|---|---|
| Payment gateway failures, chargebacks | Sender is the gateway's alerts address; subject mentions "failed" or "dispute" | #finance-alerts | Accounts lead |
| Uptime or server monitoring alerts | Sender is the monitoring service; subject starts with "Down" or "Alert" | #ops-alerts | On-call engineer |
| Emails from a key client | Sender's domain is the client's domain | #client-acme | Account manager |
| New enquiries to the website address | Sent to hello@; not from a known vendor | #new-enquiries | Sales |
| Courier and supplier exceptions | Sender is the courier; subject mentions "RTO", "returned" or "delayed" | #warehouse | Warehouse lead |
Then apply a simple test to each row: would someone in that channel do something within the day because of this email? If the answer is “probably not”, leave it in the mailbox. Newsletters, receipts with no deadline, automated weekly reports and calendar notifications almost never pass.
Two more rules worth adopting early:
- One purpose per channel. Alerts mixed with discussion get lost. A dedicated
#finance-alertschannel, separate from#finance, lets people mute discussion without muting alerts. - Never post secrets. One-time passcodes, password resets, bank statements and payroll emails stay in the mailbox, whatever the channel’s membership.

What you need before you start
- An IMAP mailbox you can sign in to with an app password. That covers Gmail, Zoho Mail, Yahoo, iCloud, most company mail servers and Google Workspace accounts whose admin permits app passwords. Microsoft has turned off app-password sign-in for IMAP, so Outlook.com and Microsoft 365 can’t be connected; forward the relevant emails to a Gmail or Zoho address instead. Creating a Google app password requires 2-Step Verification (Google’s steps).
- Permission to create a Slack app in your workspace, or a colleague who has it. If your workspace requires app approval, an admin approves it once. On the free Slack plan, the app counts toward the limit of 10 apps and integrations.
- A WorkflowMitra workspace. You can try it free for 14 days in the app, without entering a card.
Step 1: Create one Slack incoming webhook per channel
An incoming webhook is a private URL that posts a message into one Slack channel. You create it inside a small Slack app that belongs to your workspace:
- In Slack’s app dashboard (api.slack.com/apps), click Create New App and start From scratch. Give the app a name people will recognise in the channel, such as “Inbox alerts”, and select your workspace.
- Under Incoming Webhooks, switch them on.
- Click Add New Webhook to Workspace, select the destination, for example
#finance-alerts, and approve. - Copy the webhook URL. It starts with
https://hooks.slack.com/. - Repeat step 3 for each channel in your routing map. Every webhook is bound to the channel you picked.
Slack’s guide to incoming webhooks is explicit that a sender can’t override the webhook’s channel, name or icon per message. That is why routing to several channels means several webhooks. It is also why the app’s name matters: it is the name people see on every alert.
Treat each URL as a secret. Anyone who has it can post into that channel. In WorkflowMitra, save each one as a Slack webhook connection (one per channel, named after the channel) rather than pasting it into steps; connections are stored encrypted, and checking a connection only probes the URL without posting anything.
Step 2: Connect the mailbox and choose what triggers a run
In WorkflowMitra, create a workflow and add the Email trigger, When an email arrives. Add a connection for the mailbox: pick the provider, enter the address and the app password, and press Try it to confirm it connects.
The trigger has a few settings that decide how much mail starts a run:
- Folder: the inbox by default; type a folder name (or a Gmail label) to watch that instead.
- Only emails matching: a preset (all new mail, unread, unread without promotions, starred, or mail with attachments) or a Custom search, which only Gmail and Google Workspace honour.
- Check every: one minute at the shortest, one hour at the longest.
The cheapest place to filter is before the workflow runs. On Gmail and Google Workspace, a custom search uses Gmail’s own search syntax, such as from:(@payments-provider.com OR @status-page.io) or subject:(failed OR dispute). On other providers, a custom search is ignored, so use a filter in your mail app that moves matching emails into a folder (say To-Slack) and point the trigger at that folder.
Know three behaviours before you rely on it. The first check only records where the mailbox is, so mail already there never fires; only new arrivals do. Each check takes up to 25 new emails, oldest first, and the rest wait for the next check. And “Unread only” is fragile for team alerts, because anyone who opens the email first makes it read. Our guide to sending Gmail to WhatsApp goes deeper on the trigger’s filters and folders, since it uses the same trigger.
What the trigger gives the next step: from (the sender’s address), fromName, to, cc, subject, date, hasAttachments, mailbox and uid. It doesn’t include the body; more on that below.
Step 3: Route each email to the right channel
If the whole workflow serves one channel, skip this step. For a routing map like the one above, add a Switch step after the trigger and give it one route per channel.
Two details make routing reliable:
Compare lowercase text. Text rules such as Contains and Ends with are case-sensitive, so [email protected] won’t match [email protected]. Put an expression on the left side that lowercases the value first: {{ lower(from) }} for the sender and {{ lower(subject) }} for the subject, with the right side typed in lowercase.
Order the routes from specific to general. The first route that matches wins. Put “subject contains dispute and sender ends with @gateway.com” above “sender ends with @gateway.com”, or every dispute will land with the general payment emails.
A typical set of routes:
| Route | Rule | Goes to |
|---|---|---|
| Disputes | {{ lower(from) }} Ends with @gateway.com AND {{ lower(subject) }} Contains dispute | #finance-alerts, with a mention |
| Payments | {{ lower(from) }} Ends with @gateway.com | #finance-alerts |
| Monitoring | {{ lower(from) }} Ends with @monitoring-service.com | #ops-alerts |
| Client | {{ lower(from) }} Ends with @acme.com | #client-acme |
| Else | No rule | Nothing (the email stays in the mailbox) |
Switch and IF steps cost no credits, so routing itself is free. What does cost is the trigger: if you watch the whole inbox and let Switch throw most emails away, every arriving email still uses one trigger credit. Combine a mailbox-side filter or folder with Switch, so only plausible candidates reach the workflow. Triggers, actions and conditions explains how rules and routes are evaluated in more depth.
Step 4: Format the message so people can act on it
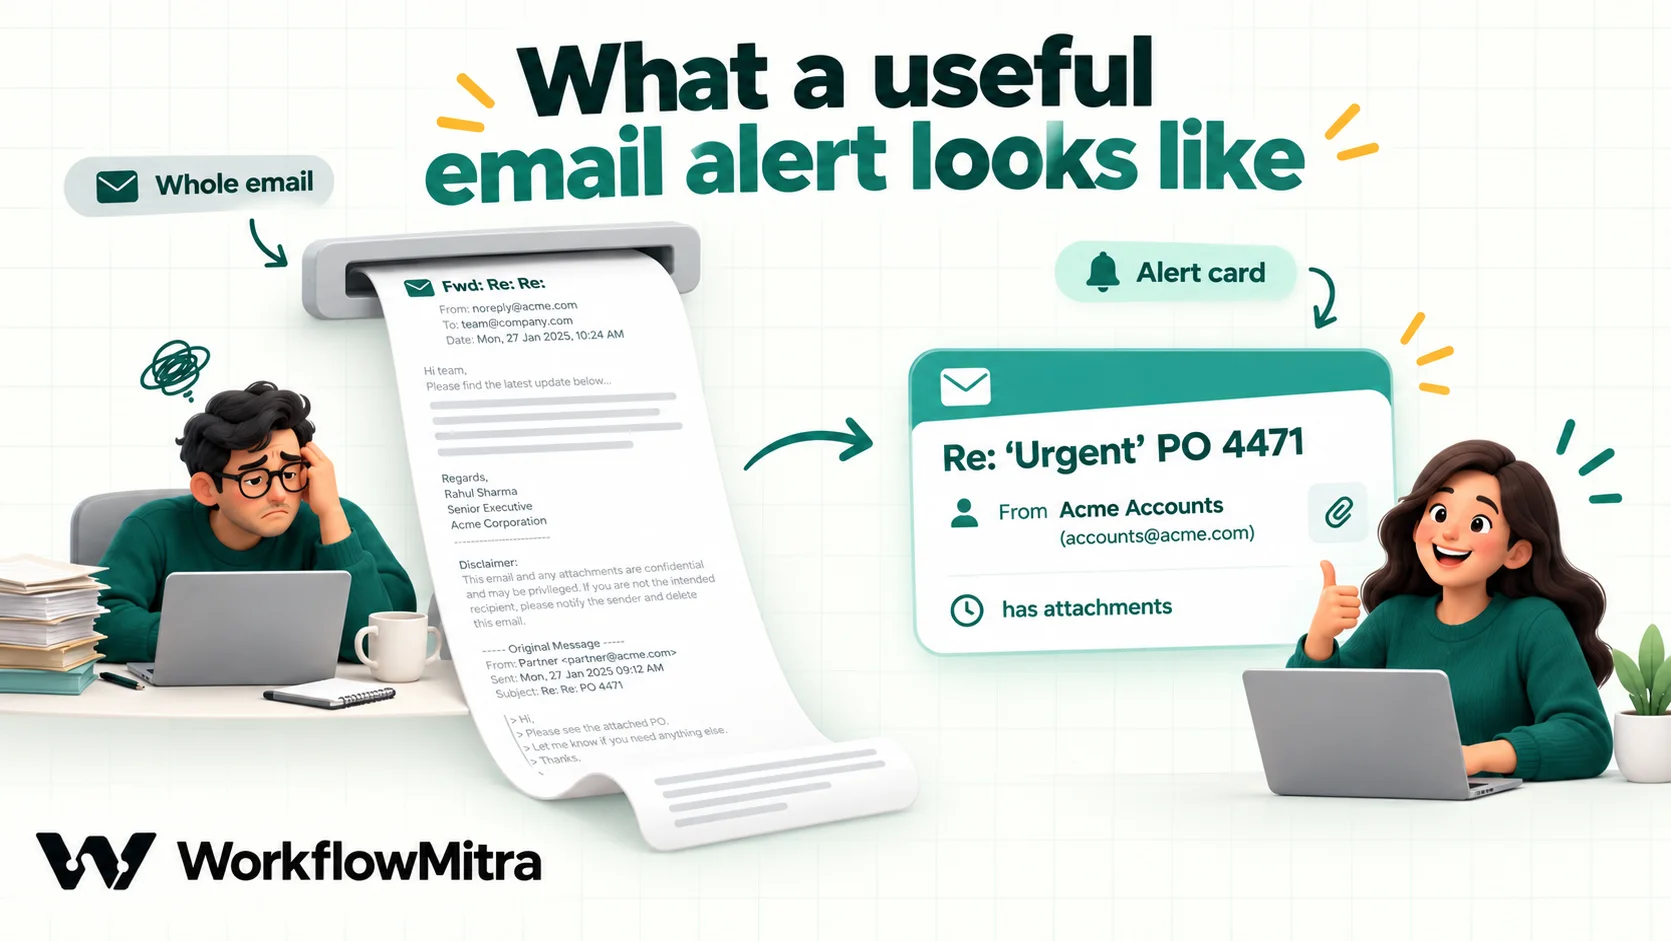
A useful Slack alert answers three questions at a glance: what is it, who sent it, and is there anything unusual about it. Sender, subject and a line of context are usually enough.
You can type a simple message straight into the Slack step:
*New email from {{ fromName }}* ({{ from }})
{{ subject }}
That works for most emails, but it has two weaknesses. Slack reads &, < and > as control characters, so a subject such as “Delivery &, < and >. And a missing sender name leaves an awkward empty line.
For a cleaner card, add a Code step between the trigger (or the Switch) and the Slack step:
// Turn the email trigger's fields into a Slack message and a Block Kit card.
const esc = (s) => String(s || '').replace(/&/g, '&').replace(/</g, '<').replace(/>/g, '>');
const clip = (s, n) => (s.length > n ? s.slice(0, n - 1) + '…' : s);
const subject = clip((input.subject || '(no subject)').replace(/\s+/g, ' ').trim(), 140);
const sender = input.fromName ? input.fromName + ' (' + input.from + ')' : input.from;
const when = new Date(input.date).toLocaleString('en-GB', {
timeZone: 'Asia/Kolkata', day: 'numeric', month: 'short', hour: '2-digit', minute: '2-digit',
});
const extras = [when, input.hasAttachments ? 'has attachments' : '', input.cc ? 'cc: ' + input.cc : '']
.filter(Boolean).join(' · ');
return {
// Plain text: shown in notifications and anywhere blocks can't render.
text: 'New email from ' + esc(sender) + ': ' + esc(subject),
blocks: [
{ type: 'section', text: { type: 'mrkdwn', text: '*' + esc(subject) + '*\nFrom ' + esc(sender) } },
{ type: 'context', elements: [{ type: 'mrkdwn', text: esc(extras) }] },
],
};Change Asia/Kolkata to your team’s time zone, for example Europe/London or America/New_York. The step escapes the three special characters, collapses the subject onto one line, shortens very long subjects, writes “(no subject)” when there isn’t one, and adds the local time, the CC list and an attachment note in smaller text underneath.
It returns two things on purpose. blocks is the card people see in the channel. text is the plain version; Slack uses it for mobile and desktop notifications, which don’t show block content, so leaving it out gives people a blank or generic notification.
Why build the card in a Code step instead of typing Block Kit JSON into the Slack step? Because the Slack step fills in {{ }} values as plain text before it reads the JSON. A subject containing a double quote, such as Re: "Urgent" PO 4471, breaks the JSON and the step fails with “Invalid Block Kit JSON”. We ran exactly that subject through the Slack step’s payload builder: typed JSON failed, while blocks built in a Code step and passed through {{ blocks }} were posted correctly. If you only use the Message field, this doesn’t affect you.
Step 5: Add the Slack step
Add a Slack step after the Code step, on each route that should post. For each one:
- Choose the Slack webhook connection for that route’s channel.
- In Message, insert
{{ text }}. - Open Advanced Settings and, under Block Kit Blocks (JSON), insert
{{ blocks }}.
If your routes share one Code step, it sits after the Switch on each route, or before the Switch so every route reads the same output. Remember that a plain {{ field }} reads only the step immediately before. If you add another step between the Code step and the Slack step later, change the mappings to {{ $node["Code"].text }} and {{ $node["Code"].blocks }}, using your Code step’s actual name.
Mentions, used sparingly
To alert people rather than just post, add a mention to the text. <!here> notifies active members of the channel and <!channel> notifies everyone in it. To mention one person, use their member ID in the form <@U012AB3CD>; you can copy it from their Slack profile.
Use mentions on the narrowest route that deserves them, such as disputes or “site down”, never on every email. A channel where every post pings everyone trains people to mute it, which defeats the purpose. Put the mention at the start of text in the Code step for that route, outside the esc() call so Slack still recognises it.
Optional: include a short preview of the email
The trigger doesn’t include the body, because bodies can be large and full of attachments. If a subject isn’t enough, insert an Email step before the Code step, choose the operation that fetches a message with its body, and point it at {{ uid }}. It returns the raw message as the mail server stores it, with MIME boundaries and encodings, so it needs cleaning before it is readable. The Gmail to WhatsApp guide includes a tested Code step that turns a raw email into one clean line; return that line as preview and add a third block or a line in text.
Ask whether you really want it, though. A preview copies part of the email into Slack, where it is searchable by everyone in the channel and kept according to your Slack retention settings. For finance, legal and HR senders, the subject and sender are often the safer choice. Slack’s own channel address is a better fit if the team genuinely needs the full email in Slack.
Test it before the team relies on it
- Turn the workflow on and let one check pass; that first check only marks where the mailbox is.
- Send a test email that should match the first route, from a different address. Watch it arrive in the right channel.
- Open that run and read the output of every step in turn: the email fields, the Switch route that matched, the Code step’s
textandblocks, and Slack’s response. - Send an email that should match nothing and confirm no run posts anything.
- Send awkward cases: a subject with quotes and
<>characters, an email with no subject, a very long subject, and one with an attachment. - Read the alert on a phone. If the notification text is unclear, fix
text, not just the blocks.
Four setups you can copy
The steps are the same each time. What changes is the filter, the channel and how much the message says.
1. Monitoring emails for an engineering team. An uptime service and a cloud provider send alerts by email. A Gmail filter labels both senders ops, and the trigger watches that label every minute. A Switch sends subjects containing “down” or “critical” to #ops-alerts with <!here> at the start of the text, and everything else from those senders to the same channel without a mention. Because the trigger only sees labelled mail, each alert costs about 2 credits and nothing else in the inbox is touched.
2. A shared support inbox in a small online shop. support@ receives customer emails, marketplace notices and supplier pitches. A Zoho Mail rule moves anything not from a known vendor domain into a Customers folder, which the trigger watches every five minutes. Each email becomes a card in #support with the customer’s name and subject. The team uses an emoji reaction to claim it, so everyone can see what’s handled at a glance. Replies still happen in the mailbox, where the history stays.
3. Finance alerts plus a running log. Payment-gateway failure and dispute emails go to #finance-alerts. After the Slack step, a Google Sheets step appends a row with the date, sender and subject, so the accounts lead has a month-end list without searching Slack. The Sheets step adds one credit per email. The Sheets side is explained in Google Sheets automation.
4. An agency with one channel per client. Each client’s domain gets a route and a webhook for that client’s internal channel. Account managers see their client’s emails in the place they already discuss the account, without having to share mailbox access. Emails from unknown senders stay in the inbox. When a new client signs, the agency adds one webhook, one connection and one Switch route.
None of these forward “important email” in general. Each names specific senders or subjects, so a post in the channel always means something.
Keep the channel useful
The first week of any email-to-Slack setup is usually fine. The trouble starts in month two, when a noisy sender or a broad rule floods the channel. A few habits keep it healthy:
- Review the channel after two weeks. Count posts nobody acted on. Tighten the rule that produced them or remove it.
- Send bursts somewhere quieter. If a system can send twenty failure emails in a minute, twenty posts help nobody. Slack’s rate limits allow incoming webhooks about one message per second with short bursts, and a flood will hit them. Fix the alert at its source, or route that sender to a separate low-priority channel.
- Use a digest for “nice to know”. For emails that matter but aren’t urgent, a Schedule trigger can run once or twice a day and use the Email step’s Search emails operation to list matching emails, then post one summary message. Our guide to automated daily reports shows the scheduling pattern.
- Mind your Slack plan’s history. On Slack’s free plan, messages and files older than 90 days are hidden and those older than a year are deleted, according to Slack’s free plan limits. The email itself stays in the mailbox, so link people back to it rather than treating Slack as the record.
Privacy and security
Posting email content to Slack copies it to another system that more people can see and search. Make it a decision, not a default.
- Check who is in each channel, including guests and members from other organisations through Slack Connect. A client’s emails shouldn’t appear in a channel shared with people outside the account team.
- Prefer private channels for finance, HR and client alerts.
- Keep webhook URLs out of documents and code repositories. If one leaks, remove the webhook in the Slack app settings and create a new one.
- Use a dedicated app password for the workflow’s mailbox connection, so you can revoke it without breaking other apps. Google revokes app passwords whenever the account password changes, which is a common reason alerts silently stop.
- Leave sensitive mail out entirely: passcodes, resets, statements, payroll and legal correspondence.
What it costs
Slack doesn’t charge for messages posted through incoming webhooks. Channel email addresses need a paid Slack plan.
In WorkflowMitra, credits are charged per executed step. The email trigger and the Slack step cost one credit each, Switch and IF are free, and a Code step this short is billed at well under one credit. A check that finds no new mail is free.
| Version | Steps per posted email | Credits per email |
|---|---|---|
| Subject and sender, typed message | Trigger, Slack | 2 |
| Routed card | Trigger, Switch, Code, Slack | About 2 |
| Routed card with a preview | Trigger, Switch, Get an email, Code, Slack | About 3 |
| Routed card plus a sheet log | Trigger, Switch, Code, Slack, Sheets | About 3 |
At 40 routed emails a day, the routed-card version uses about 2,500 credits a month, a quarter of the entry plan’s 10,000 credits for ₹999 a month (current plans are on the pricing page). If the trigger watches the whole inbox and Switch discards most emails, add one credit for every email that arrives, posted or not.
When it doesn’t work
| Symptom | Likely cause | Fix |
|---|---|---|
| Slack step fails with "Invalid Block Kit JSON" | {{ }} values typed inside the Block Kit field contain quotes | Build the blocks in a Code step and insert {{ blocks }} |
| Slack step fails saying the webhook could not be found (404) | The webhook or its app was removed, or the channel was deleted | Create a new webhook and update the connection |
| Slack says the channel is archived | Someone archived the destination channel | Point a new webhook at an active channel |
| Slack rejects an empty message | The Message field resolved to nothing, often a plain {{ field }} reading the wrong step | Use {{ $trigger.subject }} or {{ $node["Code"].text }} |
| Words missing from the posted subject | Unescaped <, > or & | Use the Code step's esc() |
| Everything posts to the same channel | Routes compare mixed-case text, or a general route sits above a specific one | Lowercase both sides; order routes specific to general |
| Nothing fires for older emails | By design: only new arrivals start runs | Move the email into the watched folder to resend it |
| Mailbox won't connect | Normal password, 2-Step Verification off, or an Outlook/Microsoft 365 mailbox | Use an app password; forward Outlook mail to Gmail or Zoho |
| Alerts stopped after weeks | Someone changed the Google account's password; Google then revokes its app passwords | Generate a fresh app password and paste it into the mailbox connection |
Every failed run records the step that broke and the error it returned. Rather than checking for those by hand, turn on the workspace’s failure alerts, which can post to a Slack webhook of their own; workflow error handling covers the options.
Common mistakes
- Forwarding the whole inbox. The channel becomes a slower, noisier copy of the mailbox, and people mute it.
- Relying on “Unread only” for a team. One person opening the email first means nobody else hears about it.
- Typing values into Block Kit JSON. It works in testing and breaks on the first subject with a quotation mark.
- Leaving out the plain
text. Notifications then say little or nothing. - Mentioning
@channelon every post. Save mentions for the route that genuinely needs a fast response. - One webhook shared across purposes. Name connections after their channel and keep one per channel, so a revoked URL breaks one route, not all of them.
Why use WorkflowMitra for email to Slack?
If every email from one address should land in one channel on a paid Slack plan, Slack’s built-in address is the tool to use. WorkflowMitra, powered by ChatMitra, is for the cases it doesn’t cover:
- One mailbox, many channels. A Switch step routes by sender, domain or subject, and each route posts to its own channel through its own webhook.
- Messages you design. A short card with the subject, sender, local time and attachment note, built safely from any email, instead of the whole email with signatures and quoted threads.
- Works on Slack’s free plan, because incoming webhooks are available on every plan.
- More than a post. The same run can log the email in Google Sheets, label or move it in the mailbox, or alert someone on WhatsApp.
- Filtering before you pay. Gmail’s search syntax on Gmail and Google Workspace, or a folder on any provider, means unrelated mail never starts a run, and empty checks are free.
- Rupee pricing per executed step, so a routed alert costs about 2 credits.
It has limits too. Mailboxes on Outlook.com or Microsoft 365 need the forwarding workaround. A webhook post can’t carry the email’s attachments. Replies in a Slack thread don’t go back to the sender by email. And the trigger only sees mail that arrives after it starts watching.
When Slack isn’t enough: escalate on WhatsApp
Slack works when someone is watching it. For alerts that matter at 11 p.m. or during a site visit, such as a server down or a large payment dispute, some teams add a second step on the most critical route that sends a WhatsApp template message to the on-call person’s phone.
That is where ChatMitra comes in. ChatMitra is the WhatsApp Business messaging layer behind WorkflowMitra, and the WhatsApp step can send approved templates through it or directly through Meta’s Cloud API. Unlike a Slack post, a WhatsApp alert from a business number needs an approved template and the recipient’s consent, and Meta charges for template messages, so keep it for the few emails that justify a phone buzzing. The Gmail to WhatsApp guide explains the template, and WhatsApp workflow automation shows the wider pattern.
Start with one channel
Pick the one email your team most often forwards by hand, create one webhook for the channel it belongs in, and build the trigger, Code and Slack steps. Live with it for a week, then add routes. The free 14-day trial is enough to build and run it. First time in the editor? Start with build your first workflow, and the Slack integration page lists what the Slack step supports.
Product behaviour described here, including the email trigger's fields and first-check behaviour, the Slack step's payload handling, the Code step and credit rates, was checked against WorkflowMitra's product code on 7 October 2026; the Code step and the Block Kit quoting failure were executed against the product's own modules. Slack features and limits are from Slack's help on sending emails to Slack and free plan limits, and Slack's developer documentation on incoming webhooks, message formatting and rate limits, read the same day. Names, domains and figures in the examples are illustrative.
Frequently Asked Questions
Questions people ask before sending emails to Slack automatically.
Yes. On paid Slack plans, open the channel, click its name, go to the Automations tab and choose to send emails to the channel; Slack gives you an address that posts every email it receives. On any plan, you can share single emails with the Slack for Gmail or Slack for Outlook add-ons, or post selected emails through a workflow and an incoming webhook.
Automate the work between your apps
Build workflows with triggers, conditions and actions, then test them before they go live. Try WorkflowMitra free for 14 days, no card required.